
Office Blog
Creating Dynamic PowerPoint Slides with Animations

PowerPoint stands as an indisputably formidable weapon in your arsenal when it comes to crafting compelling presentations that effortlessly captivate and mesmerize your audience. Utilizing the power of animations, you have the ability to breathe life into your slides, transforming them from static visual aids into dynamic and unforgettable experiences. In this comprehensive guide, we will unveil a plethora of techniques and strategies, presenting you with an array of creative options to infuse your PowerPoint slides with captivating animations. From mastering the art of entrance and exit animations to harnessing the potential of motion paths and object animations, we will walk you through each step, ensuring that you possess the know-how and expertise to create truly dynamic and visually stunning presentations that leave a lasting impact. By the end of this guide, you will have the tools at your disposal to create an immersive and unforgettable presentation experience, taking your PowerPoint slides to new heights of interactivity and engagement.
Step 1: Choose an Object to Animate
- Open your PowerPoint presentation and select the slide you want to animate.
- Choose an object to animate, such as a text box, picture, or shape.
Step 2: Add an Animation
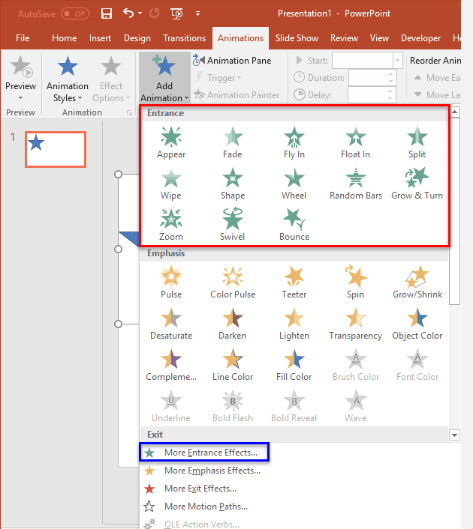
- With the object selected, go to the Animations tab in the toolbar.
- Click on Add for a dropdown menu of animation options, such as Appear or Fade.
- Select the desired animation effect and sub-option.
- Choose Effect Options to further customize the animation.
- Preview the animation by clicking on the Preview button.
Step 3: Add a Delay or Change the Duration
- With the object still selected, click on the Animations tab in the toolbar.
- Click on Timing to set a delay, duration, or trigger for the animation.
- Set a specific duration or delay time for the animation to occur.
- Use the Trigger option to specify a specific trigger for the animation, like a mouse click or another animation.
Step 4: Use Motion Paths
- With the object still selected, click on the Animations tab in the toolbar.
- Click on Add Animation and select the More Motion Paths option in the dropdown menu.
- Choose a motion path, such as a curve or line, and apply it to the object.
- Preview the animation by clicking on the Preview button.
Step 5: Create an Animated Chart or Graph
- With the chart or graph selected, go to the Animations tab in the toolbar.
- Click on Add Animation and select a desired animation effect.
- Use the Effect Options to customize the animation.
- Choose Timing to set the delay, duration, or trigger time.
- Preview the animation by clicking on the Preview button.
Step 6: Customize Motion Graphics
- With the object selected, go to the Animations tab in the toolbar.
- Click on Add Animation and select Motion Graphics from the dropdown menu.
- Choose a desired motion graphic and customize it with graphics, text, and other effects.
- Use the Effect Options and Timing options to further customize the animation.
- Preview the animation by clicking on the Preview button.
By following these step-by-step instructions, you can create dynamic PowerPoint slides with animations that will captivate and engage your audience.
Visit our website and explore the range of Microsoft Office cd keys available, designed to meet your database management needs. Whether you’re looking for budget-friendly Office 2016 cheap keys, user-friendly Office 2019 cdkeys, or the cheapest Office 2021 cd keys, we have the ideal solution.