
Excel Blog
Advanced Data Analysis with Excel’s Power Query

Excel’s Power Query is more than just a tool – it’s a game-changer for data analysis and transformations. With its advanced features and functionalities, users can unleash the full potential of their data and uncover valuable insights.
In this comprehensive step-by-step guide, we will dive deep into Excel’s Power Query, equipping you with the knowledge and skills to perform advanced data analysis and transformations. From connecting to various data sources to applying complex queries and calculations, you’ll learn how to harness the power of Power Query to extract meaningful information from your data.
Prepare to take your data analysis to new heights as we explore the endless possibilities of Excel’s Power Query. Get ready to revolutionize the way you analyze and interpret data with this indispensable tool.
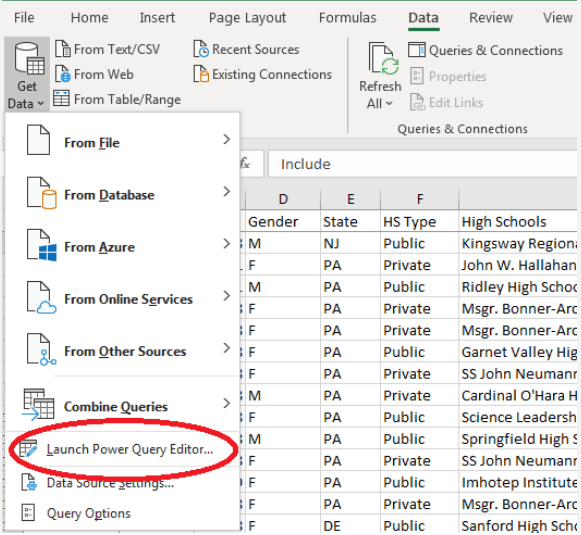
Step 1: Opening Power Query
- Launch Microsoft Excel on your computer.
- Click on the “Data” tab in the menu bar.
- Select “Get Data” from the toolbar.
- Choose the data source, such as a database, Excel file, or web data.
Step 2: Importing Data
- Connect to the desired data source.
- Select the relevant tables or data range to import.
- Apply any necessary filters or transformations during the import process.
Step 3: Navigating Power Query Editor
- Once the data is imported, the Power Query Editor will open.
- Familiarize yourself with the different options and tabs in the Power Query Editor interface.
Step 4: Data Transformation
- Use the various transformation functions available in Power Query Editor.
- Filter, sort, and remove duplicate data to clean up the dataset.
- Perform advanced transformations like adding custom calculations or splitting data into separate columns.
Step 5: Combining Data from Multiple Sources
- If needed, import additional data sources for analysis.
- Merge or append tables to combine data from multiple sources.
- Ensure proper data relationships are established for accurate analysis.
Step 6: Data Formatting and Shaping
- Format columns to the desired data type (e.g., date, text, number).
- Merge, split or transpose columns to reshape the data.
- Apply conditional formatting to highlight relevant data.
Step 7: Advanced Data Analysis
- Utilize built-in Power Query functions for advanced calculations (e.g., sumifs, countifs).
- Apply grouping and aggregation to summarize data based on specific criteria.
- Perform statistical analysis, such as calculating averages, standard deviations, or correlations.
Step 8: Refreshing and Updating Data
- Once the analysis is complete, save the Power Query setup for future use.
- Update the data with the latest information by refreshing the query.
- Automate query refresh using Excel’s data connection settings.
Conclusion:
Excel’s Power Query provides an incredible range of capabilities for advanced data analysis. By following these step-by-step instructions, you can leverage Power Query to import, transform, and analyze data from various sources with ease. Empower yourself with these advanced data analysis techniques to uncover valuable insights and make informed decisions in your work.
Transform your database management capabilities by selecting the right Microsoft Office license from our website. Discover a range of options, including cheap Office 2016 license , Office 2019 cd keys, and the cheapest Office 2021 license, and unlock your full potential.