
Office Blog
Outlook’s Task Management for Enhanced Productivity
Keeping track of tasks and deadlines is crucial for enhanced productivity. Outlook’s task management feature allows you to stay organized and efficiently manage your workload. In this blog post, we will guide you through the step-by-step process of using Outlook’s task management effectively.
Step 1: Creating a Task
To create a new task in Outlook, follow these steps:
- Open Outlook and go to the “Tasks” tab.
- Click on the “New Task” button.
- Enter the task details, such as the subject, due date, and priority.
- Add any additional notes or attachments if needed.
- Click the “Save” button to create the task.
Step 2: Assigning a Task
You can assign tasks to yourself or someone else using Outlook. Here’s how:
- Open the task you want to assign.
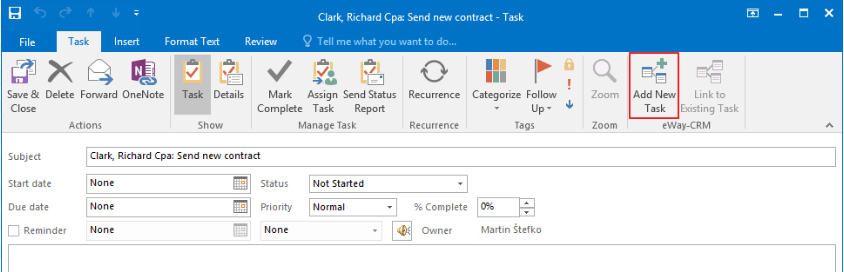
- Click on the “Assign Task” button in the top toolbar.
- Enter the email address of the person you want to assign the task to.
- Set the due date and any other relevant details.
- Click “Send” to assign the task.
Step 3: Categorizing and Organizing Tasks
Categorizing and organizing tasks can help you stay focused and prioritize your work. To do this in Outlook, follow these steps:
- Select a task from the task list.
- Right-click on the task and choose “Categorize.”
- Select a category or create a new one.
- Repeat this process for other tasks to assign categories.
Step 4: Setting Reminders for Tasks
Outlook allows you to set reminders for your tasks to ensure you don’t miss any deadlines. Here’s how to do it:
- Open the task you want to set a reminder for.
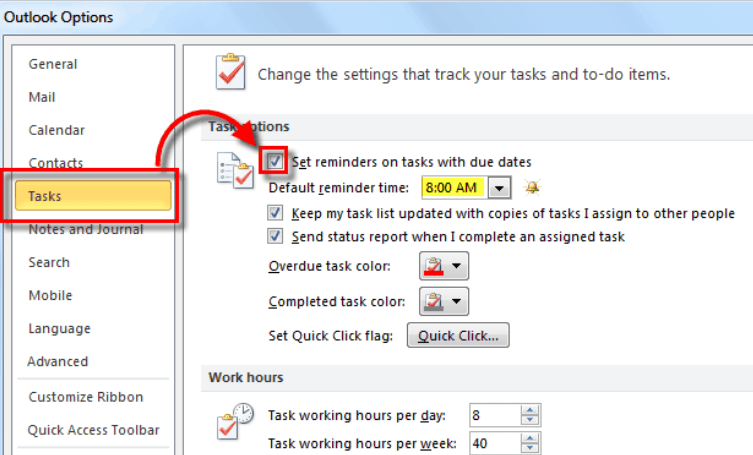
- In the “Reminder” section, click on the drop-down menu and select the desired reminder time.
- Choose whether you want the reminder to be a pop-up or an email notification.
- Click “Save” to set the reminder.
Step 5: Tracking Progress and Marking Tasks as Complete
As you complete tasks, it’s essential to track your progress and mark them as complete in Outlook. Follow these steps:
- Open the task you want to mark as complete.
- Click on the “Mark Complete” button in the top toolbar.
- Optionally, add any completion notes or comments.
- Click “Save” to mark the task as complete.
Step 6: Viewing and Filtering Tasks
Outlook provides various views and filters to help you manage your tasks efficiently. Here’s how to access them:
- Go to the “Tasks” tab in Outlook.
- Use the different views available, such as “To-Do List,” “Completed Tasks,” or “Task Timeline.”
- Apply filters, such as due date, category, or priority, to narrow down your task list.
By following these step-by-step instructions, you can make the most of Outlook’s task management feature. Stay organized, prioritize tasks, and track deadlines efficiently, leading to enhanced productivity in your workday. Happy task managing!
Achieve superior database management with the right Microsoft Office license from our website. Choose from our range of options, including cheap Office 2016 license , Office 2019 cd keys, and the cheapest Office 2021 license, and revolutionize the way you handle your data.