
Office Blog
How can I Insert a Cross-reference to a Figure in Microsoft Word?

In this tutorial, we will guide you through the process of inserting a cross-reference to a figure in Microsoft Word. Cross-references are useful for referencing figures, graphs, or tables within your document. By following these step-by-step instructions, you will be able to create accurate cross-references effortlessly.
Step 1: Launch Microsoft Word
- Open the Microsoft Word application on your computer.
Step 2: Create a New Document
- Click on the “File” tab in the top-left corner of the screen.
- Select “New” from the dropdown menu.
- Choose the type of document you want to create or select a blank document.
Step 3: Insert a Figure
- Navigate to the location in your document where you want to insert the figure.
- Click on the “Insert” tab located in the menu bar at the top of the screen.
- Select “Pictures” to insert an image from your computer.
- Select “Shapes” to insert a shape or drawing.
- Choose the appropriate option and follow the prompts to insert the figure.
Step 4: Add a Caption to the Figure
- Right-click on the inserted figure.
- Select “Insert Caption” from the dropdown menu.
- In the caption dialog box, enter a descriptive caption for the figure.
- Click “OK” to add the caption.
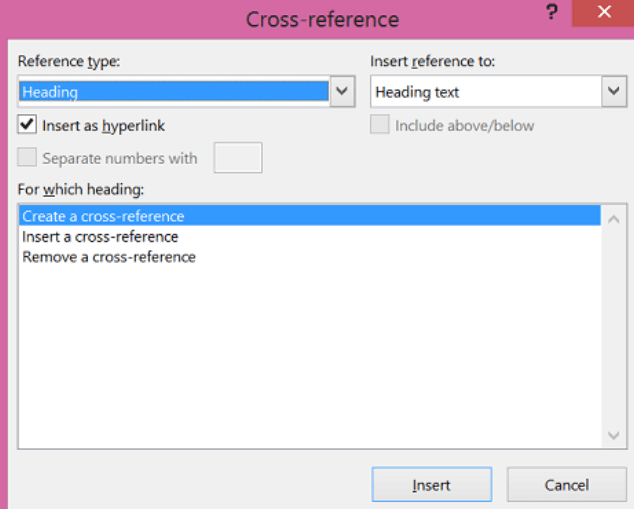
Step 5: Insert a Cross-reference
- Click on the location in your document where you want to insert the cross-reference.
- Click on the “References” tab located in the menu bar at the top of the screen.
- Select “Cross-reference” from the “Captions” group.
- In the cross-reference dialog box, select “Figure” as the reference type.
- Choose the desired figure from the list provided.
- Select the desired format for the cross-reference, such as “Only label and number” or “Above/below including label”.
- Click “Insert” to add the cross-reference.
Step 6: Update Cross-references (Optional)
- If you add or delete figures later on, it’s essential to update the cross-references.
- To update, click on the cross-reference you inserted.
- Right-click and select “Update Field” from the dropdown menu.
- Choose “Update entire table” or “Update page numbers only” as per your requirement.
Step 7: Customize Cross-references (Optional)
- To customize the appearance of the cross-references, click on the “References” tab.
- Explore options like “Insert Table of Figures” or “Modify” to adjust the formatting and style.
Step 8: Save your Document
- Once you have inserted and customized the cross-references, save your Microsoft Word document.
Conclusion:
By following these step-by-step instructions, you have learned how to insert a cross-reference to a figure in Microsoft Word. Cross-references are helpful for easy navigation and referencing within your document. Remember to update the cross-references if you add or delete figures later on. With this knowledge, you will be able to create accurate and dynamic cross-references effortlessly in your Word documents.
Increase your work efficiency and output to unprecedented levels by securing Microsoft Office at unbeatable prices. Visit our website today to revolutionize your workflow.