
Office Blog
How can I Create a Hanging Indent With Multiple levels in Microsoft Word?

In this detailed step-by-step guide, we will show you how to create a hanging indent with multiple levels in Microsoft Word. A hanging indent is commonly used for bulleted or numbered lists, references, and citations to enhance the visual appeal and readability of your document. By following these specific commands, you will be able to master the art of creating hanging indents with multiple levels in Microsoft Word.
Step 1: Launch Microsoft Word:
- Open Microsoft Word on your computer.
Step 2: Create a New Document:
- Click on the “File” tab in the top-left corner of the screen.
- Select “New” from the dropdown menu.
- Choose the type of document you want to create or select a blank document.
Step 3: Enter and Format Text:
- Start by entering the text you want to apply a hanging indent to.
- Highlight the text by either selecting individual paragraphs or using the “Ctrl + A” command to select all the content in your document.
Step 4: Access the Indentation Options:
- Click on the “Page Layout” tab located in the menu bar at the top of the screen.
- Look for the “Paragraph” section and click on the small arrow icon in the bottom-right corner of the section.
- The “Paragraph” dialog box will appear.
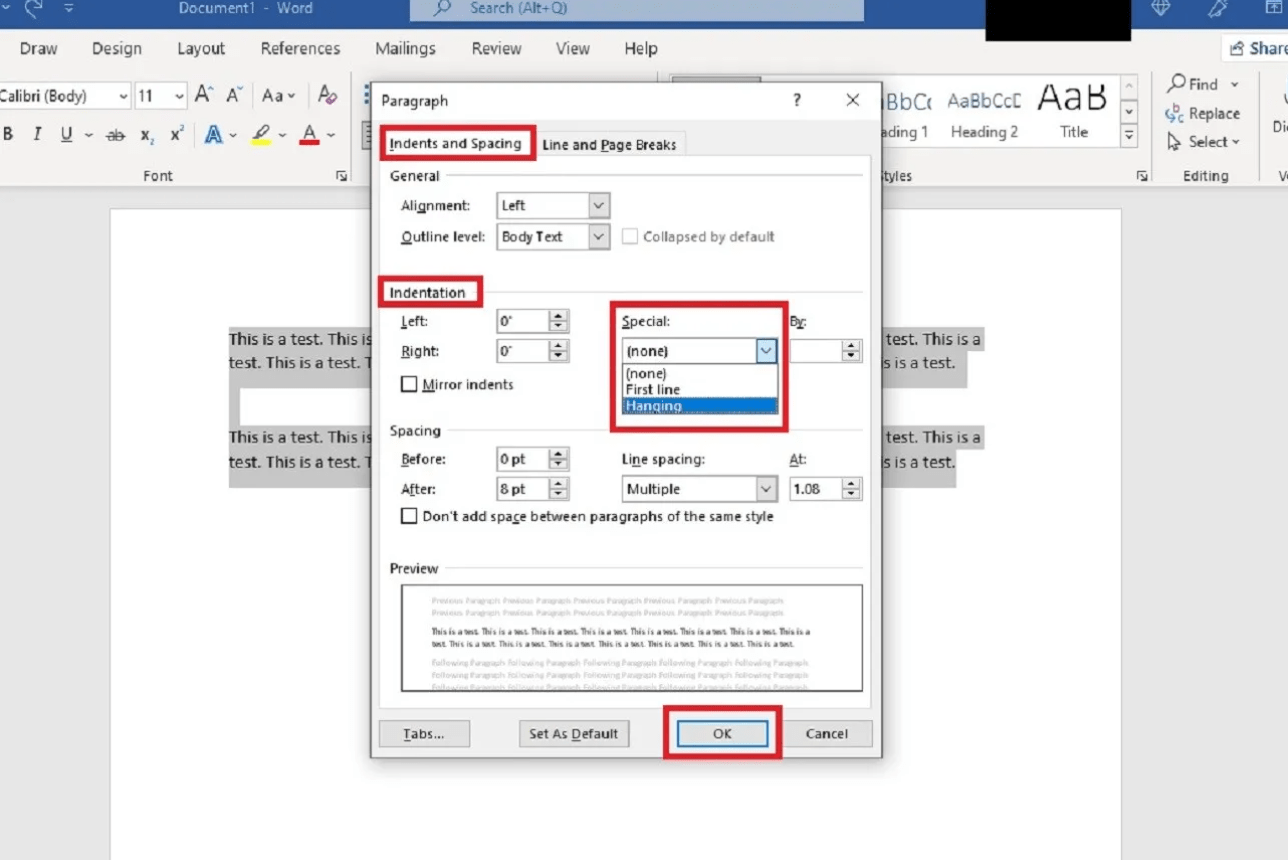
Step 5: Set the Hanging Indent:
- In the “Paragraph” dialog box, navigate to the “Indentation” section.
- Locate the “Special” dropdown menu under “Indentation.”
- Select “Hanging” from the dropdown menu.
- Enter the desired measurement for your hanging indent in the “By” field (e.g., 0.5 inches).
Step 6: Apply the Hanging Indent to Multiple Levels:
- To apply the hanging indent to multiple levels, navigate to the “Outline Level” section within the “Paragraph” dialog box.
- Select the desired outline level from the dropdown menu (e.g., Level 2 or Level 3).
- Click on the “OK” button to confirm and apply the changes.
Step 7: Adjust the Indentation Levels (Optional):
- If you want to further customize the indentation levels based on your preference, return to the “Paragraph” dialog box by following Step 4.
- Locate the “Indentation” section within the dialog box.
- Adjust the “Left” and “Right” indentation values to modify the spacing between the text and the margin.
Step 8: Review and Modify as Needed:
- Review your document to ensure that the hanging indent has been applied correctly.
- Make any necessary adjustments by selecting and editing the paragraphs or by revisiting the “Paragraph” dialog box.
Step 9: Save and Share your Document:
- Once you are satisfied with your document’s hanging indent formatting, save your Microsoft Word document.
- Share or distribute the document, impressing your audience with professional-looking and properly formatted content.
Conclusion:
By following these step-by-step instructions, you have learned how to create a hanging indent with multiple levels in Microsoft Word. Mastering this formatting technique will enable you to present your content in a visually appealing and organized manner. Use these specific commands to effortlessly create hanging indents in Microsoft Word and enhance the overall readability of your documents.
Unlock unparalleled efficiency and output with Microsoft Office, available at unbeatable prices on our website. Upgrade your workflow and experience a productivity revolution like never before.