
Office Blog
How to Insert a Page Number in the Header Starting From the Second Page in Microsoft Word?

In this step-by-step guide, we will show you how to insert a page number in the header starting from the second page in Microsoft Word. Adding page numbers can help organize your document and make it easier to navigate. By following these specific commands, you will be able to customize your headers and add page numbers effortlessly.
Step 1: Launch Microsoft Word:
- Open Microsoft Word on your computer.
Step 2: Create a New Document or Open an Existing Document:
- Click on the “File” tab in the top-left corner of the screen.
- Select “New” to create a new document or “Open” to open an existing document.
Step 3: Navigate to the Header Section:
- Click on the “Insert” tab located in the menu bar at the top of the screen.
- Look for the “Header & Footer” section and click on “Header.”
- Choose the desired header style or select “Edit Header” to access the header area.
Step 4: Prepare the Header for Page Numbers:
- Position the cursor in the header section where you want the page number to appear.
- Click on the “Design” tab that appears when the header is active.
- Enable “Different First Page” if you want the first page to have a different header.
- Check “Different Odd & Even Pages” if you want alternating headers for odd and even pages.
Step 5: Insert the Page Number Field:
- In the “Header & Footer” section of the “Design” tab, click on the “Page Number” dropdown menu.
- Select “Current Position” if you want the page number to appear where the cursor is placed, or choose one of the other options.
- Hover over the desired style for displaying the page number (e.g., “Plain Number”) and click to insert it into the header.
Step 6: Format the Page Number:
- With the page number selected, you can change its formatting by using the commands in the “Header & Footer” section.
- Customize the font type, size, color, and alignment to match your document’s style and preference.
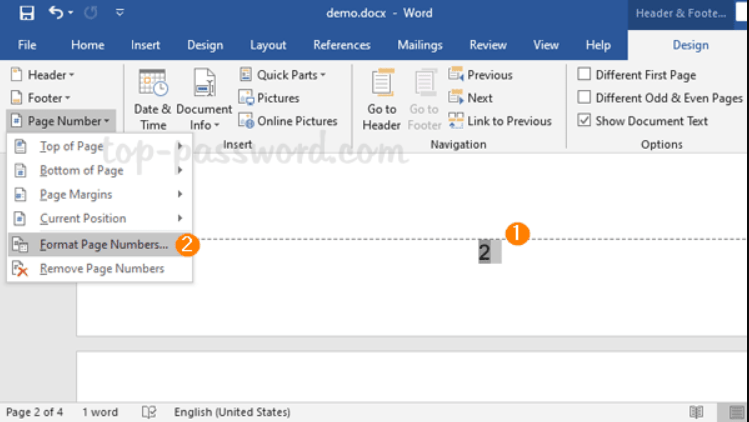
Step 7: Start Page Numbering From the Second Page:
- Click on the “Page Number” dropdown menu in the “Header & Footer” section.
- Select “Format Page Numbers” from the dropdown menu.
- In the “Page Number Format” dialog box, choose the “Start at” option.
- Enter “2” in the box to start numbering the pages from the second page.
Step 8: Preview and Finalize:
- Close the “Header & Footer Tools” by double-clicking outside the header area.
- Scroll through the document to confirm that the page numbers are appearing correctly.
- Make any necessary adjustments by revisiting the header area or repeating the steps above.
Step 9: Save and Share your Document:
- Once you are satisfied with your page number formatting, save your Microsoft Word document.
- Share or distribute the document, ensuring that your second page onwards displays the appropriate page numbers in the header.
Conclusion:
By following these step-by-step instructions, you have learned how to insert a page number in the header starting from the second page in Microsoft Word. Implementing page numbers adds organization and professionalism to your document. Use these specific commands to effortlessly customize headers and format your page numbers to suit your needs.
Maximize your productivity potential with Microsoft Office at unbeatable prices. Upgrade your workflow today and witness unmatched efficiency and output that will revolutionize your work.