
Office Blog
How do I Automate Tasks and Workflows using Macros in Microsoft Office?

Are you tired of repetitive tasks and looking for ways to enhance your productivity? Macros in Microsoft Office can be your savior! Macros are essentially mini-programs that automate tasks and workflows, saving you time and effort. In this step-by-step guide, we’ll show you how to harness the power of macros in Microsoft Office.
Step 1: Enable the Developer Tab
To get started, you’ll need to enable the Developer tab in your Microsoft Office application. Here’s how:
- Open the application (e.g., Word, Excel, PowerPoint).
- Go to File > Options.
- In the Options window, select Customize Ribbon.
- Under the Customize the Ribbon section, check the box next to Developer.
- Click OK to save the changes.
Step 2: Record a Macro
Now that you have the Developer tab enabled, let’s record your first macro. Here’s how:
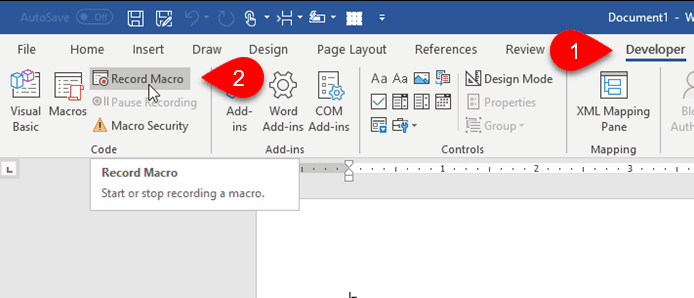
- Click on the Developer tab.
- Select Record Macro from the Code group.
- Give your macro a descriptive name and choose where to store it.
- Click OK to start recording.
- Perform the actions or tasks you want to automate. For example, in Excel, you can format cells, apply formulas, and more.
- Once you’re done, click on the Stop Recording button in the Code group.
Step 3: Run a Macro
Now that you have a recorded macro, you can run it whenever you need. Here’s how:
- Click on the Developer tab.
- Select Macros from the Code group.
- Choose the macro you want to run from the list.
- Click Run.
Step 4: Customize Your Macro
You can further customize your macro by editing the VBA (Visual Basic for Applications) code. Here’s how:
- Click on the Developer tab.
- Select Macros from the Code group.
- Choose the macro you want to edit from the list and click Edit.
- The Visual Basic Editor will open, allowing you to modify the code.
- Make the necessary changes and save the code.
Step 5: Assign a Macro to a Button or Shortcut
To simplify access to your macro, you can assign it to a button or create a keyboard shortcut. Here’s how:
- Click on the Developer tab.
- Select Macros from the Code group.
- Choose the macro you want to assign from the list.
- Click on Options.
- In the Macro Options dialog box, assign a shortcut key or create a button by choosing an image.
- Click OK to save the changes.
Step 6: Share and Export Macros
You can share and export macros to other Office applications or colleagues. Here’s how:
- Click on the Developer tab.
- Select Macros from the Code group.
- Choose the macro you want to share from the list.
- Click on Export.
- Choose a location to save the exported macro and click Save.
If you’re looking for an Excel license, visit our website where you can get it as part of the Office Suite. Choose between Office 2016, Office 2019, and Office 2021 based on your requirements.