
Excel Blog
Automating Tasks in Excel with Macros

Are you constantly plagued by the monotony of repetitive tasks in Excel, feeling as though you are stuck in an endless cycle of manual labor? Fear not, for the answer to your woes lies within the realm of macros, a powerful automation tool that can alleviate the burden of mundane tasks and bestow upon you the gift of precious time and effort-saving proficiency. In this enlightening article, we will take you by the hand and lead you through a comprehensive step-by-step tutorial on how to create a macro in Excel. From unraveling the mysteries of recording macros to understanding the fundamental principles of VBA (Visual Basic for Applications), we will equip you with the knowledge and skills necessary to automate your Excel workflows with ease and finesse. By following our expert guidance and adopting this revolutionary approach, you will unlock the potential to streamline your Excel processes, liberating yourself from the shackles of repetitive tasks, and empowering yourself to accomplish more in less time. Bid farewell to the drudgery of monotony and embrace the era of automation, where macros transform Excel into a celestial command center for productivity and efficiency.
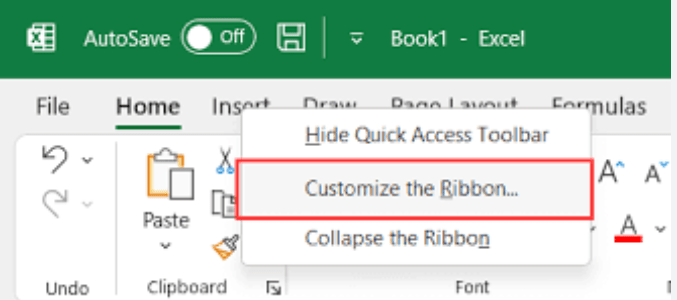
Step 1: Enable the Developer Tab
Macros are built using VBA (Visual Basic for Applications), which is accessible through the Developer tab in Excel. If you do not see this tab, follow these steps:
- Click File > Options > Customize Ribbon
- In the right pane, under Main Tabs, check the Developer box
- Click OK
Step 2: Recording a Macro
Now that you have access to the Developer tab, you can start recording your macro:
- Click the Developer tab > Record Macro
- Name your macro and choose a keyboard shortcut
- Select where to store your macro (e.g. Personal Macro Workbook)
- Click OK
Step 3: Perform the Task
Excel will now record every action you take. Perform the task you want to automate, such as formatting a table or adding a formula.
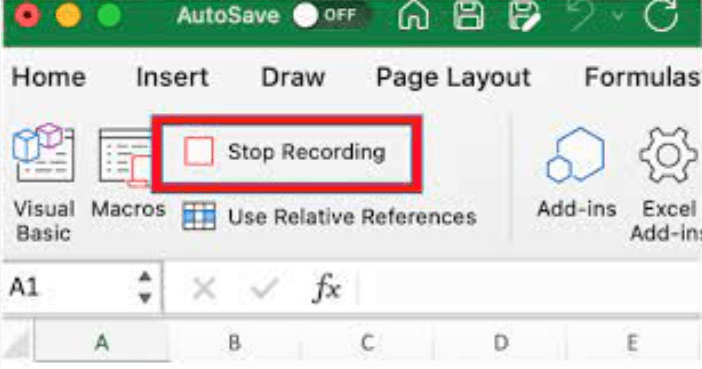
Step 4: Stop the Macro Recording
Once you have completed the task, stop the macro recording:
- Click the Developer tab > Stop Recording
Step 5: Test the Macro
Before you use your macro, test it out:
- Click the Developer tab > Macros
- Select your macro and click Run
- Verify that the macro performs the desired task
Step 6: Edit the Macro (Optional)
If you need to make changes to your macro, you can edit it:
- Click the Developer tab > Macros
- Select your macro and click Edit
- Make the necessary changes
- Save your changes
Step 7: Using the Macro
Now that you have created and tested your macro, you can use it to automate tasks:
- Click the Developer tab > Macros
- Select your macro and click Run
- Watch as Excel automates the task for you!
Conclusion:
By following these simple steps, you can start automating tasks in Excel with macros. Macros will save you time and effort, and make your work in Excel more efficient. Happy automating!
Discover the perfect Microsoft Office license on our website, perfectly suited for your specific database management requirements. Choose from a variety of options, including affordable Office 2016 keys, convenient Office 2019 keys, and the cheapest Office 2021 cd keys, ensuring the ideal fit.