
Windows Blog
Windows 10 – Clean Install Guide

Performing a clean install of Windows 10 is a great way to start fresh and ensure optimal performance on your computer. However, it is crucial to back up your data and follow the steps carefully to avoid any potential data loss or installation issues. Make sure to have your Windows 10 product key ready for activation.
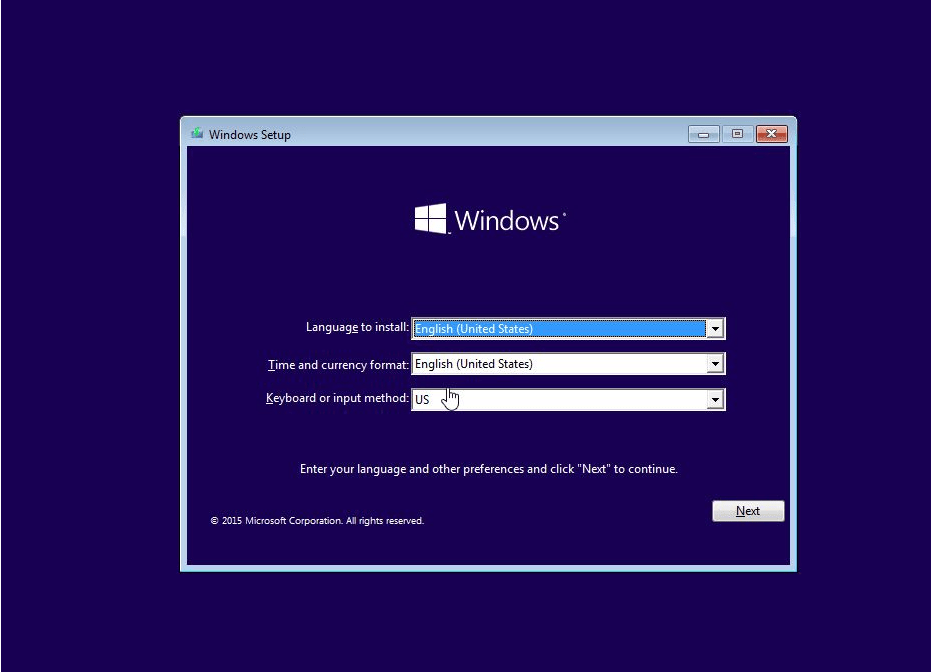
Step 1: Prepare your installation media
- Download the Windows 10 ISO file from the official Microsoft website.
- Connect a blank USB drive (with at least 8GB of space) to your computer.
Step 2: Create a bootable USB drive
- Open the Rufus software.
- Select your USB drive from the “Device” dropdown menu.
- Click on the “Select” button and browse to the location where you saved the Windows 10 ISO file.
- Click on the “Start” button to create a bootable USB drive.
Step 3: Backup your data
- Copy and paste all your important files and folders to an external hard drive or cloud storage service.
Step 4: Restart your computer and boot from USB
- Restart your computer.
- Enter your computer’s BIOS settings by pressing the necessary key during startup (usually F2, F5, F8 Del).
- Change the boot order so that your computer boots from the USB drive first.
Step 5: Begin the Windows 10 installation process
- Proceed to the Windows 10 setup by clicking on the “Next” button.
- Click on the “Install now” button.
Step 6: Enter your product key
- Enter your Windows 10 product key if prompted or skip this step by clicking on the “I don’t have a product key” option.

Step 7: Accept the license terms
- Read the license terms and conditions and check the box to accept them.
- Click on the “Next” button.
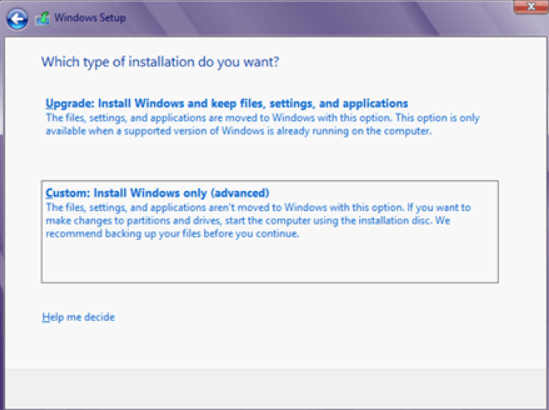
Step 8: Choose the installation type
- Select the “Custom: Install Windows only (advanced)” option.
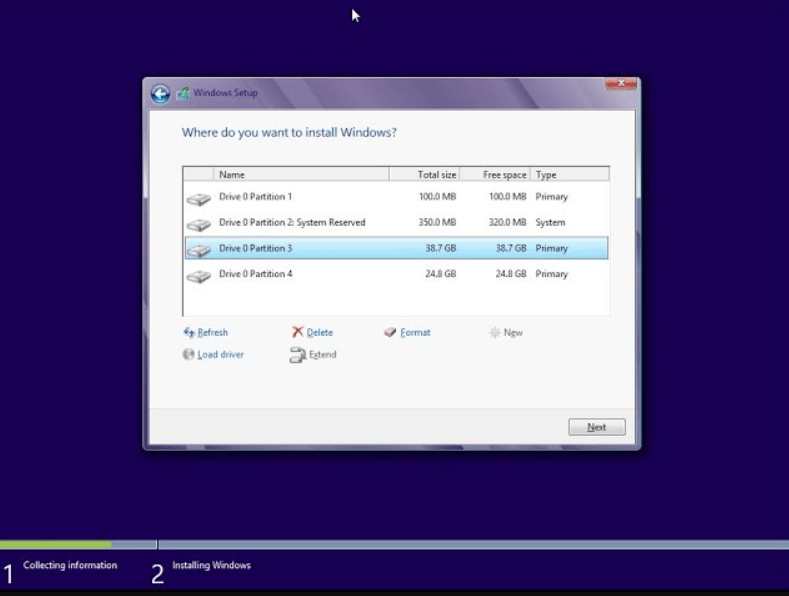
Step 9: Delete existing partitions
- Delete all existing partitions on your hard drive by clicking on each partition and selecting the “Delete” option.
- Confirm the deletion when prompted.
Step 10: Install Windows on the unallocated space
- Select the unallocated space on your hard drive and click on the “Next” button.
Step 11: Wait for the installation process to complete
- Wait for Windows 10 to install on your computer. This may take some time.
Step 12: Set up Windows 10
- Choose your region and language preferences.
- Enter your username and password for your Windows account.
- Set your privacy settings.
Step 13: Install drivers and update Windows
- Install any necessary drivers for your hardware.
- Update Windows 10 to the latest version by going to Settings > Update & Security > Windows Update.
Step 14: Restore your data
- Copy back your backed up files and folders to your computer.
Step 15: Install essential software and configure your settings
- Install any necessary software for your needs.
- Configure your personal settings and preferences in Windows 10.
Step 16: Activate Windows 10
- Go to Settings > Update & Security > Activation.
- Click on the “Change product key” option.
- Enter your valid Windows 10 product key and click on the “Next” button.
- Follow the prompts to complete the activation process.
Step 17: Install necessary software updates
- Go to Settings > Update & Security > Windows Update.
- Click on the “Check for updates” button and install any available updates for Windows 10.
- Restart your computer if prompted to complete the installation.
Step 18: Set up your internet connection
- Connect to your Wi-Fi or wired internet connection.
- Go to Settings > Network & Internet.
- Click on the “+” button under Wi-Fi or Ethernet to add and connect to your network.
- Enter the necessary connection details or select your network from the list, and follow the prompts to complete the setup.
Step 19: Install antivirus software
- Download and install a reliable antivirus software from a trusted provider.
- Run a full system scan to detect and remove any potential malware or viruses.
- Configure the antivirus software’s settings according to your preferences.
Step 20: Create a system backup
- Go to Settings > Update & Security > Backup.
- Click on the “Add a drive” option to select an external hard drive or network location as your backup destination.
- Click on the “More options” link to customize your backup settings, such as which files and folders to include.
- Click on the “Back up now” button to start the backup process.
Important:
After completing the Windows 10 clean install, you will have a fresh and optimized operating system for your computer. Remember to install necessary drivers, update Windows, and configure your settings according to your preferences. Don’t forget to reinstall essential software and restore your backed-up data. Enjoy your clean and efficient Windows 10 installation!
Looking to upgrade your device on a budget? Buy cheap Windows 10 Pro key from our website and get excellent value for your investment.