
Windows Blog
Windows 10 Backup and Restore: A Step-by-Step Guide

Losing important files can be a nightmare, but with Windows 10 backup and restore features, you can protect your data. Follow this step-by-step guide to ensure your files are safe and easily recoverable.
Step 1: Access Backup Settings
- Click on the Start button, then go to Settings.
- In the Settings menu, select Update & Security.
- From the left-hand sidebar, choose Backup.
Step 2: Set Up File Backup
- Under the Back up using File History section, click on the Add a drive button.
- Select the external storage drive where you want to save your backup files.
- Toggle the Automatically back up my files switch to the On position.
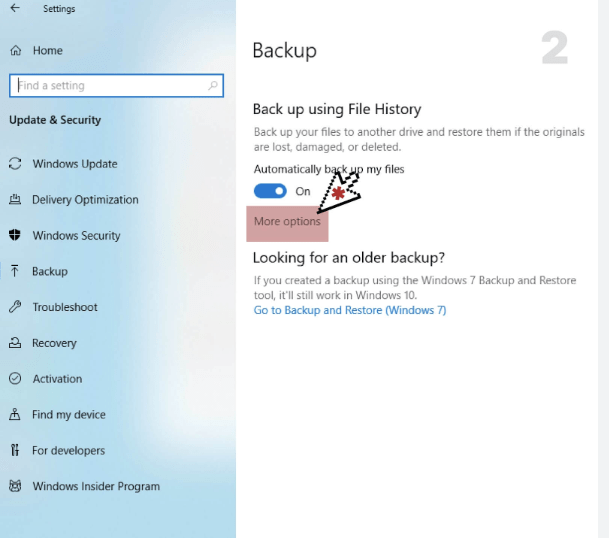
Step 3: Customize Backup Options
- Click on the More options link under Related settings.
- Here, you can adjust the frequency of backups by selecting Back up now or changing the Backup my files drop-down menu to your desired interval.
- You can also specify how long to keep your backups by changing the Keep my backups drop-down menu.
Step 4: Backup Specific Folders
- To include additional folders in your backup, click on the Add a folder button under Back up these folders.
- Choose the specific folders you want to backup, then click on the Choose this folder button to confirm.
Step 5: Restore Files from Backup
- To restore files, click on the Restore files from a current backup link under the Back up using File History section.
- Browse through the backed-up files and folders to locate the desired items.
- Select the files or folders you want to restore, then click on the Restore button.
- Choose whether you want to replace the existing files or keep both versions.
By following these steps, you can easily set up and use the Windows 10 backup and restore features. Don’t risk losing important files – be proactive and protect your data with regular backups.
Upgrade your device the smart way! Buy cheap Windows 10 keys from our website and make a cost-effective and valuable investment.