
Office Blog
How do I Insert and Format Images in Publisher?

Adding and formatting images can greatly enhance the visual appeal of your Publisher project. In this step-by-step guide, we will walk you through the process of inserting and formatting images in Publisher, allowing you to create stunning visuals effortlessly.
Step 1: Open Microsoft Publisher
Launch Microsoft Publisher on your computer and open the document you wish to work on.
Step 2: Inserting an Image
Navigate to the “Insert” tab on the Publisher toolbar. Click on the “Pictures” option and select the image you want to insert from your computer. Alternatively, you can also drag and drop the image directly onto the Publisher canvas.

Step 3: Resizing the Image
Once the image is inserted, you might need to resize it to fit your layout. Click on the image to select it, then grab one of the corner handles and drag inward or outward to adjust its size. Hold the Shift key while resizing to maintain the image’s aspect ratio.
Step 4: Positioning the Image
To move the image to a specific location on the canvas, click and drag it to your desired position. Use alignment and distribution options available in the “Format” tab to align the image with other elements on the page.
Step 5: Formatting the Image
Publisher provides several formatting options to enhance your images. Select the image and navigate to the “Format” tab. From here, you can adjust brightness, contrast, and recolor the image. You can also apply artistic effects, add borders, or apply picture styles to customize the appearance.
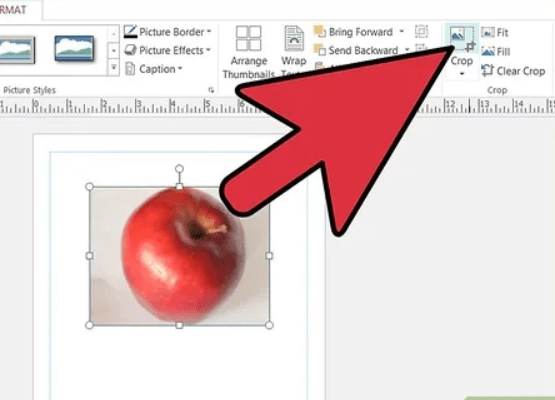
Step 6: Cropping the Image
To crop an image, select it and go to the “Format” tab. Click on the “Crop” option and use the crop handles to trim unwanted parts of the image. Click outside the image to apply the changes.
Step 7: Adding Effects to the Image
Publisher offers various effects that you can apply to your images. Select the image and go to the “Format” tab. Click on the “Effects” button and choose from the available effects, such as shadows, reflections, or glows. Experiment with different effects to achieve the desired look.
Step 8: Saving and Exporting
Once you are satisfied with the placement and formatting of your images, save your Publisher document. If you want to export it to another format, like PDF or an image file, click on the “File” tab, select “Save As,” and choose your desired format.
With these simple steps, you can easily insert and format images in Microsoft Publisher. Enhance your Publisher projects by adding visual elements, adjusting their size, positioning, and applying various formatting options. Get creative and make your publications visually stunning with images that truly stand out!
Take advantage of our web’s unbeatable price on Microsoft Office CD keys and boost your productivity on a budget.