
Office Blog
How do I add or remove Specific Office Applications during installation?

When installing Microsoft Office, you have the flexibility to choose specific applications that you want to include or exclude. Follow these step-by-step instructions to add or remove specific Office applications during the installation process.
Step 1: Launch the Installation Wizard
- Run the Office Setup: Begin by running the Microsoft Office installation file on your computer.
- Select Installation Options: After launching the setup, you will be presented with different installation options. Choose the “Customize” or “Customize Installation” option.
Step 2: Choosing Applications to Add or Remove
- Expand the Application List: On the “Customize” or “Customize Installation” screen, you will see a list of all the Office applications available for installation.
- Add Applications: To include an application that is not selected by default, tick the checkbox next to it. This will add it to the installation queue.
- Remove Applications: If you want to exclude a particular application, untick the checkbox next to it. This will remove it from the installation queue.
- Modify Application Settings: Some applications may have additional settings that you can modify. To access these settings, click on the application name or expand the dropdown arrow next to it.
Step 3: Install Office with Customized Applications
- Save Changes: Once you have made your desired changes to the application selection, click on the “Install” or “Next” button to proceed with the installation.
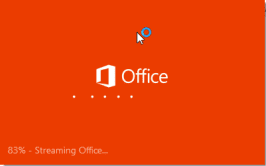
- Monitor the Installation: The installation progress bar will appear, indicating the installation process. Wait for the process to complete.
- Launch Installed Applications: Once the installation is finished, you can launch the installed Office applications from the Start menu or desktop shortcuts.
By following these simple steps, you can select the specific Office applications you need and exclude the ones you don’t, customizing the installation according to your requirements.
If you require an Excel license, visit our website to obtain one within the Office Suite. You can choose between Office 2016, Office 2019, or Office 2021 based on your preferences.