
Windows Blog
How can I Set Up a Virtual Desktop in Windows 11?
Windows 11 offers the feature of virtual desktops, allowing you to create multiple desktop environments on a single screen. This step-by-step guide will walk you through the process of setting up a virtual desktop in Windows 11.
Step 1: Open Task View:
- Press the Windows key + Tab on your keyboard or click the Task View icon on the taskbar.
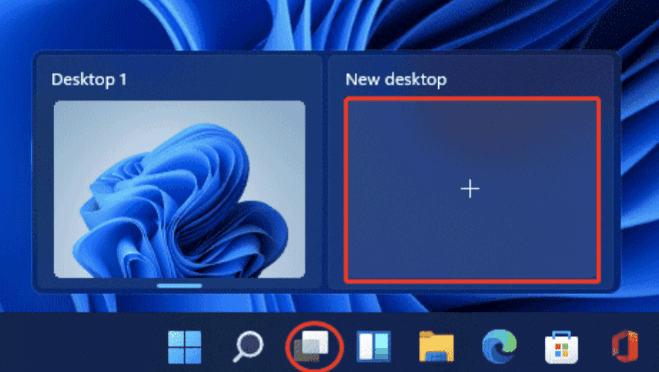
Step 2: Create a New Virtual Desktop:
- In the Task View, click on the “+” button labeled “New Desktop” at the top left corner of the screen.
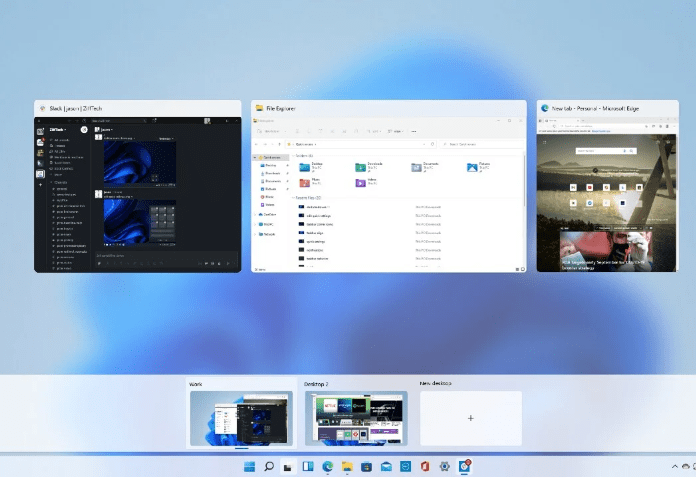
Step 3: Switch between Virtual Desktops:
- To switch between virtual desktops, press the Windows key + Ctrl + Left/Right arrow on your keyboard.
- Alternatively, click on the Task View icon and select the desired desktop from the list.
Step 4: Move Apps to Virtual Desktops:
- Open the desired app or window you want to move to a specific virtual desktop.
- Right-click on the app’s title bar and select “Move to” from the context menu, then choose the desired virtual desktop.
Step 5: Customize Virtual Desktops:
- To customize virtual desktops, click on the Task View icon.
- You can rearrange desktops by dragging and dropping them in the desired order.
Step 6: Close Virtual Desktops:
- To close a virtual desktop, open the Task View and hover over the desktop you want to close.
- Click on the “X” button that appears on the top right corner of the desktop thumbnail.
Step 7: Additional Virtual Desktop Options:
- Right-click on the Task View icon to access additional options, such as adding or closing virtual desktops.
By following the step-by-step instructions in this guide, you can create and switch between virtual desktops effortlessly.
Looking to upgrade your device without breaking the bank? Purchase a Windows key cheap from our website and save big!