
Office Blog
Designing Professional PowerPoint Templates

In this guide, we will show you the step-by-step process of designing professional PowerPoint templates. Our expert tips and techniques will help you create visually stunning presentations that captivate your audience.
From selecting the right color scheme to incorporating your brand identity, we will cover all the essential elements for creating cohesive and visually appealing templates. Elevate your presentation game with our guide and make a lasting impact on your audience. Let’s dive in and unlock your full presentation design potential!
Step 1: Define the Purpose and Theme
- Identify the purpose of your presentation and the key message you want to convey.
- Choose a theme or color scheme: Click on the “Design” tab in the ribbon and select a pre-designed theme or customize your own by clicking on “Colors” and “Fonts.”
- Open PowerPoint and create a new presentation: Click on “File” > “New” > “Blank Presentation.”
Step 2: Set Slide Master and Layouts
- Customize the Slide Master: Click on the “View” tab, then “Slide Master.” Edit the placeholders, choose fonts, and apply desired formatting.
- Create additional slide layouts: In the Slide Master view, click on “Insert Layout” to add different layouts for title slides, content slides, etc.
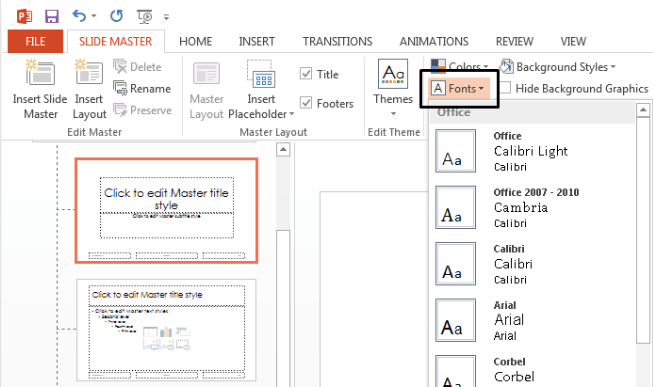
Step 3: Customize Fonts and Colors
- Choose fonts: In the “Slide Master” view, click on “Fonts” and select your desired font combination.
- Apply a color scheme: In the “Slide Master” view, click on “Colors” and choose from the available color schemes or click on “Customize Colors” to create your custom color scheme.
Step 4: Add Professional Graphics
- Insert icons: Click on “Insert” > “Icons” and choose from a wide variety of built-in icons.
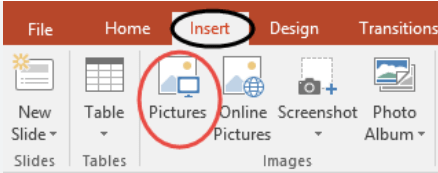
- Insert images: Click on “Insert” > “Pictures” to add images from your computer or online sources.
- Insert shapes: Click on “Insert” > “Shapes” to insert and customize different shapes to enhance your slides.
Step 5: Create Consistent Slide Layouts
- Modify layouts: In the “Slide Master” view, select a layout and make adjustments to the positioning of placeholders, headers, and footers.
- Apply layouts: In the “Normal” view, right-click on a slide and choose “Layout” to apply the desired layout to individual slides.
Step 6: Incorporate Transitions and Animations
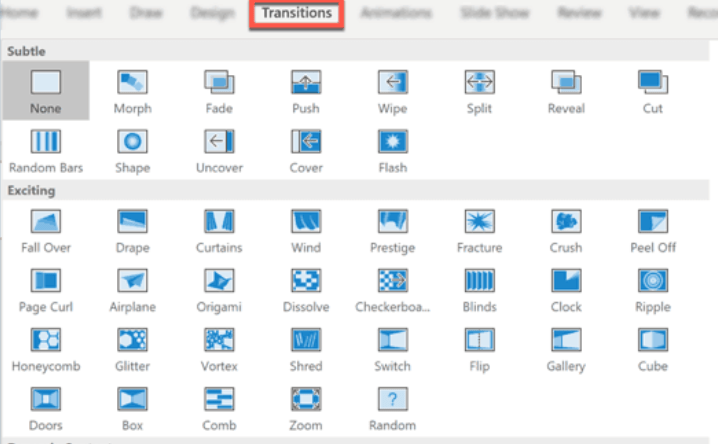
- Apply slide transitions: Click on the “Transitions” tab and choose a transition effect to add between slides.
- Add animations to elements: Select an element on a slide, go to the “Animations” tab, and choose an animation effect for that element.
Step 7: Test and Finalize
- Review your presentation: Go through each slide, ensuring elements are aligned properly and the design is cohesive.
- Run a slideshow: Click on “Slide Show” > “From Beginning” to test your slides and check for any visual inconsistencies or timing issues.
- Make necessary adjustments: If needed, go back to the respective steps and modify elements based on your testing. Once satisfied, save your final template.
Conclusion:
By following these step-by-step instructions and employing specific commands, you can design professional PowerPoint templates that will impress your audience. Remember to define your presentation’s purpose and choose an appropriate theme. Customize fonts, colors, and layouts to create consistency throughout your slides. Incorporate professional graphics, transitions, and animations to enhance visual appeal. Test and finalize your template to ensure a polished and captivating presentation. With practice and attention to detail, you will master the art of designing professional PowerPoint templates that leave a lasting impact on your audience.
Enhance your database management efficiency by selecting the ideal Microsoft Office license from our website. Explore our offerings, including Office 2016 Pro Plus keys, Office 2019 Pro Plus keys, and Office Pro Plus 2021 keys, and boost your productivity.