
Office Blog
Word’s Reference Tools: Citations, Bibliographies, and Indexes

Word’s reference tools are vital for academic and professional writing, managing citations, creating bibliographies, and indexes for precision and credibility. Our blog provides an effective guide on incorporating references seamlessly using these tools.
Mastering Word’s reference tools enhances professionalism, saves time and effort, and helps maintain accuracy. Features like shared libraries and automatic updates facilitate collaboration and document management. Improving the credibility of your writing, these indispensable tools ensure high-quality work that meets academic and professional standards. Invest in mastering Word’s reference tools to uphold the precision and credibility of your writing.
Step 1: Insert Citations:
When citing sources in your document, you can use Word’s built-in citation tool.
- Place the cursor where you want to insert a citation in your document.
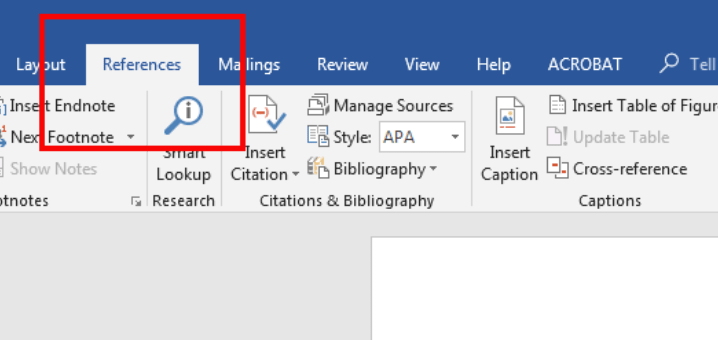
- Click on the “References” tab in the ribbon.
- Select “Insert Citation” and choose the appropriate citation type, such as “APA” or “MLA”.
- Enter the required information for the citation and click “OK”.
Step 2: Create a Bibliography:
Word’s bibliography tool allows you to easily create and format a bibliography for your document.
- Click on the “References” tab in the ribbon.
- Select “Bibliography” and choose the appropriate bibliography style, such as “APA” or “MLA”.
- Word will automatically generate a bibliography based on the citations you have inserted.
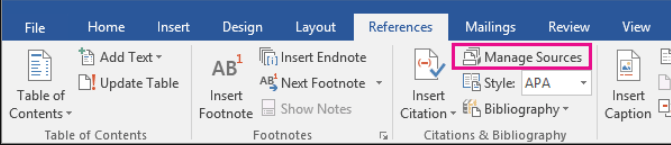
Step 3: Manage Sources:
Word’s citation tool also allows you to manage your sources and edit your citations.
- Click on the “Manage Sources” button in the “References” tab.
- Add, edit or remove sources from the “Source Manager”.
- Click “OK” to save your changes.
Step 4: Insert an Index:
Word’s index tool allows you to create an index for your document to help readers find specific information easily.
- Place the cursor where you want to insert an index in your document.
- Click on the “References” tab in the ribbon.
- Select “Insert Index” and choose the appropriate index style, such as “Alphabetic” or “Numeric”.
- Word will insert an index field in your document.
Step 5: Update Index:
After creating an index, you can update it to reflect any changes you have made to your document.
- Click on the index field in your document.
- Click on the “Update Index” button in the “References” tab.
- Choose to update either the entire index or just the page numbers.
Step 6: Custom Index Entries:
Word’s index tool allows you to create custom index entries to make your index more specific and effective.
- Place the cursor where you want to insert a custom index entry in your document.
- Click on the “References” tab in the ribbon.
- Select “Mark Entry” and enter the text you want to appear in the index.
- Click “Mark” to add the custom index entry.
Step 7: Edit Index Entries:
After adding custom index entries, you can edit or remove them as needed.
- Click on the index entry in your document.
- Click on the “Mark Entry” button in the “References” tab.
- Make any necessary changes to the text and click “Mark” to update the index entry.
Conclusion:
Word’s reference tools are essential for academic and professional writing. By following these steps, you can insert citations, create bibliographies, generate indexes, and manage your sources effectively using Word’s reference tools. Utilize these tools to save time and ensure the accuracy of your work. Start using Word’s reference tools today!
Take your database management to the next level by selecting the right Microsoft Office license from our website. Explore our offerings, such as Office 2016 cheap keys, Office 2019 cd keys, and the cheapest Office 2021 licenses, and find the perfect fit for your needs.