
Office Blog
What Accessibility Features does Microsoft Office include for users with Disabilities?

Microsoft Office is committed to inclusivity and provides a range of accessibility features to empower users with disabilities. In this step-by-step guide, we’ll explore some of the key accessibility features you can utilize in Microsoft Office applications to ensure an inclusive experience.
Step 1: Using the Accessibility Checker
- Open the Document: Launch the Microsoft Office application (e.g., Word, Excel, PowerPoint) and open your document.
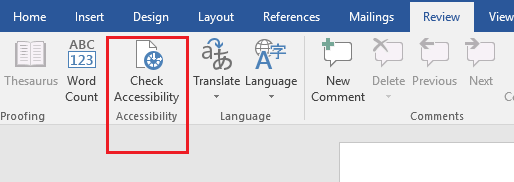
- Click on the Review Tab: Navigate to the Review tab in the toolbar.
- Select Accessibility Checker: Look for the Accessibility Checker icon and click on it.
- Review the Results: The Accessibility Checker will display any accessibility issues found in your document, such as missing alt text for images or inconsistent heading styles.
- Resolve the Issues: Follow the suggestions provided by the Accessibility Checker to make your document more accessible, such as adding alternative text or adjusting formatting.
Step 2: Utilizing the Dictate Feature
- Open the Microsoft Office Application: Launch the desired Microsoft Office application, such as Word or PowerPoint.
- Click on the Home Tab: Navigate to the Home tab in the toolbar.
- Select the Dictate Option: Locate the Dictate button and click on it.
- Start Speaking: Start speaking naturally, and the Dictate feature will transcribe your speech into text in real-time.
- Complete Your Text: Dictate will automatically add punctuation and formatting commands. If necessary, speak the specific commands (e.g., “new paragraph”) to control the formatting.

Step 3: Using the Immersive Reader
- Open the Document: Launch the Microsoft Office document, such as Word or OneNote, that you want to read using Immersive Reader.
- Click on the View Tab: Navigate to the View tab in the toolbar.
- Select Immersive Reader: Look for the Immersive Reader icon and click on it.
- Customize Text Preferences: In the Immersive Reader view, you can adjust font size, spacing, and background color to enhance readability.
- Utilize Additional Features: Immersive Reader offers features like text-to-speech, parts of speech highlighting, and picture dictionary to aid comprehension.

Step 4: Enabling Subtitles and Captions in Video Presentations
- Open the Presentation: Launch Microsoft PowerPoint and open your presentation.
- Select the Slide with the Video: Locate the slide containing the video you want to add subtitles or captions to.
- Click on the Playback Tab: Navigate to the Playback tab in the toolbar.
- Choose the Subtitle/Captions Option: Look for the Subtitles or Captions button and click on it.
- Add the Subtitles/Captions: Follow the on-screen prompt to upload a subtitle or caption file or use automatic speech recognition to generate subtitles.
By using the Accessibility Checker, Dictate, Immersive Reader, and Subtitles/Captions options, you can ensure that your documents are fully accessible and inclusive to all users.
Obtain an Excel license from our website, available in the Office Suite. Decide between Office 2016, Office 2019, or Office 2021 depending on your needs.