
Office Blog
Outlook Calendar Management for Better Scheduling

Effective calendar management is essential for efficient scheduling and productivity. In this guide, we will explore techniques to master calendar management in Outlook. We’ll cover setting up and customizing calendar views, color-coding events, scheduling meetings, and setting reminders. You’ll also learn about sharing calendars and integrating with Microsoft Teams for better coordination. Take control of your schedule and enhance productivity with these valuable tips in Outlook.
Step 1: Creating and organizing events:
- Open Outlook and click on the Calendar tab.
- Click on the desired date and time, then enter the event details.
- Use the “Subject” field to provide a brief description of the event.
- Specify the start and end time, and set reminders if necessary.
- Categorize events using labels such as work, personal, or important.
Step 2: Scheduling appointments and meetings:
- To schedule an appointment, click on the desired date and time in the calendar view.
- Alternatively, use the “Ctrl + Shift + A” shortcut to create a new appointment.
- Enter the details, including attendees’ names, location, and duration.
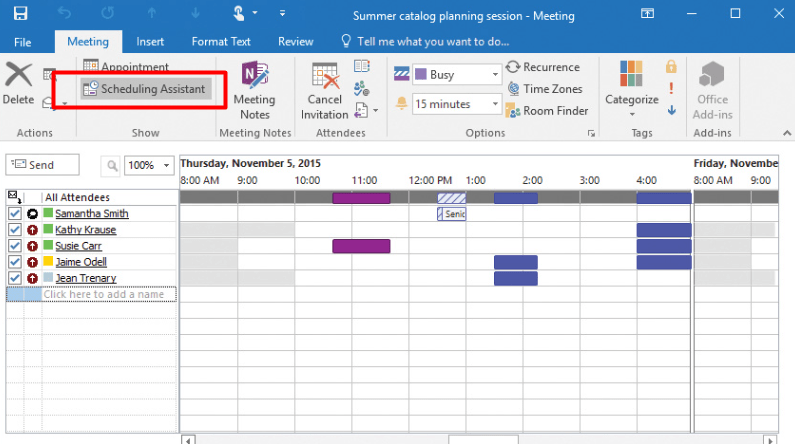
- Use the “Scheduling Assistant” feature to check participants’ availability.
Step 3: Managing recurring events:
- For events that occur regularly, utilize the recurring events option.
- Click on the “Recurrence” button in the event creation window.
- Specify the frequency (daily, weekly, monthly) and select the desired pattern.
- Set an end date for the series or choose to make it indefinite.
Step 4: Sharing and delegating calendars:
- To share your calendar with colleagues or team members, go to the “Home” tab.
- Click on “Share Calendar” and choose the desired sharing settings.
- Select recipients via email or directly from your contact list.
- To delegate your calendar, right-click on it and select “Properties”.
- Choose the delegate and assign specific permissions.
Step 5: Customizing calendar views:
- Tailor your calendar display according to your preferences.
- Use the “View” tab to change the calendar layout to day, week, or month view.
- Apply filters to show or hide certain events or categories.
- Customize the time scale to highlight your most productive hours.
Step 6: Setting reminders and managing time effectively:
- Stay on top of your schedule by setting reminders for important events.
- Right-click on an event and select “Add Reminder” to configure the reminder time.
- Use the “To-Do Bar” feature to display upcoming events and tasks.
- Prioritize tasks and allocate time blocks for specific activities.
Conclusion:
By following these step-by-step instructions for Outlook calendar management, you can streamline your scheduling and boost productivity. Create and organize events, schedule appointments and meetings efficiently, manage recurring events, share and delegate calendars, customize views, set reminders, and effectively manage your time. With a well-managed calendar, you can stay organized, meet deadlines, and make the most of your day. Take control of your schedule, optimize your productivity, and achieve better results with Outlook calendar management.
Unleash the potential of your database management system with a Microsoft Office license tailored to your requirements. Browse through our website to find the perfect fit, whether it’sOffice 2016 cheap keys, Office 2019 cd keys, and the cheapest Office 2021 licenses.