
Office Blog
How to Apply a Neon or Glowing Effect to Objects in PowerPoint?

PowerPoint presentations are not limited to static and dull visuals. With the right techniques, you can add eye-catching effects to your slides to make them more engaging and memorable. One popular effect is the neon or glowing effect, which adds a vibrant and dynamic look to objects in PowerPoint. In this step-by-step guide, we will explore how to apply a neon or glowing effect to objects in PowerPoint, making your presentations stand out from the crowd.
Step 1: Open PowerPoint and Select the Object:
- Launch PowerPoint on your computer.
- Open the presentation containing the desired slide.
- Select the object to which you want to apply the neon or glowing effect.
Step 2: Access the “Format Shape” Options:
- Right-click on the selected object to open a context menu.
- Within the menu, click on the “Format Shape” option to access the formatting options.
Step 3: Choose the Fill Option:
- In the “Format Shape” panel on the right, locate and click on the “Fill & Line” tab.
- Under the “Fill” section, choose the desired fill option for the object. The neon or glowing effect can work best with solid colors or gradients.
Step 4: Adjust the Color:
- After selecting the fill option, click on the “Color” drop-down menu to choose a color for the object. Consider using bright and vibrant colors for a neon effect or a soft and muted color for a glowing effect.
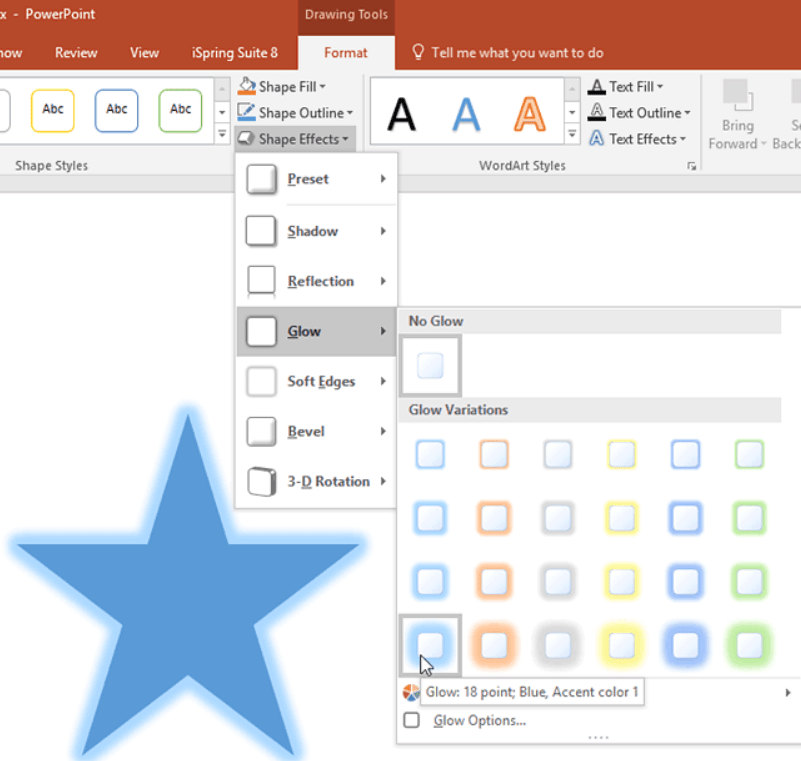
Step 5: Enable the Glow Effect:
- In the “Format Shape” panel, navigate to the “Glow & Soft Edges” option.
- Click on the “Glow” checkbox to enable the glow effect.
Step 6: Customize the Glow Settings:
- Adjust the “Radius” slider to control the size of the glow effect. Increase it for a larger and more prominent glow, or decrease it for a subtler effect.
- Fine-tune the “Transparency” slider to set the intensity of the glow. Higher values will make the glow more transparent, while lower values will make it more solid.
Step 7: Experiment with Additional Glow Options:
- Explore other options in the “Glow & Soft Edges” section, such as “Color” and “Size,” to further customize the glow effect.
- Change the glow color by clicking on the “Color” drop-down menu and selecting a different hue.
Step 8: Preview and Adjust as Needed:
- Preview the neon or glowing effect on the object by clicking outside the formatting panel.
- If necessary, go back to the “Format Shape” panel and make any further adjustments to achieve the desired visual effect.
Conclusion:
By following these step-by-step instructions, you can easily apply a neon or glowing effect to objects in PowerPoint, elevating the visual impact of your presentations. Experiment with colors, sizes, and transparency settings to create dazzling and unique effects that capture and captivate your audience’s attention. Add a touch of vibrancy and dynamism to your slides, making your content shine and leaving a lasting impression on your viewers.
Don’t settle for less. Visit our website and find the best price for Microsoft Office to unleash its full potential and supercharge your productivity.