
Office Blog
How do I use the Tags Feature in OneNote to categorize my notes?

OneNote’s Tags feature stands as a robust asset in the arsenal of digital organization, offering users a versatile means to categorize and organize their notes with precision. By harnessing the capabilities of the Tags feature, users can streamline their note-taking process, enhance retrieval efficiency, and create a structured framework for managing information. In this comprehensive tutorial, we will delve into the functionalities of the Tags feature in OneNote and provide step-by-step guidance on its effective utilization for note categorization.
With a myriad of customizable tags at your disposal, ranging from prioritization markers to thematic labels, the Tags feature empowers users to tailor their note organization strategy to suit their individual preferences and workflow requirements. Whether you’re annotating action items, flagging important details, or grouping notes by topic, the Tags feature offers a versatile toolkit for organizing information in a meaningful and intuitive manner. Through this guide, you’ll gain insights into how to leverage Tags effectively, allowing you to categorize notes with precision, track progress on tasks, and maintain clarity amidst the sea of information.
Moreover, the Tags feature facilitates enhanced collaboration and communication by providing a standardized framework for categorizing notes and conveying key information. Whether you’re collaborating with colleagues on a project, sharing meeting minutes with team members, or collaborating on research with classmates, the consistent use of tags ensures that everyone involved can easily interpret and navigate the shared notes. By embracing the Tags feature in OneNote, users can foster collaboration, streamline communication, and elevate productivity in their personal and professional endeavors.
Step 1: Open OneNote
Launch OneNote on your computer or device and open the notebook where you want to use the Tags feature.
Step 2: Understand the Tags Pane
Locate the Tags pane on the right side of the OneNote window. If it is not visible, go to the “View” tab on the toolbar and check the “Tags” option to display the Tags pane.
Step 3: Select a Note
Choose a note that you want to categorize using tags. Click on the note to select it.
Step 4: Apply a Tag
In the Tags pane, click on the desired tag to apply it to the selected note. You can choose from a variety of built-in tags such as “To Do,” “Important,” “Idea,” or create your custom tags by clicking on the “Create New Tag” option. The applied tag will appear next to the note.

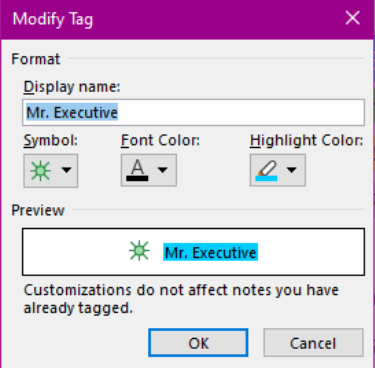
Step 5: Customize Tags
To create your custom tags, click on the “Create New Tag” option in the Tags pane. Name the tag and choose an icon from the available options. You can also assign a shortcut key for quick tagging in the future. Click “OK” to save the custom tag.
Step 6: Filter Notes by Tags
To filter and view notes with specific tags, click on the “Find Tags” option at the bottom of the Tags pane. A search bar will appear. Enter the tag name or select a tag from the dropdown list, and OneNote will display all the notes tagged with that particular tag.
Step 7: Remove or Modify Tags
If you want to remove or modify a tag from a note, select the note and click on the “Clear Tag” option in the Tags pane. To modify a tag, right-click on the note, go to the “Tags” option in the context menu, and choose the desired tag or create a new one.
Step 8: Review Tag Summary
To get an overview of how many notes are tagged with each tag, navigate to the “Home” tab on the OneNote toolbar and click on the “Tag Summary” button. OneNote will show a summary of the tagged notes based on the applied tags.
By following this step-by-step guide, you can maximize the usage of the Tags feature and create a well-structured note-taking system in OneNote.
Elevate your work experience with the cheapest Microsoft Office CD keys, now accessible on our website. Seamlessly create, edit, and collaborate on documents, spreadsheets, and presentations, and watch your productivity soar to new heights. Don’t miss out – explore our range of licenses now!