
Office Blog
How do I Take Notes in Microsoft OneNote?

Microsoft OneNote is a robust note-taking application that helps you capture and organize your ideas. In this step-by-step guide, we will walk you through the process of taking notes in Microsoft OneNote.
Step 1: Launch Microsoft OneNote
- Click on the Microsoft OneNote icon on your desktop or search for it in the Start menu to launch the application.
Step 2: Create a New Notebook
- In the main interface of OneNote, click on “File” and select “New” to create a new notebook.
- Choose a location to save your notebook and provide a name for it. Click “Create” to proceed.
Step 3: Create Sections
- Once your notebook is created, you can start creating sections to further organize your notes.
- Right-click on the notebook and select “Add Section“. Give the section a descriptive name and press Enter.
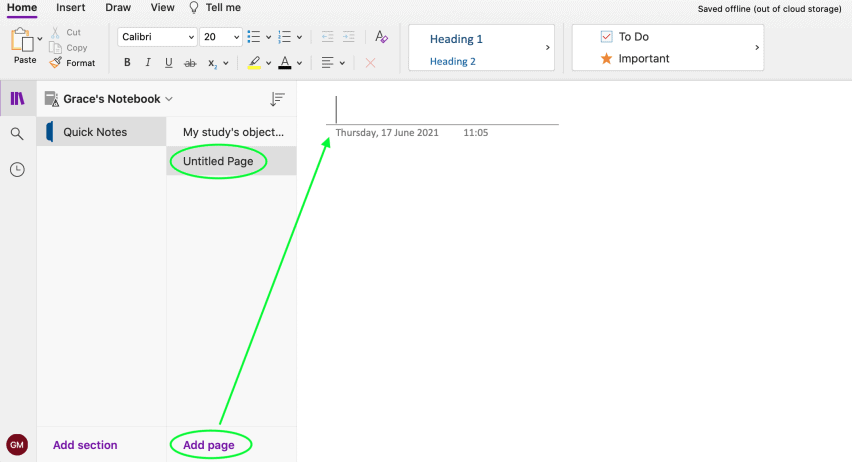
Step 4: Add Pages
- Within each section, you can create multiple pages to write your notes.
- Right-click on the section and select “Add Page” or simply click on the “+” icon next to the section name.
Step 5: Format and Customize Pages
- OneNote provides various formatting options to enhance your notes.
- Use the toolbar to format text, insert images, create checklists, draw sketches, or record audio.
Step 6: Use Tags and Labels
- OneNote offers tags and labels to categorize and highlight important information.
- Select a particular portion of your notes and apply tags from the toolbar, such as “To-Do“, “Important“, or create custom tags.
Step 7: Sync and Access Notes Across Devices
- OneNote allows you to sync your notes across multiple devices.
- Sign in with your Microsoft account, go to “File“, click on “Account“, and enable synchronization.
Step 8: Search and Retrieve Notes
- OneNote has a powerful search feature that helps you find specific notes or information quickly.
- Use the search bar at the top and enter relevant keywords to search within your notes.
Step 9: Save and Share Notes
- Your notes are automatically saved as you work in OneNote.
- To share your notes, go to “File“, click on “Share“, choose the desired sharing option, and follow the prompts.
By following the step-by-step instructions above, you can create notebooks, sections, and pages, format your notes, and benefit from features like tagging, syncing, and sharing.
Get your Excel license from our website, which comes as part of the Office Suite. Choose from Office 2016, Office 2019, or Office 2021 based on what you require.