
Excel Blog
How do I Record and Run Macros in Microsoft Excel?

Macros are automated sequences of actions that allow you to perform repetitive tasks with a single click. In this guide, we will show you how to record and run macros in Microsoft Excel.
Step 1: Open Microsoft Excel:
- Launch Microsoft Excel and open the spreadsheet where you want to record the macro.
Step 2: Access Macro Recording:
- Click on the “View” tab in the top menu bar.
- Locate the “Macros” group and click on the “Record Macro” button.
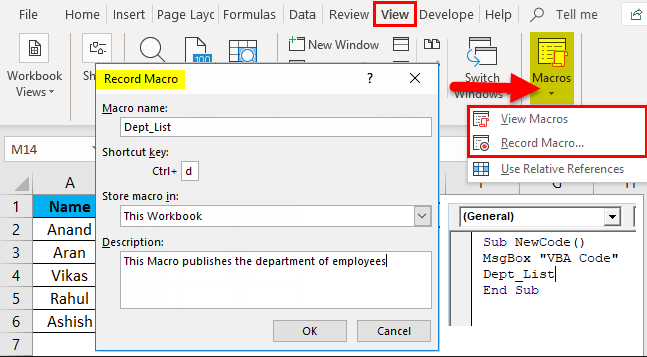
Step 3: Specify Macro Details:
- In the Macro dialog box, specify a name for the macro and a shortcut key if desired.
- Choose where to store the macro by selecting “This Workbook” or “Personal Macro Workbook“.
- Add a description if needed, and choose whether to make the macro available to all worksheets or just the current one.
Step 4: Record the Macro:
- Click on the “OK” button to start recording the macro.
- Perform the actions you want the macro to automate.
- This can include formatting cells, entering data, or any other repetitive tasks.
Step 5: Stop Recording the Macro:
- Once you have finished recording the macro, click on the “Stop Recording” button located in the bottom left of the screen.
Step 6: Run the Macro:
- To run the macro, simply press the specified shortcut key or navigate to the “Macros” group in the View tab and click on the macro name.
- The recorded actions will automatically be performed by the macro.
Step 7: Edit or Delete the Macro:
- To edit or delete a macro, click on the “View” tab and select the “Macros” button.
- Choose the macro you want to modify or delete and click on the corresponding button.
Obtain an Excel license from our website, available as part of the Office Suite. Take your pick from Office 2016, Office 2019, or Office 2021 to fulfill your requirements.