Office Blog
How do I Import and Export Data in Microsoft Visio?
Microsoft Visio is more than a diagramming tool; it’s a powerful platform for integrating, visualizing, and sharing data. By importing and exporting data in Visio, you can streamline workflows, enhance collaboration, and create dynamic, data-driven visuals. In this blog, we’ll guide you through the steps to efficiently import and export data in Microsoft Visio.
1. Why Use Data Import and Export in Visio?
Importing and exporting data in Visio enhances its functionality by allowing you to:
- Visualize data directly in diagrams.
- Automate updates to diagrams based on changes in external data sources.
- Share diagram data with stakeholders in easily accessible formats like Excel or CSV.
2. Importing Data into Microsoft Visio
Visio allows you to import data from various sources, such as Excel spreadsheets, SQL databases, and SharePoint lists. Here’s how to do it:
Step 1: Prepare Your Data
- Ensure your data is well-organized, with clear headers and no empty rows or columns.
- Supported formats include Excel (.xlsx), CSV, and ODBC-compliant databases.
Step 2: Start the Data Import Wizard
- Open your Visio diagram or create a new one.
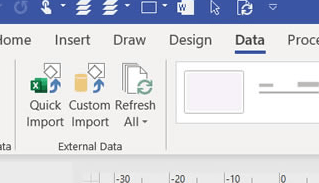
- Go to the Data tab on the ribbon and select Link Data to Shapes.
- Choose the source of your data:
- Excel Workbook
- Microsoft Access Database
- SharePoint List
- SQL Server or another OLEDB/ODBC data source

Step 3: Configure Data Import Settings
- Follow the wizard to locate and select your data file or connection.
- Map your data fields to corresponding shape data in Visio.
- Specify whether to automatically link data to shapes based on unique identifiers or do it manually.
Step 4: Visualize Imported Data
- Once linked, your shapes can display data as text or visual indicators (e.g., color-coded icons, data bars).
- Use Data Graphics under the Data tab to customize the appearance of imported data on shapes.
3. Exporting Data from Microsoft Visio
Exporting data from Visio enables you to share diagram data for reporting, analysis, or integration into other systems.
Step 1: Ensure Shape Data Exists
- Confirm that shapes in your diagram have associated data fields. Add or edit shape data via the Shape Data pane (found under the View tab).
Step 2: Export Data
- Navigate to the Data tab on the ribbon.
- Click Export to Excel (or the appropriate export option for your needs).
- Save the exported data as an Excel file, which you can then share or analyze further.

Step 3: Customize Export Settings (Optional)
- Before exporting, you can filter or organize data to include only relevant fields or rows.
4. Advanced Features for Data Integration
Visio also supports advanced data integration features:
- Live Data Connections: Connect to a live data source to update diagrams automatically when the source changes.
- Data Refresh: Use the Refresh All button on the Data tab to update linked data without re-importing.
- Export to SharePoint: Share diagrams with linked data on SharePoint for collaborative access.
5. Tips for Seamless Data Handling in Visio
- Validate Data: Before importing, ensure the source data is free of errors or inconsistencies.
- Use Unique Identifiers: Linking shapes to data works best when each data row has a unique ID, such as an employee number or product code.
- Leverage Templates: Save time by using Visio templates designed for specific data visualization purposes.
6. Use Cases for Data Import and Export in Visio
- Business Process Management: Import task data into flowcharts to track progress and performance.
- Network Diagrams: Integrate device inventory data into IT network diagrams.
- Organizational Charts: Auto-generate org charts from an employee database or Excel sheet.
- Project Timelines: Import project schedules to create Gantt charts or timelines.
Get genuine Microsoft Visio keys at unbeatable prices—unlock powerful diagramming and flowchart tools without breaking the bank!

