
Office Blog
How do I Create Advanced Queries and SQL Statements in Microsoft Access?

Microsoft Access is a powerful database management tool that allows you to create complex queries using SQL (Structured Query Language). In this step-by-step guide, we will walk you through the process of creating advanced queries and SQL statements in Microsoft Access.
Step 1: Launch Microsoft Access
Start by launching Microsoft Access on your computer.
Step 2: Open the Database
Open the database in which you want to create the advanced queries and SQL statements.
Step 3: Navigate to the “Create” Tab
Click on the “Create” tab located at the top of the screen. This tab contains the necessary tools for creating queries.
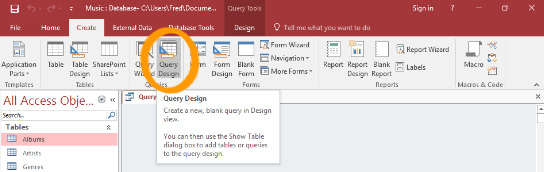
Step 4: Select “Query Design”
In the “Queries” group, click on the “Query Design” button. This will open the Query Design view, where you can build advanced queries.
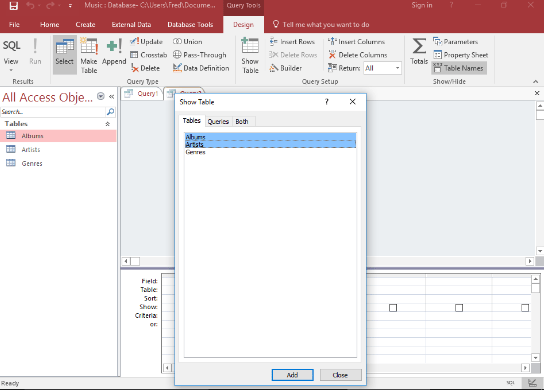
Step 5: Add Tables
In the Query Design view, go to the “Show Table” group and click on the “Add Table” button. Select the tables you want to include in your query and click “Add” to add them to the query designer.
Step 6: Join Tables (if required)
If you need to join multiple tables together, select the tables and click on the “Join” button in the Query Design view. Specify the join type and join fields to establish the relationships between the tables.
Step 7: Add Fields to the Query
From the table grid in the Query Design view, select the fields you want to include in your query. Drag and drop them onto the design grid.
Step 8: Apply Criteria to the Query
To filter the data in your query, click on the desired field in the design grid, and enter the criteria you want to apply. You can use comparison operators, wildcards, and logical operators to refine the results.
Step 9: Add Sorting and Grouping
To sort the query results, click on the “Sort” button in the Query Design view. Specify the sort order for each field. If you want to group the data, click on the “Group By” button and select the field(s) to group by.
Step 10: Switch to SQL View
Once you have designed your query, you can switch to the SQL View to see the generated SQL statement. Click on the “SQL View” button in the Query Design view.
Step 11: Write Custom SQL Statements (if required)
In the SQL View, you can manually write custom SQL statements to create more advanced queries. Make the necessary modifications to the SQL code to fit your requirements.
Step 12: View and Run the Query
Return to the Query Design view to view and run your query. Click on the “View” button to see the query results. If everything looks correct, click on the “Run” button to execute the query.
By following these step-by-step instructions, you can harness the power of Microsoft Access to create advanced queries and SQL statements.
Obtain an Excel license from our website, available as part of the Office Suite. Choose from Office 2016, Office 2019, or Office 2021 to fulfill your requirements.