
Windows Blog
How do I Change the Default Media Player in Windows 10?

By default, Windows 10 uses Windows Media Player as the default media player. However, if you prefer to use a different media player for a better playback experience, you can easily change the default setting. In this step-by-step guide, we will show you how to change the default media player in Windows 10, complete with specific commands.
Step 1: Open the Settings menu:
Click on the Start menu and select the gear icon to open the Settings menu. Alternatively, press the Windows key + I to open Settings directly.
Step 2: Access the Apps section:
In the Settings menu, click on the “Apps” option.
Step 3: Select the Default apps tab:
Within the Apps section, choose the “Default apps” tab from the left sidebar.
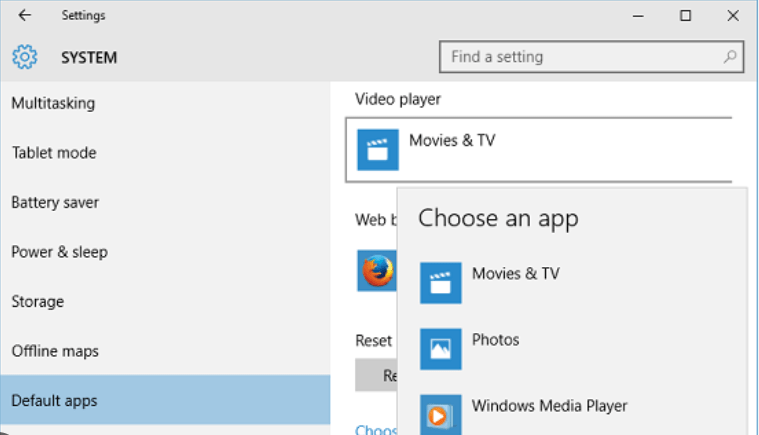
Step 4: Locate the Video Player setting:
Scroll down until you find the “Video Player” option and click on it.
Step 5: Choose your preferred media player:
A drop-down menu will appear with a list of available media players. Select your preferred media player from the list.
Step 6: Confirm your selection:
Once you have chosen your preferred media player, the drop-down menu will automatically close, and the new media player will be set as the default for video playback.
Step 7: Test the new default media player:
To ensure the change has taken effect, open a video file on your computer. It should now open and play with the new default media player.
Conclusion:
Changing the default media player in Windows 10 is a simple process that allows you to enhance your video playback experience. By following the step-by-step guide and using the specific commands provided here, you can easily switch to your preferred media player. Enjoy a seamless and personalized video playback experience on your Windows 10 PC.
Upgrade your device the smart way! Visit our website and buy cheap Windows keys to get the best value for your investment.