
Office Blog
How do I Change the Default Line Thickness in Microsoft Word?

Microsoft Word allows you to personalize your documents by adjusting the line thickness. Follow these step-by-step instructions to learn how to change the default line thickness in Microsoft Word.
Step 1: Open Microsoft Word
- Launch Microsoft Word on your computer.
Step 2: Access the “Home” Tab
- Click on the “Home” tab in the top menu bar.
Step 3: Select the “Borders” Drop-down Menu
- In the “Paragraph” section, locate and click on the drop-down menu labeled “Borders”.
Step 4: Choose “Borders and Shading”
- From the options presented in the drop-down menu, select “Borders and Shading”.
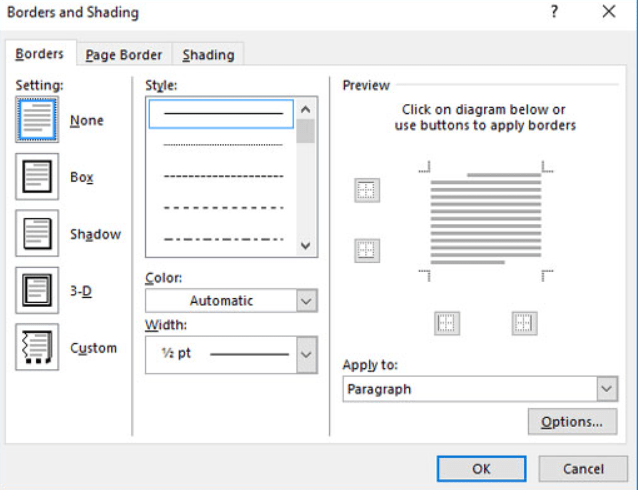
Step 5: Navigate to the “Borders” Tab
- In the “Borders and Shading” dialog box, click on the “Borders” tab.
Step 6: Adjust Line Thickness
- Under the “Setting” section, choose the type of border you want to modify (e.g., “Left border”, “Right border”).
- Next to the border type, adjust the line thickness by clicking the dropdown menu labeled “Width” and selecting your desired thickness.
Step 7: Apply the Changes
- Once you’ve chosen your desired line thickness, click on the “OK” button to apply the changes.
Step 8: Check the Default Line Thickness
- To verify that the default line thickness has been changed, create a new document or open an existing one to observe the updated line thickness.
Conclusion:
By following these simple steps, you can easily change the default line thickness in Microsoft Word. Personalize your documents and achieve the desired visual effect with ease.
Looking for an Excel license? Get it from our website along with the Office Suite, offering options like Office 2016, Office 2019, and Office 2021.