
Office Blog
How can I Insert an Index in Microsoft Word?

Incorporating an index into your Microsoft Word document enhances its usability by enabling readers to locate specific topics, keywords, or sections quickly. An index serves as a roadmap, guiding readers to relevant information within the document and facilitating efficient navigation. In this detailed tutorial, we’ll walk you through the step-by-step process of inserting an index using specific commands in Microsoft Word.
To begin, open your Word document and navigate to the location where you want to insert the index. Typically, the index is placed at the end of the document, after all the main content. Once you’ve positioned your cursor in the appropriate spot, navigate to the “References” tab in the Word ribbon.
Next, click on the “Insert Index” option within the “Table of Contents” group. This will open the “Index” dialog box, where you can customize various options for the index, such as the formatting style, levels of headings to include, and whether to include page numbers or hyperlinks. Once you’ve configured the settings according to your preferences, click “OK” to insert the index into your Word document. By following these simple steps, you can enhance the navigability of your document and make it easier for readers to access specific information with an index created using Microsoft Word.
Step 1: Open Microsoft Word and open your document.
- Launch Microsoft Word on your computer.
- Open the document you want to add an index to by clicking on “File” in the top-left corner and selecting “Open.”
Step 2: Place the cursor where you want the index to appear.
- Scroll to the specific location in your document where you want the index to be inserted.
- Click to place the cursor at that position.
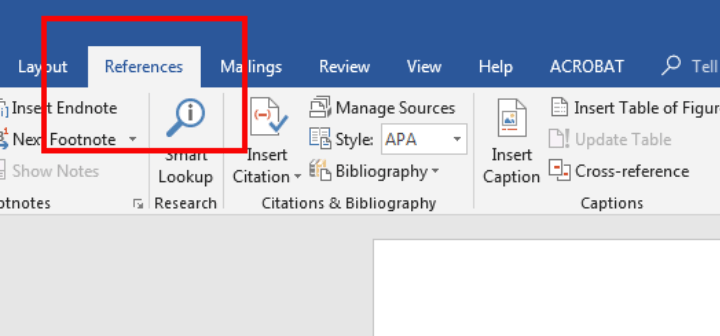
Step 3: Navigate to the “References” tab.
- Locate the “References” tab in the ribbon at the top of the screen.
- Click on the “References” tab to access the necessary commands for inserting an index.
Step 4: Click on “Insert Index.”
- Within the “References” tab, find the “Index” group.
- Click on the “Insert Index” button to open the “Index” dialog box.
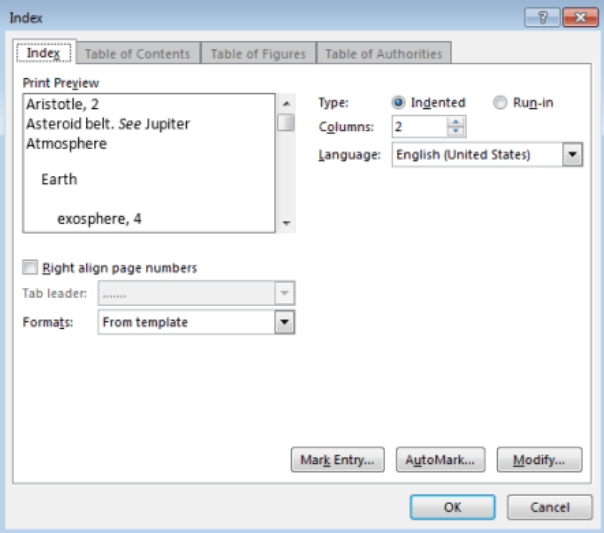
Step 5: Customize the index settings.
- In the “Index” dialog box, you can customize the appearance and behavior of the index.
- Choose the format: Alphabetical, Numerical, or User-defined.
- Select the columns and tabs options.
- Modify the styles, indentation, and other formatting options.
Step 6: Insert the index.
- After customizing the settings, click on the “OK” button in the “Index” dialog box.
- The index will be inserted into your document at the specified location.
Step 7: Update the index, if necessary.
- If you make any changes to your document that require an update to the index, right-click on the index and select “Update Field.”
- Choose either “Update page numbers only” or “Update entire table” to update the index accordingly.
Step 8: Save your document.
- Click on “File” and select “Save” to save your document with the inserted index.
- Choose a location on your computer and provide a name for the file.
- Click on “Save” to save the document.
Conclusion:
Inserting an index in Microsoft Word can greatly enhance the accessibility and usability of your document. By following the step-by-step guide and utilizing the specific commands provided, you can easily add a comprehensive index to your Word document. Take advantage of this feature to make your document more reader-friendly and navigable.
Get the most out of Office 2021 Home & Student CD keys without spending a fortune. Our website offers the cheapest prices on this essential software, empowering you to accomplish tasks efficiently and professionally.