
Office Blog
How can I Create a Form with Fields in Microsoft Word?

Creating forms with fields in Microsoft Word is a valuable skill that can enhance the interactivity and professionalism of your documents. Whether you’re designing a survey, questionnaire, or feedback form, adding form fields allows users to input information directly into the document, streamlining data collection and organization. In this comprehensive tutorial, we’ll guide you through the step-by-step process of creating a form with fields in Microsoft Word.
To begin, open a new Word document or an existing one where you want to create the form. Navigate to the “Developer” tab in the Word ribbon. If you don’t see the Developer tab, you may need to enable it in the Word options. Once you’ve accessed the Developer tab, click on the “Legacy Tools” button in the Controls group.
Next, select the type of form field you want to add to your document. Word offers various types of form fields, including text boxes, checkboxes, drop-down lists, and date pickers. Click on the desired form field type, then position your cursor in the document where you want to insert it. Word will insert the form field at the cursor location, allowing you to customize its properties and options as needed. Repeat this process to add additional form fields to your document, arranging them according to your layout and design preferences. By following these straightforward steps, you can create a professional and interactive form with fields in Microsoft Word, tailored to your specific needs and requirements.
Step 1: Open Microsoft Word and start a new document.
- Launch Microsoft Word on your computer.
- Click on “File” in the top-left corner and select “New” to start a new document.
Step 2: Enable the “Developer” tab.
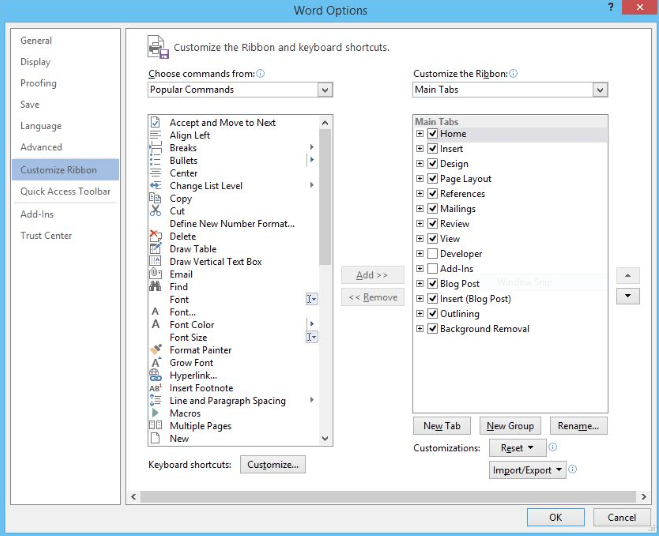
- Click on “File” and select “Options.”
- In the Word Options dialog box, click on “Customize Ribbon.”
- Under the “Customize the Ribbon” section, check the box next to “Developer.”
- Click on “OK” to enable the Developer tab.
Step 3: Design the form.
- Click on the “Developer” tab in the ribbon.
- In the “Controls” group, click on “Design Mode” to enable it.
- Select the type of form field you want to add, such as a text field, checkbox, or dropdown list.
- Click on the location in the document where you want to insert the form field.
Step 4: Customize the form fields.
- Right-click on the form field and select “Properties.”
- In the Properties dialog box, you can customize the field name, appearance, formatting, and other properties.
- Click on “OK” to apply the changes.
Step 5: Protect the form.
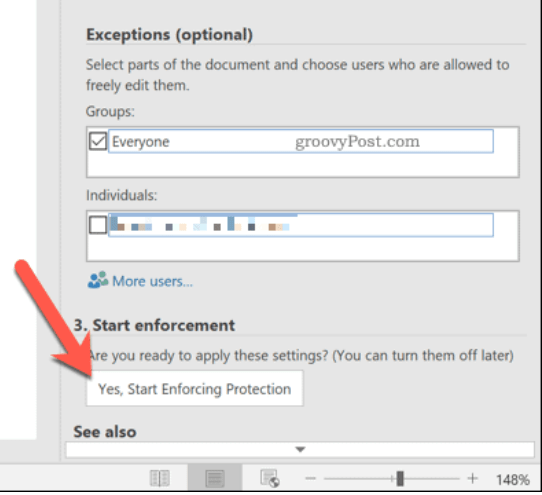
- Click on the “Developer” tab and then click on “Protect Document.”
- Choose “Restrict Editing” to enable form protection.
- Specify the editing restrictions and password if desired.
- Click on “Yes, Start Enforcing Protection” to protect the form.
Step 6: Save and distribute the form.
- Click on “File” and select “Save” to save the form.
- Choose a location on your computer and provide a name for the form.
- Optionally, you can convert the form to a PDF to ensure compatibility across different devices.
Conclusion:
Creating a form with fields in Microsoft Word is a straightforward process that adds interactivity to your documents. By following our step-by-step guide, you can easily create professional forms and streamline document interactions. Explore the various form field options and customize them to meet your specific requirements.
Discover unparalleled value with Microsoft Office 2021 Pro Plus license from our website. Unlock a world of efficiency and professional-grade features at the most affordable price. Don’t miss out.