
Excel Blog
Efficient Data Management in Excel

Managing data efficiently in Excel is crucial for organizing, analyzing, and visualizing information effectively. Follow these step-by-step instructions to become a master at data management in Excel:
Step 1: Prepare your data
- Open Excel and import or enter your data into a new worksheet.
- Ensure that each column represents a different data field, and each row represents a separate record.
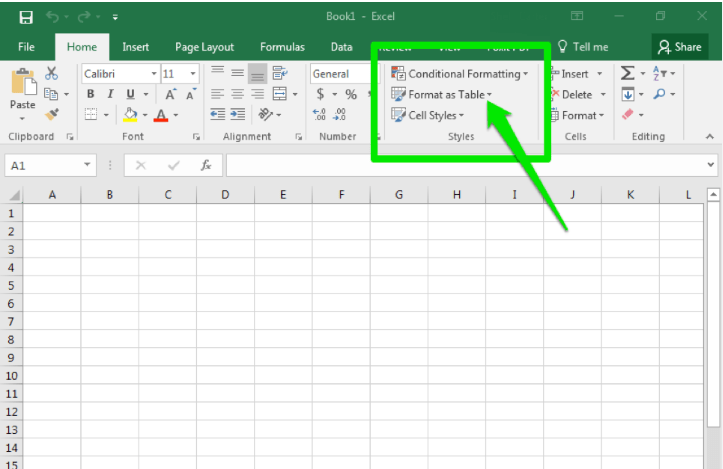
Step 2: Format your data as a table
- Select your data range.
- On the Home tab, click on the Format as Table button in the Styles group.
- Choose a table style that suits your needs, and Excel will apply formatting and table functionality automatically.
Step 3: Sort and filter your data
- Select the table.
- On the Data tab, click on the Sort and Filter buttons in the Sort & Filter group.
- Sort your data by specific columns in ascending or descending order.
- Apply filters to narrow down your data based on specific criteria.
Step 4: Use formulas and functions
- Select the cell where you want to use a formula or function.
- Begin with an equals sign (=) followed by the function or formula.
- Use formulas to perform calculations, such as SUM, AVERAGE, or COUNT.
- Utilize functions like IF, VLOOKUP, or CONCATENATE for more advanced data manipulation.
Step 5: Create meaningful visualizations
- Select the data you want to visualize.
- On the Insert tab, choose the desired chart type from the Charts group.
- Customize the chart by adding titles, axes labels, and formatting options.
- Experiment with different chart types to represent your data effectively.
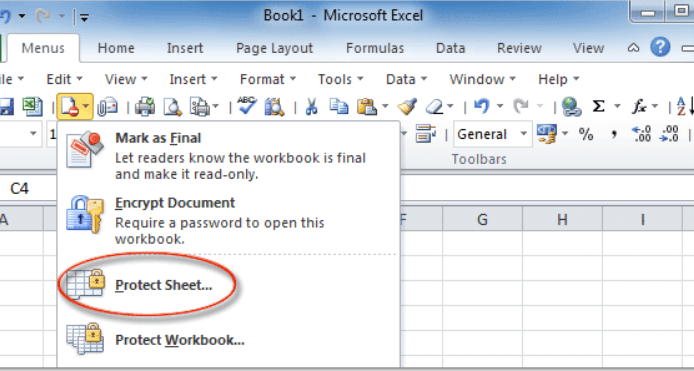
Step 6: Protect and secure your data
- On the Review tab, click on the Protect Sheet button in the Changes group.
- Set a password to protect your worksheet from unwanted changes.
- Use permissions to define who can edit or access specific cells or ranges.
Step 7: Use data validation
- Select the cell or range you want to validate.
- On the Data tab, click on the Data Validation button in the Data Tools group.
- Define the validation criteria, such as restricting values to a specific range or type.
Step 8: Regularly backup and save your file
- Click on the File tab and select Save As.
- Choose a storage location and provide a file name.
- Consider saving your file in different formats (e.g., .xlsx and .csv) for versatility.
By following these step-by-step instructions, you can efficiently manage data in Excel and unlock its full potential for analysis and visualization. Maximize your productivity and make informed decisions based on organized and well-managed data.
Dive into our website and explore the vast selection of Microsoft Office cheap keys available, designed to meet your database management needs. From cheap Office 2016 keys to user-friendly Office 2019 cdkeys and the cheapest Office 2021 cd keys, we have the right solution for you.