
Windows Blog
Making the Most of Windows 10’s Taskbar and Start Menu

Windows 10’s Taskbar and Start Menu are powerful tools for navigating your computer and increasing productivity. Here’s a step-by-step guide on how to make the most of these features:
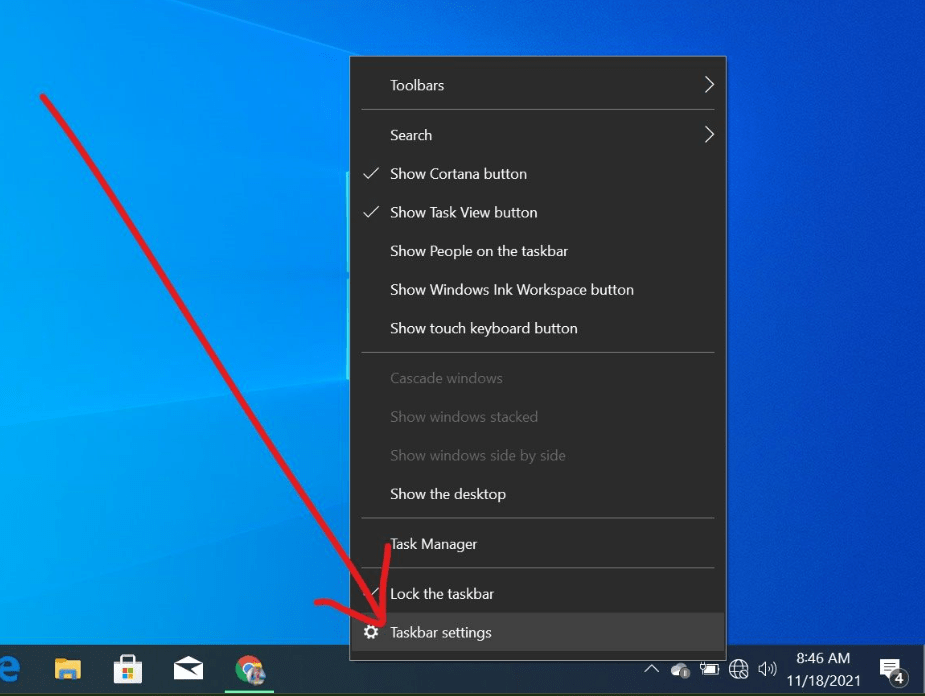
Step 1: Customize the Taskbar
- Right-click on an empty space on the Taskbar.
- Click on Taskbar settings.
- Customize the Taskbar by enabling or disabling different options like Cortana, Task View, or System icons.
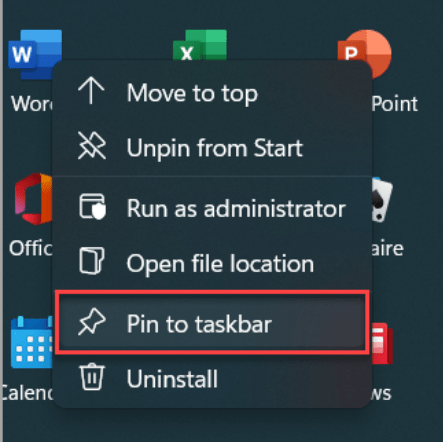
Step 2: Pin frequently used apps
- Open the Start Menu.
- Locate the app you want to pin.
- Right-click on the app.
- Click on Pin to Start or Pin to Taskbar.
Step 3: Adjust Taskbar position
- Right-click on an empty space on the Taskbar.
- Hover over Taskbar settings.
- Click on Taskbar location on screen.
- Choose the position you prefer: Bottom, Left, Right, or Top.
Step 4: Access Taskbar Jump Lists
- Find an app on the Taskbar with a small arrow next to it.
- Left-click on the app icon or hover over it.
- A Jump List will appear showing recent files or actions associated with the app.
Step 5: Utilize Taskbar search
- Click on the search bar located on the Taskbar.
- Type in your search query.
- Windows will display relevant apps, files, and settings based on your search.
Step 6: Customize the Start Menu
- Right-click on the Start button.
- Click on Settings.
- Navigate to Personalization.
- Customize the Start Menu layout, colors, and other options to fit your preferences.
Step 7: Organize Start Menu tiles
- Open the Start Menu.
- Locate an app tile you want to move.
- Click and drag the tile to your desired position.
- Organize your tiles into groups by dragging one tile on top of another.
Step 8: Resize the Start Menu
- Hover over the edge of the Start Menu.
- When the resize cursor appears, click and drag to adjust the size.
- Increase or decrease the height or width according to your preference.
Step 9: Customize Start Menu folders
- Open the Start Menu.
- Right-click on an empty area.
- Select More and then Open file location.
- Customize the folder by rearranging shortcuts or adding/deleting items.
By following these step-by-step instructions, you can customize and optimize Windows 10’s Taskbar and Start Menu according to your needs. Take advantage of these features to enhance your productivity and make navigating your computer more efficient.
Get the most out of your device upgrade without emptying your pockets! Buy Windows 10 cheap keys from our website and enjoy the best value.