
Excel Blog
Understanding Excel Error Messages and How to Fix Them

Excel is a powerful tool for managing data, but encountering error messages can be frustrating. In this blog post, we will cover common Excel error messages and provide step-by-step instructions on resolving them.
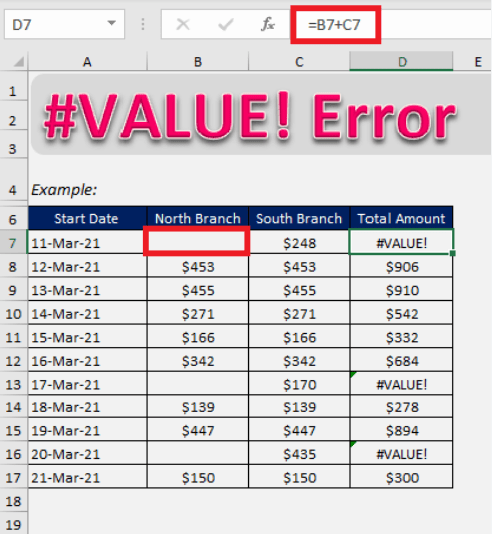
Step 1: #VALUE! Error
- Identify which formula is producing the #VALUE! error.
- Check each cell referenced in the formula to ensure they contain the correct data type (numbers or dates, not text).
- Use the ISNUMBER function to verify if a cell contains a number: =ISNUMBER(cell).
- If a cell contains text, update it to a numerical value or use a function like VALUE to convert it: =VALUE(cell).
Step 2: #REF! Error
- Locate the cell or range producing the #REF! error message.
- Determine if the referenced cell has been deleted or moved.
- Update the formula to refer to the correct cell by using the Find and Replace function (Ctrl + F).
- Replace the old cell reference with the new cell reference throughout the formula.
Step 3: #DIV/0! Error
- Identify the formula causing the #DIV/0! error.
- Add an IF statement to the formula to check if the divisor is zero using the IF function: =IF(divisor=0, “Error message”, formula).
- Replace the “Error message” with a custom text or modify the formula to handle the zero divisor case appropriately.
Step 4: #NAME? Error
- Locate the formula or function producing the #NAME? error message.
- Check if the formula or function is spelled correctly.
- Verify that the appropriate data range or workbook is open and referenced correctly.
- Use the ISFUNCTION function to check if Excel recognizes the function: =ISFUNCTION(cell).
Step 5: #N/A Error
- Identify the formula generating the #N/A error.
- Analyze the data being used in the formula to ensure it’s valid.
- Check for any typographical errors, incorrect references, or missing information.
- Verify that any linked workbooks or external data sources are accessible.
- Use the ISNA function to check if a cell contains the #N/A error: =ISNA(cell).
Conclusion:
By following these step-by-step instructions, you can understand and troubleshoot common Excel error messages effectively. Remember to research any other error messages you encounter to identify their causes and solutions. With better error handling skills, you can optimize your data management and improve productivity in Excel.
Discover the ideal Microsoft Office license on our website, designed to cater to your unique database management requirements. Choose from a range of options, including cheap Office 2016 keys, Office 2019 keys, and cheapest Office 2021 keys, ensuring the perfect fit.