Office Blog
How do you Apply a 3D Rotation to an Object in PowerPoint?
Applying a 3D rotation to objects in PowerPoint can make your presentations more dynamic and engaging. Here’s a step-by-step guide to help you achieve the perfect 3D effect.
Step 1: Open Your PowerPoint Presentation
- Launch PowerPoint: Open the PowerPoint application on your computer.
- Open a Presentation: Go to “File” > “Open” to navigate to and open an existing presentation, or use “File” > “New” to create a new one.
- Select a Slide: Click on the slide where you want to apply the 3D rotation.
Step 2: Insert an Object
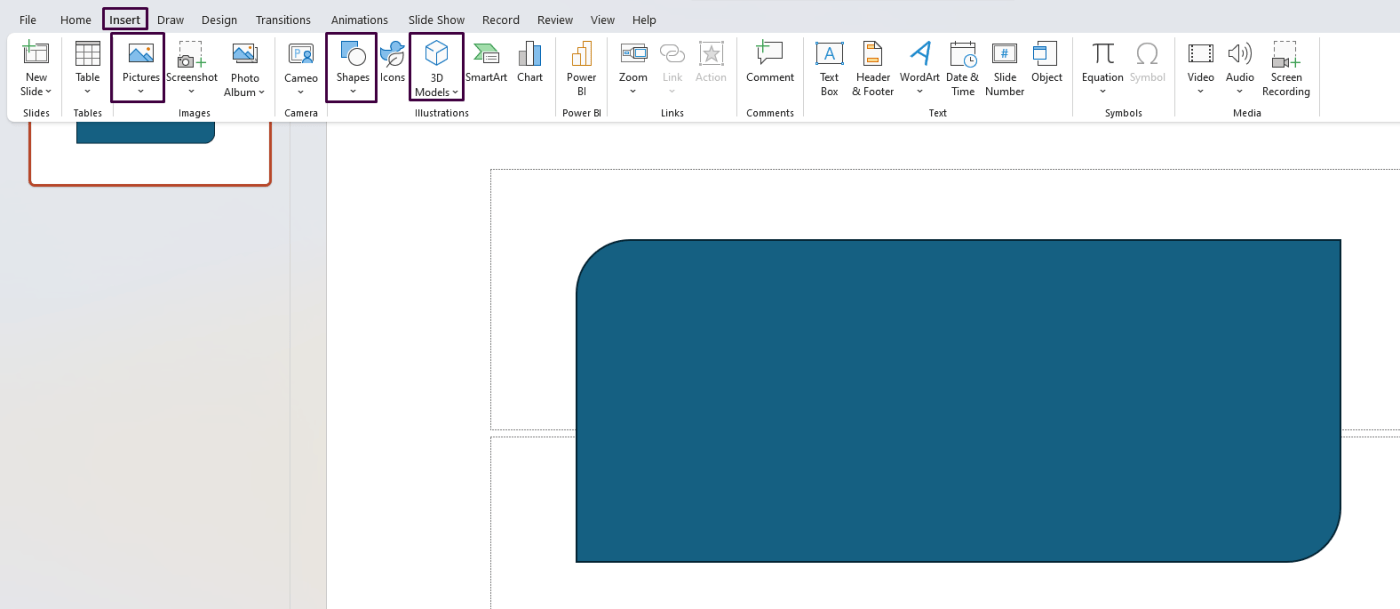
- Go to Insert Tab: Navigate to the “Insert” tab in the top menu.
- Choose Object Type: Select the type of object you want to insert, such as “Shapes,” “Icons,” “3D Models,” or “Pictures.” For example, to insert a shape:
- Click on “Shapes” and select the desired shape from the drop-down menu.
- Draw the Object: Click and drag on the slide to draw the object if it’s a shape. For images or 3D Models, click to insert and then adjust the size as needed.

Step 3: Apply 3D Format
- Select the Object: Click on the object to select it.
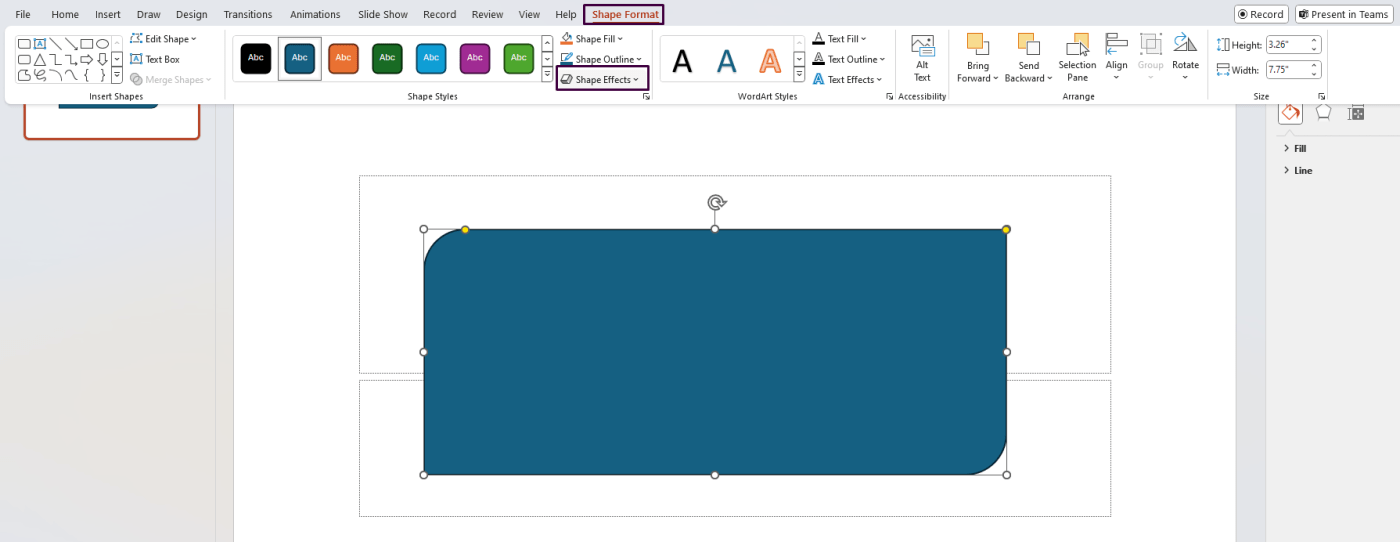
- Go to Format Tab: Navigate to the “Format” tab under “Drawing Tools” (this tab may also be labeled as “Picture Tools” or “3D Model Tools” depending on the object).
- Open 3D Format Options: In the “Shape Effects” or “Picture Effects” group, click on the “3-D Format” option to open various 3D effect options.

Step 4: Apply 3D Rotation
- Open 3-D Rotation Options: In the “Shape Effects” or “Picture Effects” drop-down menu, hover over or click on “3-D Rotation” to see various preset options.
- Choose Preset Rotation: Select from the available preset 3-D rotations to quickly apply a 3D effect.
- Custom 3-D Rotation: For a customized look, you can:
- Click on “3-D Rotation Options” at the bottom of the 3-D Rotation menu.
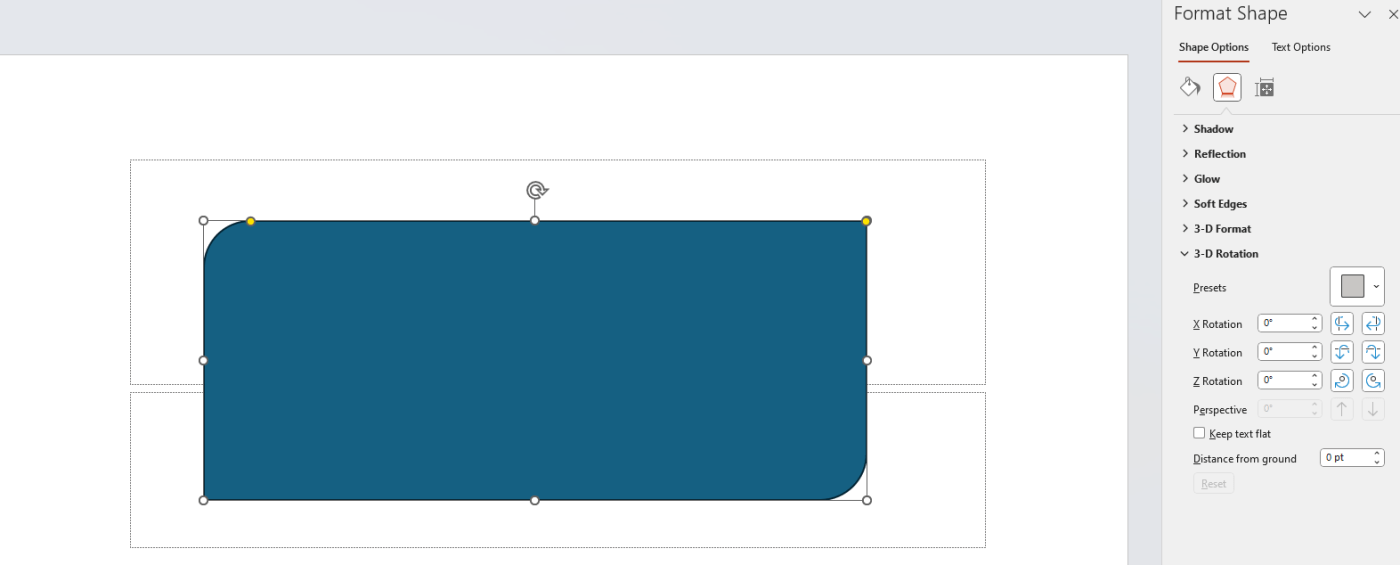
- In the “Format Shape” pane that appears, navigate to the “3-D Rotation” section.
- Adjust the “X Rotation,” “Y Rotation,” and “Z Rotation” values to customize the angle and depth of the 3D effect.

Step 5: Fine-Tuning the 3D Effect
- Adjust Depth and Contours:
- Navigate to “3-D Format” in the “Format Shape” pane.
- Adjust parameters like “Depth,” “Bevel,” and “Contour” to further customize the object’s 3D appearance.
- Reposition Object:
- Click and drag the object to reposition it on the slide as needed.
- Use size handles around the object to adjust its size.
Step 6: Save Your Presentation
- Save Your Work: Click “File” > “Save” or use the shortcut
Ctrl + Sto save your presentation. - Save As New Version: If you wish to keep the original presentation unchanged, use “File” > “Save As” to create a new version with your edits.
Get genuine Office Keys at unbeatable prices on our website, offering fast and secure transactions for instant software activation.

