Office Blog
How do I Add and Format Shapes in PowerPoint?
Shapes in PowerPoint allow you to visually enhance your presentations and convey information more effectively. In this step-by-step guide, we will show you how to add and format shapes in PowerPoint.
Step 1: Open PowerPoint and Access the “Insert” Menu
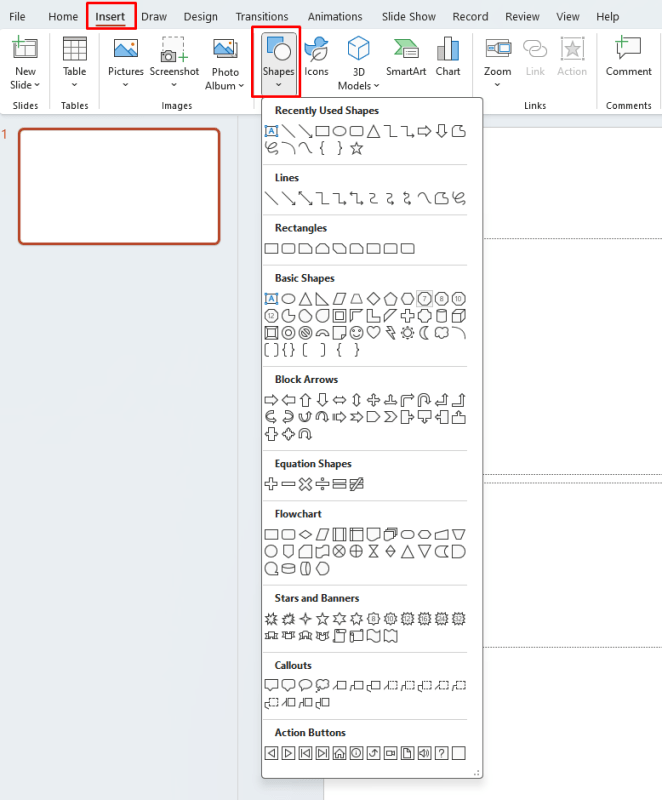
Open your PowerPoint presentation. In the PowerPoint ribbon, click on the “Insert” tab to access the various insert options.
Step 2: Select the Shape
In the “Insert” tab, click on the “Shapes” button. A drop-down menu will appear with a wide range of shapes to choose from. Click on the desired shape to select it.

Step 3: Draw the Shape
Once you have selected the shape, your cursor will transform into a crosshair. Click and drag on the slide to draw your shape. To maintain proportions, hold down the Shift key while drawing.
Step 4: Customize the Shape’s Size and Position
With the shape selected, you can adjust its size and position. Click on the shape and use the resizing handles to modify its dimensions. To move the shape, click and drag it to the desired location on the slide.
Step 5: Apply Fill Color to the Shape
To add color to the shape, click on the “Shape Fill” button in the PowerPoint ribbon. A drop-down menu will appear with various color options. Select the desired fill color.
Step 6: Add Outline to the Shape
If you want to add an outline to the shape, click on the “Shape Outline” button in the PowerPoint ribbon. From the drop-down menu, choose the desired outline color, thickness, and style.
Step 7: Format the Shape Effects
To further enhance the appearance of the shape, you can apply various effects. Click on the “Shape Effects” button in the PowerPoint ribbon and choose from options like shadow, reflection, glow, and more.
Step 8: Duplicate and Arrange Shapes
If you want to add multiple shapes to your presentation, you can duplicate and arrange them. Right-click on the shape and select “Duplicate” from the context menu. Use the alignment guides and arrange options to position the shapes precisely.
Step 9: Group and Ungroup Shapes
To manage multiple shapes together, you can group them. Select the shapes you want to group, right-click, and choose the “Group” option. Similarly, to ungroup shapes, select the grouped shape, right-click, and select “Ungroup.”
By following these step-by-step instructions, you can easily add and format shapes in PowerPoint to create visually appealing and engaging presentations.
Looking to maximize your savings on Microsoft Office? Our website offers the best price for you to tap into the full power of this productivity suite.

