Windows Blog
How do I Change the Date and Time Settings in Windows 10?
Keeping your system’s date and time accurate is crucial for various tasks in Windows 10. Here’s a step-by-step guide on how to change the date and time settings:
Step 1: Access the Date and Time Settings
- Right-click on the date and time display in the bottom right corner of the taskbar.
- From the context menu, select Adjust date/time.

Step 2: Set the Date and Time Manually
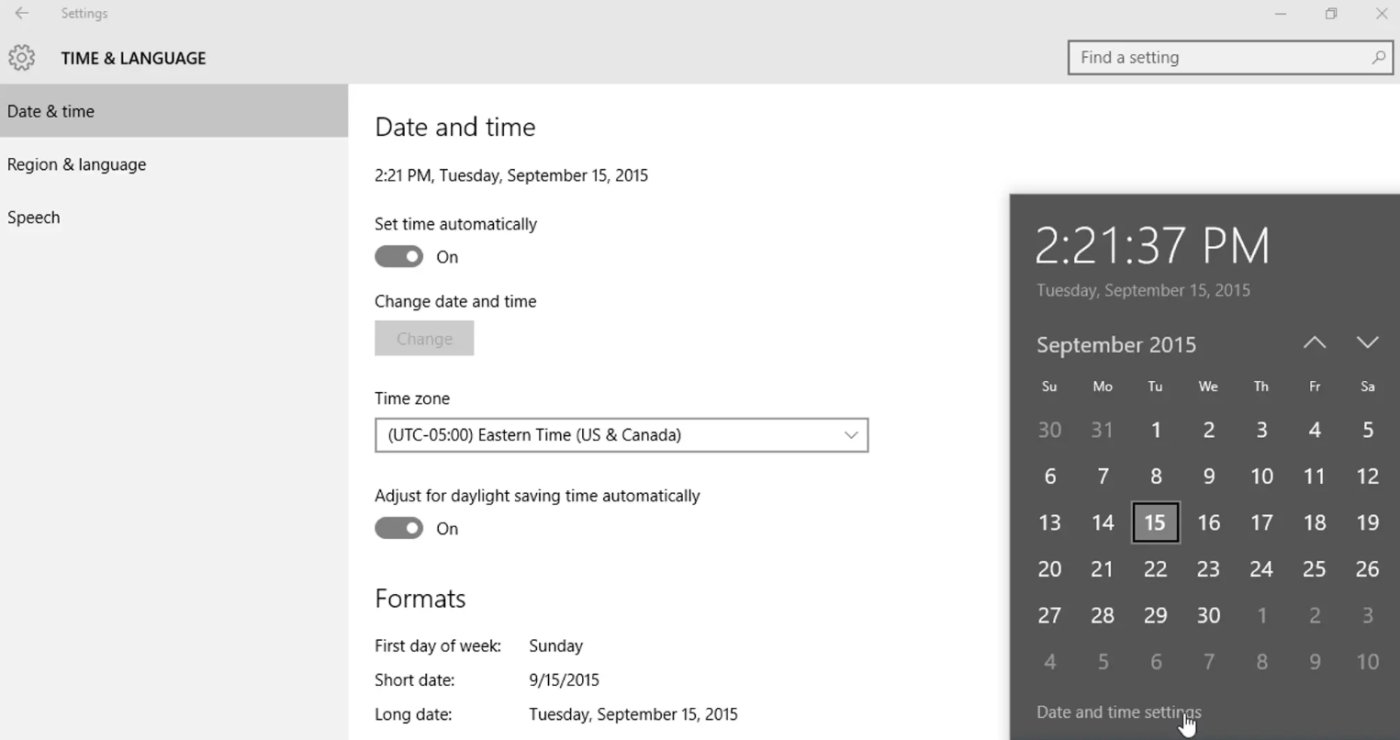
- In the Date & time settings window, turn off the toggle switch for Set time automatically if it’s already enabled.
- Click on Change under the “Change date and time” section.
- Adjust the date and time values using the provided drop-down menus.
- Click Change to confirm the new date and time.
Step 3: Change Time Zone
- To change the time zone, click on Change under the “Change time zone” section.
- Select the desired time zone from the drop-down menu.
- Click OK to apply the new time zone.

Step 4: Enable Automatic Time Synchronization
- Turning on automatic time synchronization ensures your computer’s clock is always accurate.
- In the Date & time settings window, enable the toggle switch for Set time automatically.
- Windows will automatically synchronize the time with the internet time server.
Step 5: Customize Date and Time Formats
- To customize the format of the date and time display, click on Change date and time formats.
- Adjust the format settings according to your preference.
- Click Apply to save the changes.
Step 6: Additional Time Settings
- Under the Date & time settings, you can find additional options like Adjust for daylight saving time automatically and Set the time zone automatically.
- Customize these settings based on your requirements.
By following these steps, you can easily change the date and time settings in Windows 10. Keep your system accurately synchronized and up-to-date, ensuring seamless functionality and accurate timestamps.
Upgrade your device without emptying your pockets! Get the best value for your investment with our cheap Windows 10 cheap keys from our website.

