
Windows Blog
How to Update BIOS on Windows 11
Updating your BIOS (Basic Input/Output System) is an essential task to ensure compatibility, stability, and performance of your computer, especially when upgrading to a new operating system like Windows 11. In this step-by-step guide, we will walk you through the process of updating your BIOS on Windows 11, providing specific commands for each step.
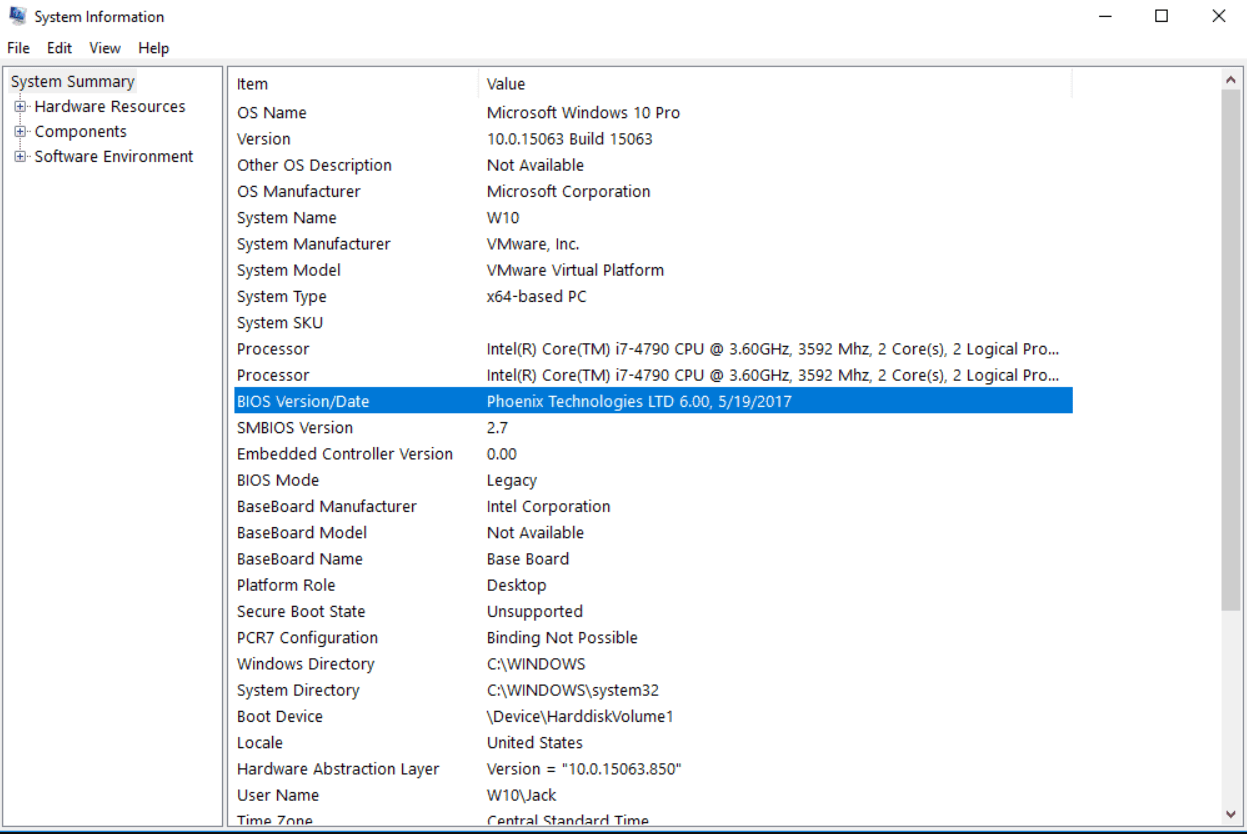
Step 1: Identify Your Current BIOS Version
- Press the Start button and type “System Information” in the search bar.
- Open the “System Information” app from the search results.
- In the System Summary tab, look for the BIOS Version/Date information.
Step 2: Download the Latest BIOS Version
- Visit the website of your computer’s manufacturer.
- Locate the Support or Downloads section.
- Enter your computer’s model and operating system details.
- Find and download the latest BIOS version for Windows 11.
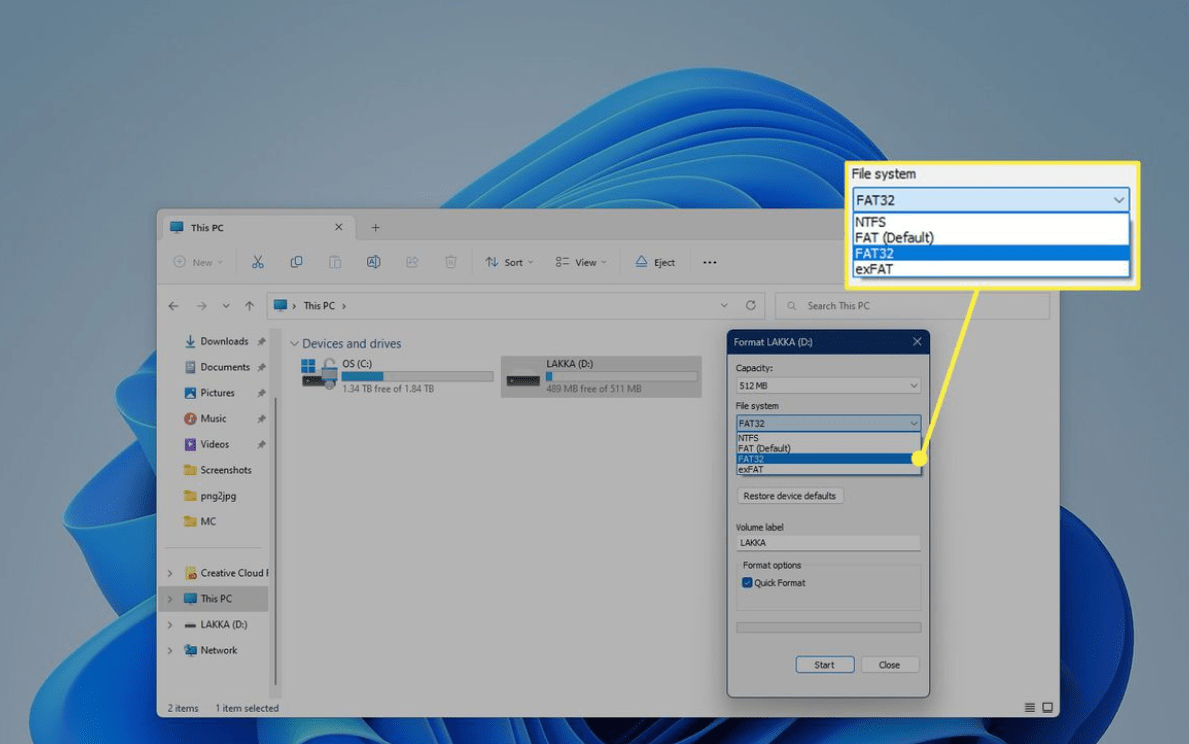
Step 3: Prepare a USB Flash Drive
- Insert a blank USB flash drive into your computer.
- Open the File Explorer and format the USB drive to FAT32 file system.
- Create a new folder on the USB drive and name it “BIOS Update”.
Step 4: Extract and Copy the BIOS Update Files to the USB Drive
- Locate the downloaded BIOS update file on your computer.
- Right-click on the file and select “Extract” or “Extract Here” to unzip the contents.
- Copy all the extracted files to the “BIOS Update” folder on the USB drive.
Step 5: Restart your Computer and Enter BIOS Menu
- Restart your computer
- During the startup process, look for a message such as “Press [Key] to enter BIOS Setup” or “Press [Key] to access UEFI settings”.
- Press the indicated key (e.g., F2, Del, Esc) to enter the BIOS menu.
Step 6: Update BIOS from USB Drive
- In the BIOS menu, navigate to the “Advanced” or “Tools” section.
- Look for an option like “Update BIOS”, “Flash BIOS”, or “EZ Flash”.
- Select the option and choose to update from a USB drive.
- Browse and locate the BIOS update file stored on your USB drive.
- Follow the on-screen instructions to initiate the BIOS update process.
Step 7: Wait for the BIOS Update to Complete
- Avoid interrupting the BIOS update process or turning off your computer.
- Wait patiently for the update to complete, which may take several minutes.
- Your computer may automatically restart during the process.
Step 8: Verify the Updated BIOS Version
- After the computer restarts, repeat Step 1 to check the BIOS version.
- Ensure that the BIOS version displayed matches the one you downloaded and updated.
Conclusion
Updating the BIOS on Windows 11 is a crucial step to optimize the performance and compatibility of your computer. By following these step-by-step instructions, you can easily update your BIOS with specific commands for each stage. Remember, updating the BIOS carries some risks, so it is crucial to carefully follow the instructions provided by your computer manufacturer and ensure a stable power source during the update process.
Get more out of your device without emptying your wallet! Buy cheap Windows 11 key from our website and upgrade smartly.