
Office Blog
How does Microsoft OneNote Facilitate Note-taking and Organization?

Note-taking and staying organized are crucial skills in both personal and professional settings. Microsoft OneNote is a powerful tool that can help you in this regard. With its features and functionalities, OneNote makes it easy to create and organize digital notes. Let’s explore how to leverage Microsoft OneNote step by step to facilitate note-taking and organization.
Step 1: Launch OneNote
Start by launching the Microsoft OneNote application on your computer or mobile device. Ensure that you have signed in to your Microsoft account or Office 365 subscription.
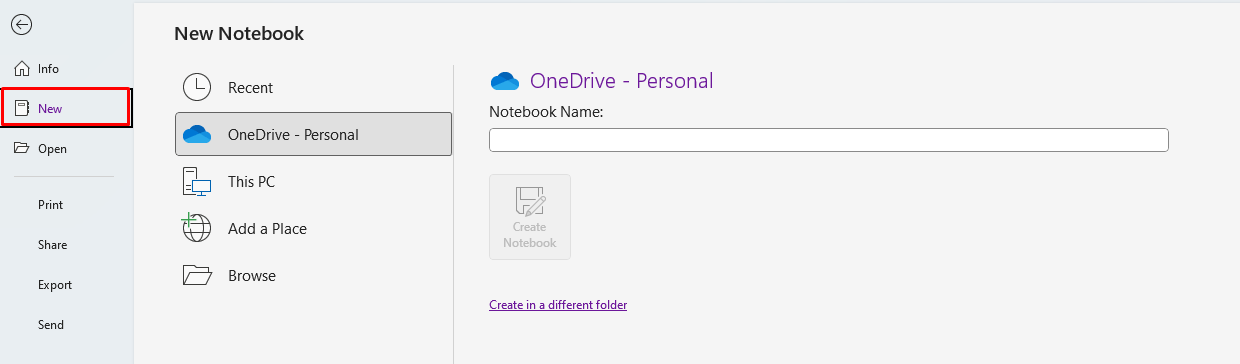
Step 2: Create a Notebook
In OneNote, a Notebook acts as a container for your notes. To create a new Notebook, click on the “File” or “Home” tab (depending on your version of OneNote) and select “New Notebook.” Choose a name and a location to save your Notebook.
Step 3: Add Sections
Within a Notebook, you can create multiple Sections to further organize your notes. To add a new Section, right-click on the Notebook, select “Add Section,” and enter a name for the Section.
Step 4: Create Pages
Pages are individual sheets within each Section where you can write your notes. To create a new Page, click on the desired Section, right-click, and select “New Page.” Give your Page a name related to its content.
Step 5: Format and Write Notes
Once your Page is created, you can start writing your notes. Utilize the formatting options in the toolbar to structure, style, and emphasize your text. OneNote allows you to add headings, bullet points, numbering, tables, and more.
Step 6: Insert Media and Attachments
Enhance your notes by inserting media and attachments. You can add images, screenshots, audio recordings, and even attach files directly to your pages. These elements can provide additional context and visual representation to your notes.
Step 7: Use Tags and Labels
OneNote offers a variety of tags and labels that you can use to categorize and classify your notes. You can assign tags like “To Do,” “Important,” or “Question,” among others, to easily identify and filter specific types of content later.
Step 8: Organize with Sections and Pages
As your notes accumulate, leverage the flexibility of sections and pages to keep them organized. Create new sections for different topics or projects, and use pages within those sections to categorize and group related information.
Step 9: Sync and Access Anywhere
OneNote features seamless synchronization, ensuring that your notes are always available across your devices. Utilize the “Sync” functionality to keep your notes up to date and accessible from your computer, tablet, or mobile phone.
Step 10: Utilize Collaboration Features
OneNote allows you to collaborate with others in real-time. Share specific pages or entire notebooks with colleagues or friends, enabling them to view and edit the notes simultaneously. Leverage this feature for group projects or shared brainstorming sessions.
By following the steps above, you can create and structure notebooks, sections, and pages efficiently. Utilize formatting options, tags, and labels to enhance note context and categorization.
Explore our website and find the lowest prices on Microsoft Office, providing unmatched value for acquiring the essential suite of productivity tools for personal or professional use.