Office Blog
How do you Insert and Format a Horizontal Line in Word?
Adding a horizontal line to your Word document can help separate sections, create visual breaks, or enhance the overall layout. Follow these steps to effortlessly insert and format a horizontal line in Microsoft Word.
Step 1: Open Your Word Document
- Open Microsoft Word.
- Click on “File” in the top-left corner.
- Select “Open” and choose the document where you want to insert and format the horizontal line.
Step 2: Place the Cursor
- Scroll to the section of the document where you want to insert the horizontal line.
- Click to place the cursor where you want the line to appear.
Step 3: Use the Ribbon to Insert a Horizontal Line
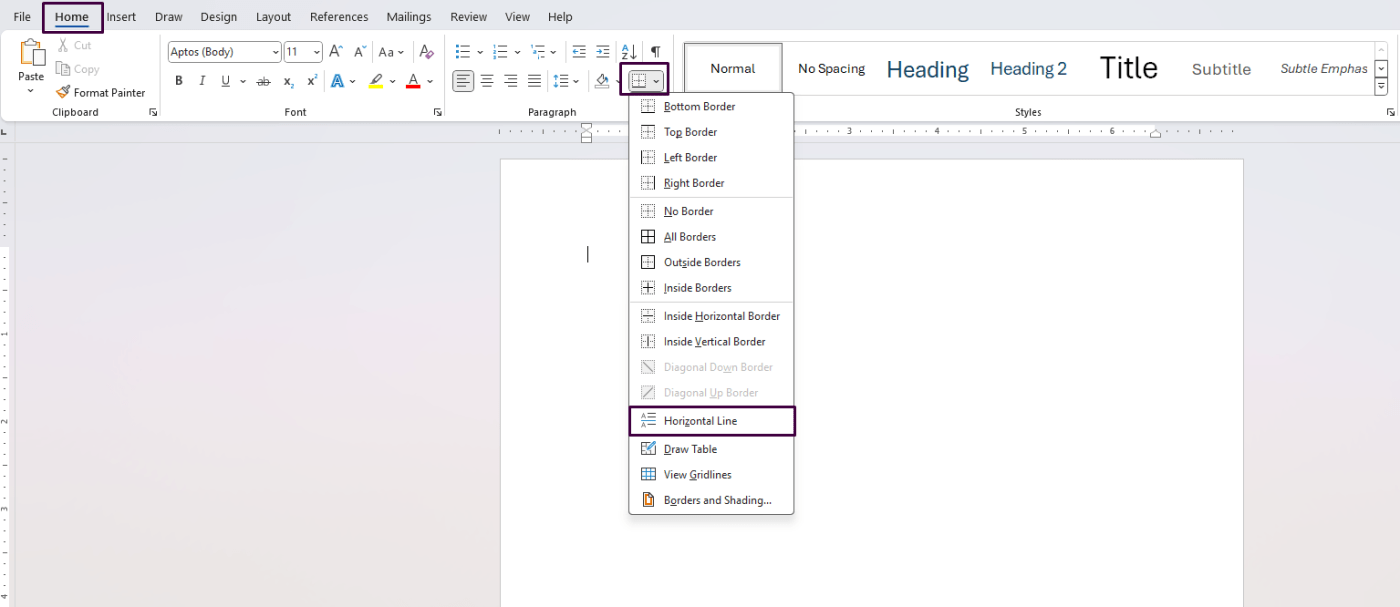
- Navigate to the “Home” tab on the Ribbon.
- In the “Paragraph” group, click the dropdown arrow next to the “Borders” button.
- Select “Horizontal Line” from the list.

Step 4: Format the Horizontal Line
- Right-click the horizontal line to open the context menu.
- Click on “Format Horizontal Line.”
- A dialog box will appear with formatting options.
Step 5: Customize Line Attributes
- Color: Click on the “Color” dropdown to choose a different color for your line.
- Width: Adjust the width by entering a specific value in the “Width” field.
- Height: Modify the height to make the line thicker or thinner.
- Alignment: Choose the alignment option that best suits your document layout (e.g., left, center, right).
Step 6: Apply Your Formatting Choices
- After making the desired changes, click “OK” to apply the formatting.
- Review the horizontal line in your document to ensure it meets your preferences.
Step 7: Save Your Document
- Click on “File” in the top-left corner.
- Select “Save” or “Save As” to preserve your changes.
Get your genuine Office Keys today and enjoy lifetime access to the full suite of Microsoft Office tools at unbeatable prices.

