Office Blog
How can you Create a Macro in Word?
Creating a macro in Microsoft Word can significantly boost your productivity by automating repetitive tasks. Follow this step-by-step guide to easily create and run a macro within your Word documents.
Step 1: Open Your Word Document
- Launch Microsoft Word.
- Click on “File” at the top-left corner of the screen.
- Select “Open” and choose the document you want to work on, or create a new document by selecting “New.”
Step 2: Enable the Developer Tab
- Click on “File” in the top-left corner.
- Go to “Options” at the bottom of the sidebar.
- In the Word Options dialog box, click on “Customize Ribbon.”
- In the right pane, check the box next to “Developer” under the “Main Tabs” list.
- Click “OK” to enable the Developer tab.
Step 3: Start Recording the Macro
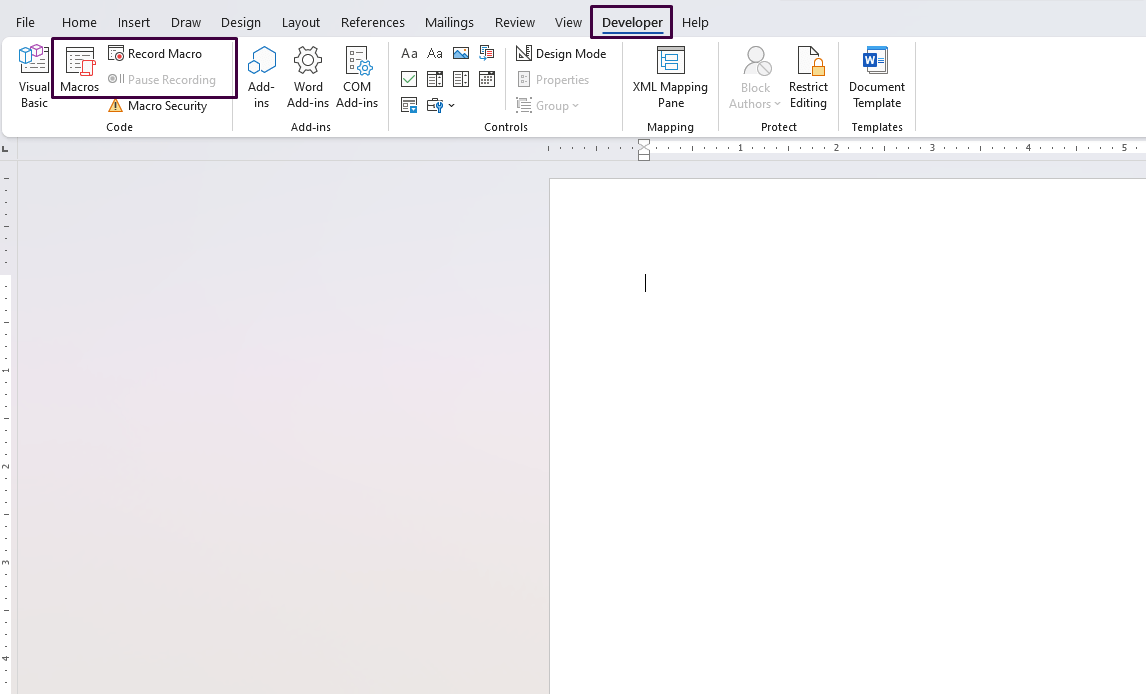
- Navigate to the “Developer” tab now visible in the Ribbon.
- Click on “Record Macro” in the “Code” group.

Step 4: Name and Assign the Macro
- In the Record Macro dialog box, enter a name for your macro. Use a meaningful name that represents the task.
- Optional: Add a description for clarity.
- In the “Store macro in” dropdown, select where you want to save the macro (e.g., “All Documents (Normal.dotm)” or “This Document”).
- Assign a shortcut key by clicking on the “Keyboard” button if desired. In the Customize Keyboard dialog, press the keys you want to assign and click “Assign.”
Step 5: Perform the Actions You Want to Automate
- Once you click “OK,” Word will start recording.
- Carry out all the actions you want the macro to automate. For example, format text, insert headers, or apply styles.
Step 6: Stop Recording the Macro
- Go back to the “Developer” tab in the Ribbon.
- Click on “Stop Recording” in the “Code” group.
Step 7: Run the Macro
- To run your macro, go to the “Developer” tab.
- Click on “Macros” in the “Code” group.
- In the Macros dialog box, select the macro you created and click “Run.”
Step 8: Assign the Macro to a Button (Optional)
- If you want to add a macro button to the Ribbon or Quick Access Toolbar, go to “File” > “Options.”
- Select “Customize Ribbon” or “Quick Access Toolbar” based on your preference.
- Choose “Macros” from the dropdown menu on the left side.
- Select your macro and click “Add” to place it in the selected area.
- Click “OK” to confirm.
Get your genuine Office Keys today and enjoy lifetime access to the full suite of Microsoft Office tools at unbeatable prices.

