Office Blog
How do I Create a Timeline in PowerPoint?
A timeline in PowerPoint can be a powerful tool to visualize and present information chronologically. In this step-by-step guide, we’ll show you how to create a timeline in PowerPoint.
Step 1: Open PowerPoint and choose a slide
Start by opening PowerPoint and selecting the slide where you want to add the timeline. You can choose an existing slide or create a new one.
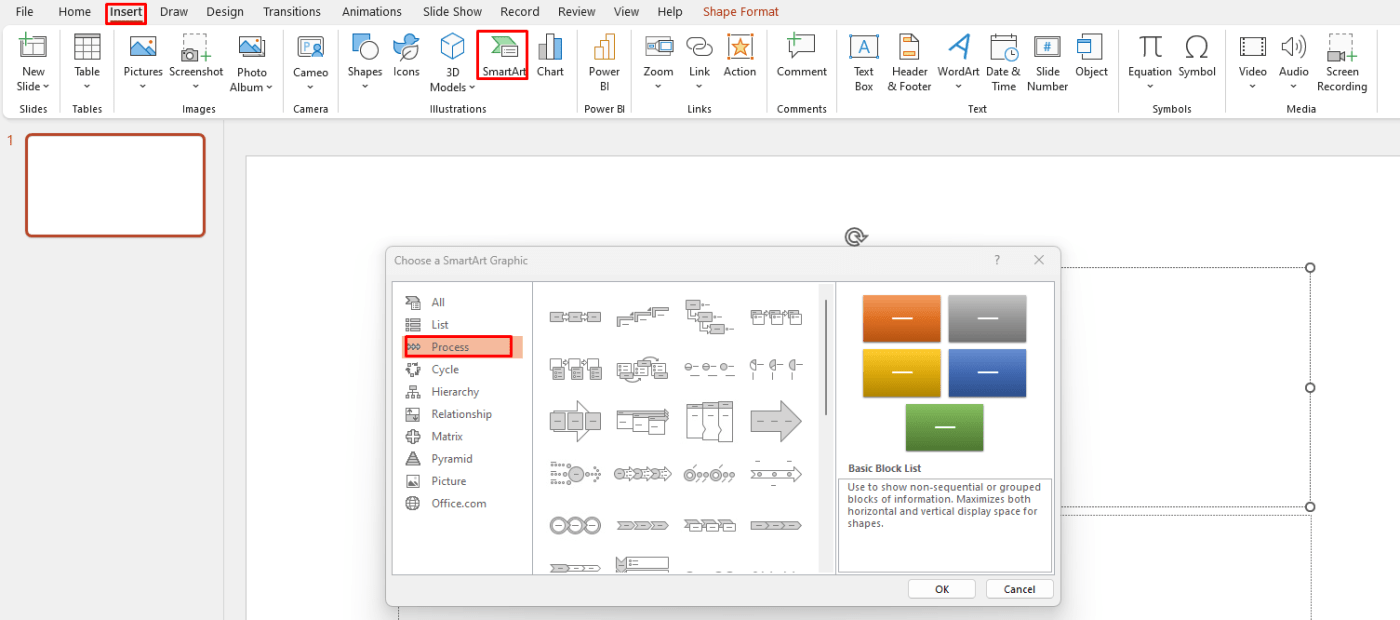
Step 2: Go to the “Insert” tab
Navigate to the “Insert” tab in the PowerPoint ribbon. This tab contains all the options for inserting different objects into your slide.
Step 3: Click on “SmartArt”
Under the “Insert” tab, select “SmartArt” to open the SmartArt graphics menu.
Step 4: Choose a timeline layout
In the SmartArt menu, select the “Process” category, and then choose a timeline layout from the options provided. You can choose from basic timeline layouts, such as a simple or stacked timeline, or more complex variants, such as a circular or pyramid timeline.

Step 5: Enter timeline information
Once you have selected the timeline layout, the SmartArt graphic will appear on your slide. Click on the text placeholders to enter your timeline information, including the date, event, and description.
Step 6: Customize the timeline
After entering your information, customize the timeline by changing the color, layout, or design. You can do this by using the SmartArt tools or by manually formatting the graphic.
Step 7: Duplicate and modify the timeline
If you need to create multiple timeline slides, simply duplicate the slide and modify the information as needed. You can also add additional elements or shapes to the timeline to provide more detail or enhance the visual appeal.
By following these steps, you can create a visually appealing timeline slide in PowerPoint that effectively conveys chronological information.
If you’re missing an Excel license, we can help! Get one from our website, bundled as part of the Office Suite. Choose from Office 2016, Office 2019, or Office 2021, depending on your individual needs and preferences.

