
Windows Blog
How can I Schedule Automatic Maintenance in Windows 11?
Windows 11 offers automatic maintenance to optimize system performance by performing various tasks in the background. This step-by-step guide will walk you through the process of scheduling automatic maintenance in Windows 11.
Step 1: Open the Settings:
- Click on the Start button on the taskbar or press the Windows key on your keyboard.
- Click on “Settings” (gear icon) in the Start menu to open the Settings app.
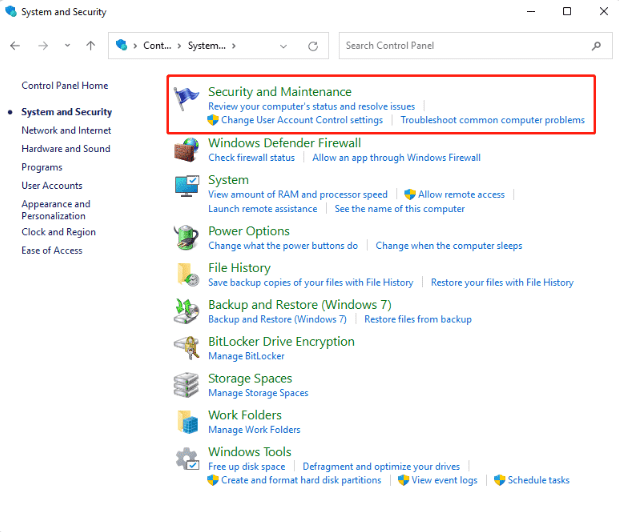
Step 2: Access the Maintenance Settings:
- In the Settings app, click on “System”.
- Select “Advanced” from the left-hand side menu.
- Scroll down and click on “Maintenance”.
Step 3: Enable Automatic Maintenance:
- Toggle the “Automatic maintenance” switch to the “On” position.
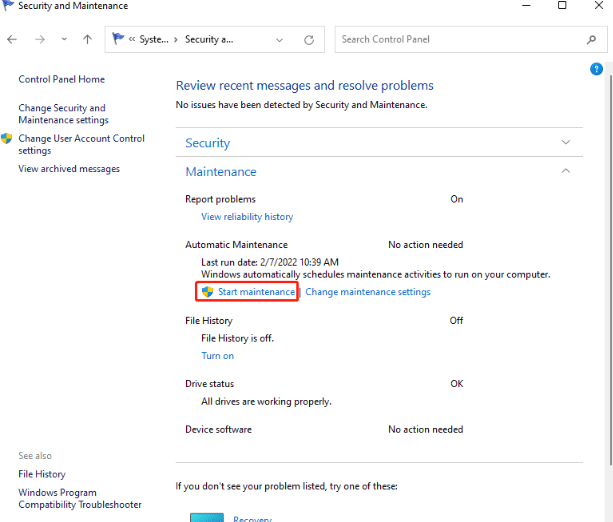
Step 4: Customize Maintenance Settings:
- Click on the “Change maintenance settings” link below the toggle switch.
- Here, you can customize the frequency and time for automatic maintenance to run.
Step 5: Customize Additional Maintenance Options:
- In the Maintenance settings, you can also customize additional options such as software updates, security scans, and troubleshooting tasks.
- Enable or disable specific tasks based on your preferences.
Step 6: Advanced Maintenance Settings:
- If you want more control over the maintenance tasks, click on the “Advanced settings” link.
- Here, you can fine-tune the maintenance settings further.
Step 7: Close the Settings App:
- After customizing the automatic maintenance settings, you can close the Settings app.
By following the step-by-step instructions in this guide, you can easily set up and customize automatic maintenance to suit your needs.
Smart and affordable device upgrade awaits! Visit our website to buy cheap Windows 11 Pro CD Key and get the best value for your investment.