
Office Blog
What is the best way to Format Long Documents in Word?

Format long documents in Microsoft Word, but with the right tools and methods, and you can create a polished and professional document. This step-by-step guide will walk you through the best practices for formatting long documents in Word, ensuring consistency and ease of navigation.
Step 1: Use Styles for Consistency
- Open the Styles Pane:
- Go to the “Home” tab.
- Click on the small arrow in the bottom right corner of the “Styles” group to open the Styles pane.
- Apply Heading Styles:
- Select the text you want to format as a heading.
- Choose a heading style (e.g., Heading 1, Heading 2) from the Styles pane.
- Modify Styles:
- Right-click a style in the Styles pane.
- Click “Modify” to customize the font, size, color, and other formatting options.
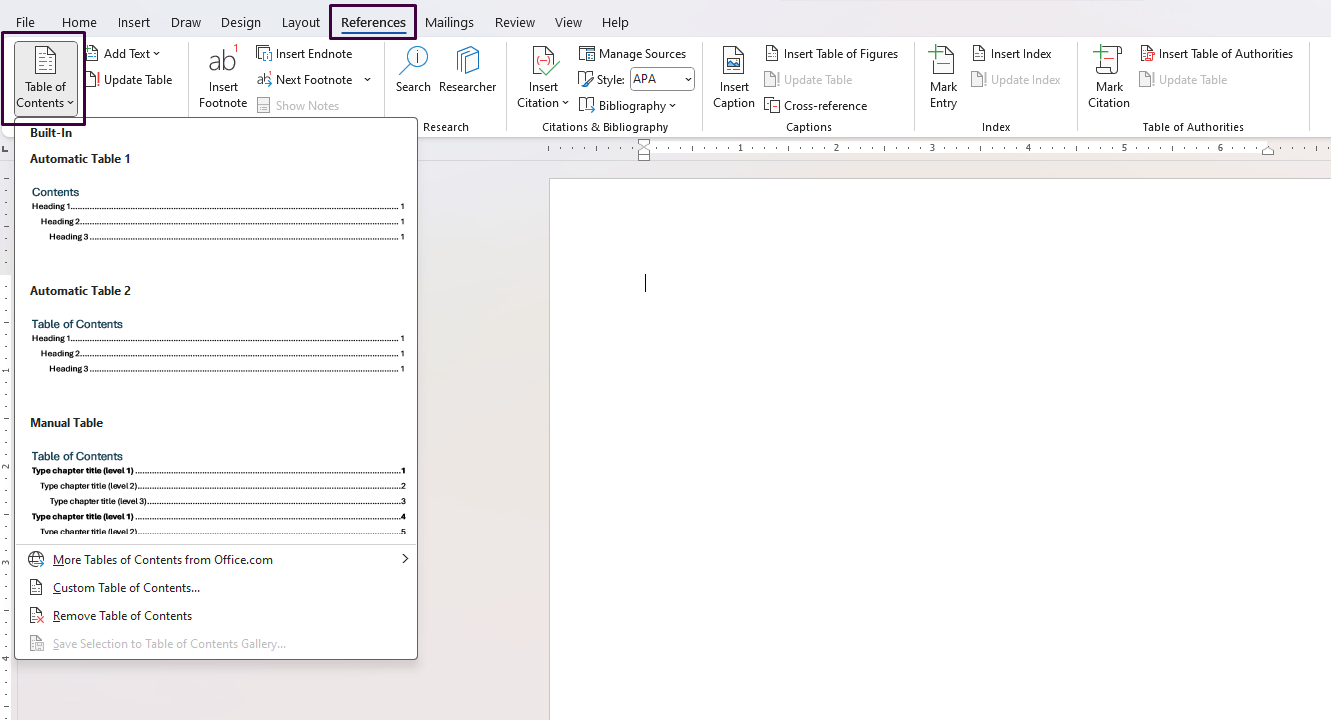
Step 2: Insert a Table of Contents
- Place the Cursor:
- Click where you want the Table of Contents (TOC) to appear (usually at the beginning of the document).
- Insert TOC:
- Go to the “References” tab.
- Click “Table of Contents” in the “Table of Contents” group.
- Choose a pre-formatted TOC style, or click “Custom Table of Contents” for more options.
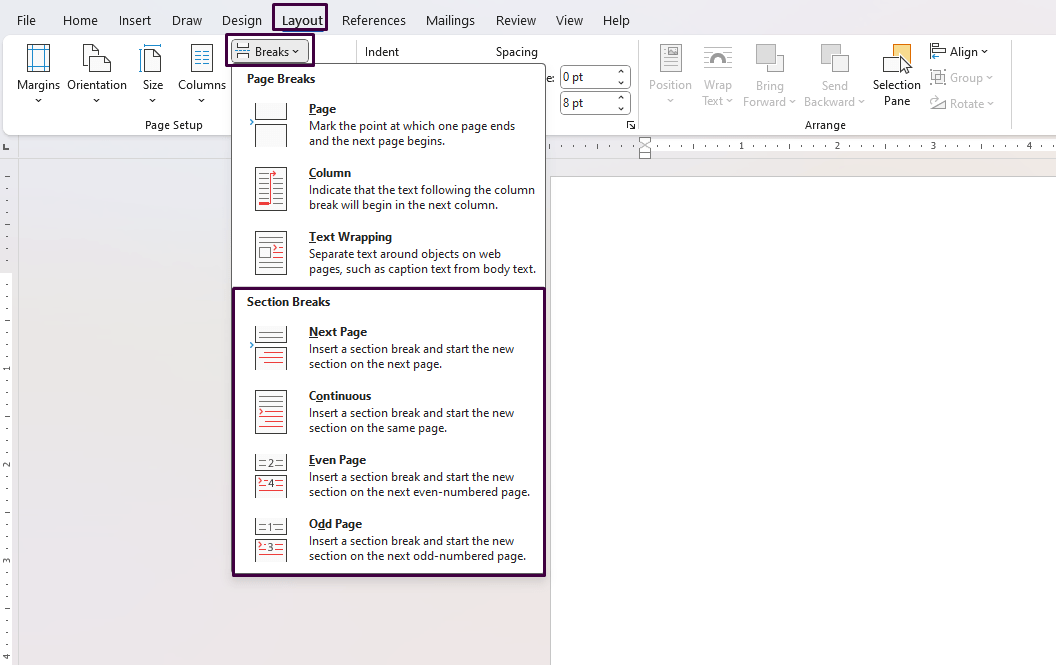
Step 3: Use Section Breaks
- Insert Section Breaks:
- Place your cursor where you want to start a new section.
- Go to the “Layout” or “Page Layout” tab.
- Click “Breaks” in the “Page Setup” group.
- Choose the type of section break you need (e.g., Next Page, Continuous).
- Format Sections Individually:
- After inserting section breaks, you can apply different headers, footers, or page orientations to each section.
Step 4: Add Headers and Footers
- Insert Header/Footer:
- Double-click at the top or bottom of the page to open the header or footer area.
- Customize Headers/Footers:
- Use the “Header & Footer Tools” Design tab that appears.
- Click “Header” or “Footer” to select a pre-designed style or choose “Edit Header” or “Edit Footer” to customize it.
- Include Page Numbers:
- Click “Page Number” in the “Header & Footer” group.
- Choose the location and style for your page numbers.
Step 5: Utilize the Navigation Pane
- Open the Navigation Pane:
- Go to the “View” tab.
- Check the box next to “Navigation Pane” in the “Show” group.
- Navigate Through Headings:
- Use the pane to quickly jump between sections and headings in your document.
Step 6: Insert Graphics and Tables
- Insert a Graphic:
- Place your cursor where you want the graphic.
- Go to the “Insert” tab.
- Click “Pictures” to insert an image from your computer, or “Online Pictures” to search for images online.
- Insert a Table:
- Place your cursor where you want the table.
- Go to the “Insert” tab.
- Click “Table” and choose the number of rows and columns required.
Step 7: Apply Consistent Formatting
- Use the Format Painter:
- Select the text formatted the way you like.
- Click the “Format Painter” in the “Clipboard” group on the “Home” tab.
- Drag the brush across the text you want to reformat.
- Set Document Themes:
- Go to the “Design” tab.
- Choose a theme from the “Themes” group to ensure a consistent look throughout your document.
Step 8: Check Accessibility and Compatibility
- Check Accessibility:
- Go to the “Review” tab.
- Click “Check Accessibility” in the “Accessibility” group to ensure your document is accessible to all readers.
- Check Compatibility:
- Go to the “File” tab.
- Click “Info,” then select “Check for Issues” and choose “Check Compatibility” to ensure your document works well with earlier versions of Word.
Unlock your productivity with official Office Keys now available for purchase on our website.