
Office Blog
What are Quick Parts in Word and how do you use them?

Creating documents in Microsoft Word can sometimes be repetitive, especially if you frequently insert the same elements. Quick Parts can save you a significant amount of time. But what exactly are Quick Parts, and how can they be utilized effectively? This guide provides step-by-step instructions on how to use this powerful feature.
Step 1: Access the Quick Parts Gallery
To start using Quick Parts in Word, you first need to know where to find them.
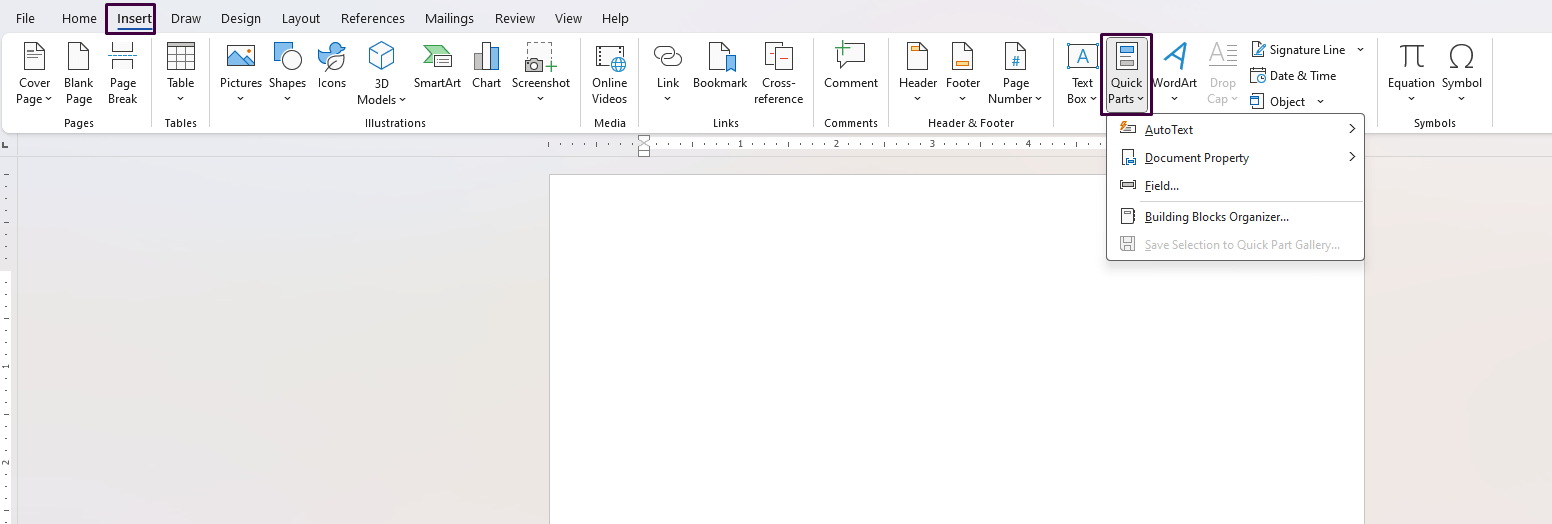
- Open Microsoft Word.
- Click on the “Insert” tab on the Ribbon.
- Look for the “Text” group.
- Click on “Quick Parts” to open the Quick Parts gallery.
Step 2: Inserting Pre-defined Building Blocks
Quick Parts are essentially building blocks that include text, images, headers, footers, cover pages, and more.
- Click on “Quick Parts” from the Quick Parts gallery.
- You’ll see various options: “AutoText,” “Document Property,” and “Field.”
- AutoText: Predefined text snippets that you frequently use.
- Document Property: Information related to the document, such as title, author, etc.
- Field: Dynamic content that changes based on conditions (e.g., date or page number).
- Choose the type of building block you’d like to insert.
Step 3: Creating a New Quick Part
If the predefined options don’t meet your needs, you can create your own custom Quick Parts.
- Select the content in your document that you want to save as a Quick Part.
- Go to the “Insert” tab, click “Quick Parts.”
- Choose “Save Selection to Quick Part Gallery…”
- A new window will appear where you can name your Quick Part, add a description, and select which gallery to save it in.
- Click “OK” to save.
Step 4: Inserting Your Custom Quick Part
Now that you’ve created your custom Quick Part, inserting it into any document is easy.
- Place your cursor where you want the Quick Part to be inserted.
- Go to “Insert” > “Quick Parts.”
- Select the Quick Part you created from the gallery.
Step 5: Managing Quick Parts
Over time, you may need to update or delete Quick Parts. Here’s how to manage them:
- Go to “Insert” > “Quick Parts.”
- Right-click on the Quick Part you wish to manage.
- Edit Properties: Modify the name, description, options, etc.
- Delete: Remove the Quick Part from the gallery.
Step 6: Using AutoText for Frequently Used Snippets
AutoText is another handy feature within Quick Parts for frequently used snippets of text.
- Type the snippet of text you frequently use.
- Select the text and go to “Insert” > “Quick Parts.”
- Choose “AutoText” > “Save Selection to AutoText Gallery…”
- Name your Snippet and click “OK” to save.
To insert this AutoText later, simply type its name and press F3, or select it from the AutoText gallery.
Unlock your productivity with official Office Keys now available for purchase on our website.