Office Blog
Microsoft Word Formatting Tips for Polished Reports
Creating a polished and professional report in Microsoft Word can make a lasting impression, whether it’s for business, education, or personal projects. While the content is crucial, proper formatting ensures readability, clarity, and a professional appearance. Here are some Microsoft Word Formatting tips to help you format your reports effectively in Microsoft Word.
1. Start with a Professional Template
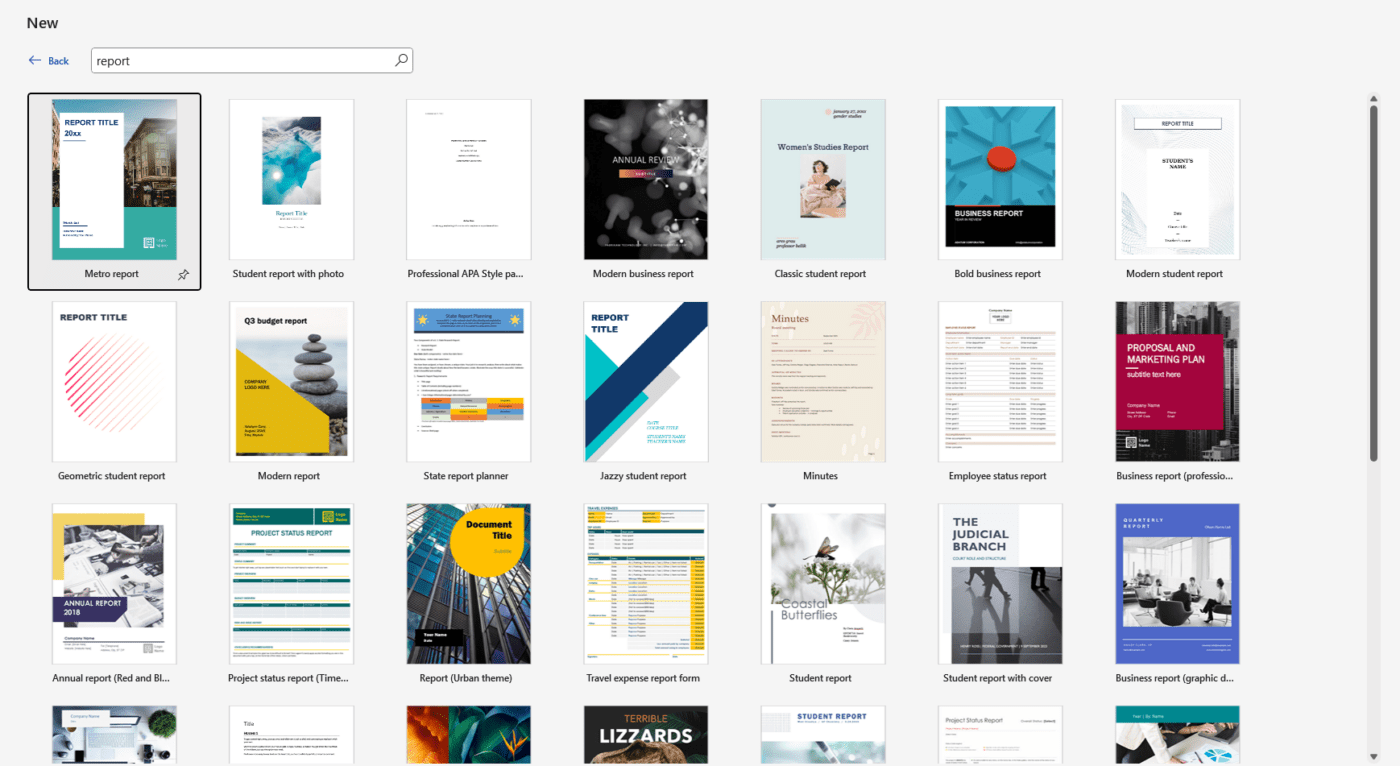
Microsoft Word offers a variety of templates specifically designed for reports. Using a template saves time and ensures consistent formatting.
- How to access templates:
- Go to File > New.
- Search for “Report” in the search bar.
- Select a template that suits your needs.
You can customize the template to match your brand or style, but it provides a strong foundation to start with.

2. Set Up Page Layout Properly
The page layout determines the overall structure of your report.
- Margins: Go to Layout > Margins and select Normal (1-inch margins) or customize as needed.
- Orientation: Ensure the document is set to Portrait unless a Landscape orientation is necessary for charts or tables.
- Spacing: Use 1.15 or 1.5 line spacing for better readability. Adjust this under Home > Line and Paragraph Spacing.

3. Use Styles for Consistent Formatting
Styles are your best friend for creating a cohesive and organized document.
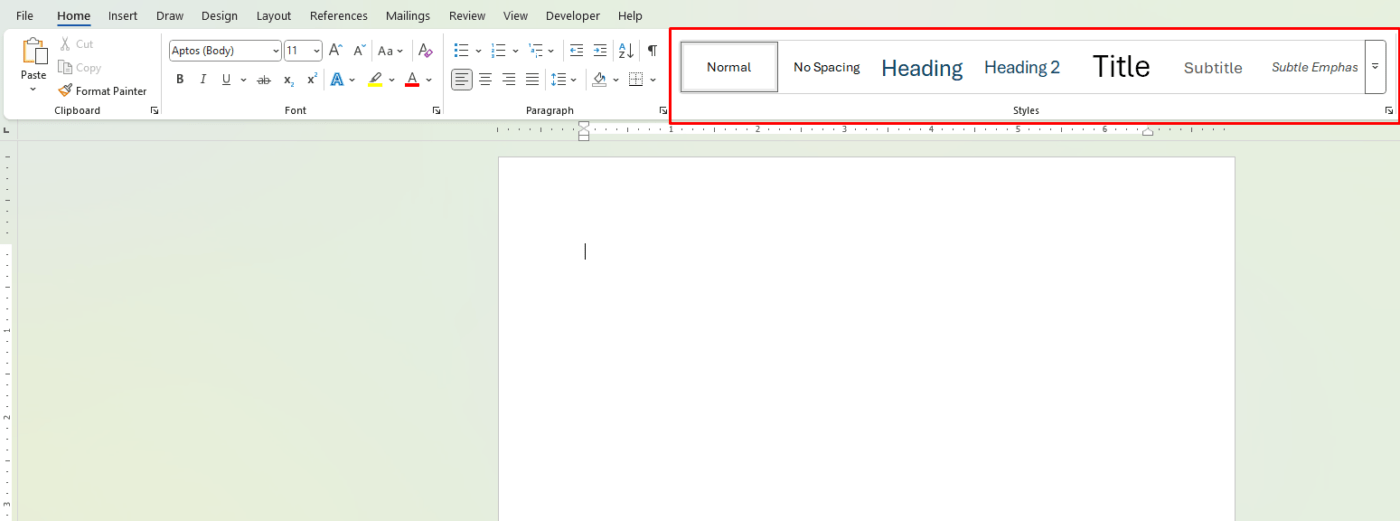
- Headings: Use built-in heading styles (e.g., Heading 1, Heading 2) for sections and subsections.
- Body Text: Apply the Normal style for the main content.
- Benefits:
- Heading styles make it easier to generate a Table of Contents (TOC).
- Consistency throughout the document improves readability.
- How to apply styles: Highlight the text, go to the Home tab, and select a style from the Styles gallery.

4. Create a Table of Contents
A well-structured Table of Contents (TOC) is essential for navigation in lengthy reports.
- How to insert a TOC:
- Use heading styles throughout the document.
- Go to References > Table of Contents and choose a style.
- Update the TOC automatically as you make changes by clicking Update Table.

5. Incorporate Visual Elements
Visuals like tables, charts, and images make reports more engaging and easier to understand.
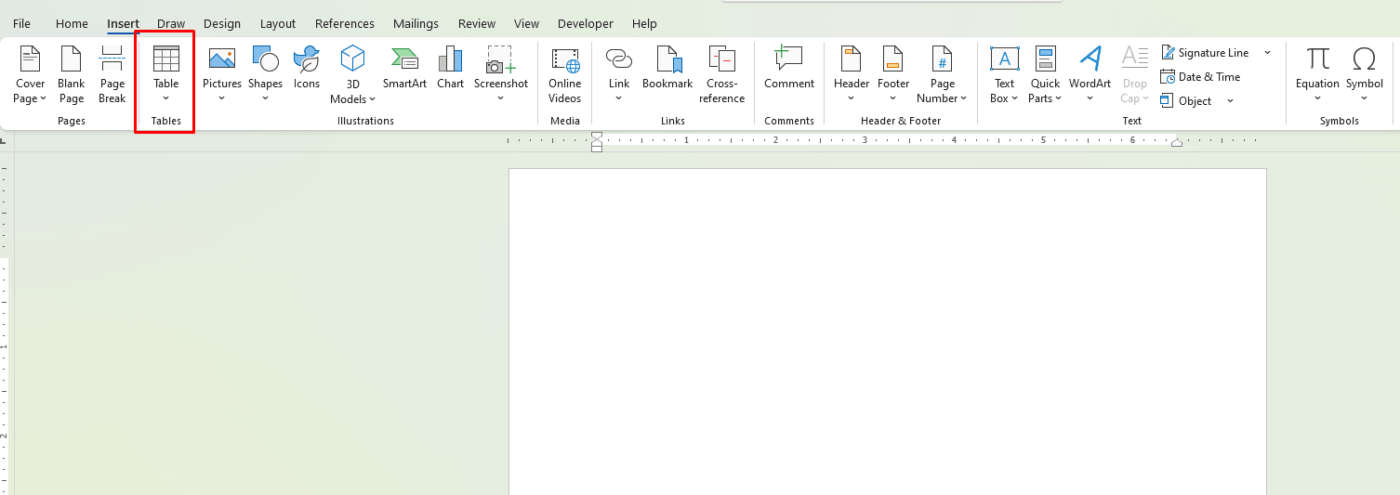
- Adding tables: Go to Insert > Table and create a grid to present data. Format tables using Table Design for a professional look.
- Inserting charts: Use Insert > Chart to create graphs that represent data visually.
- Images: Add relevant images through Insert > Pictures, and align them using the Wrap Text feature for a clean layout.

6. Use Section Breaks for Better Organization
Section breaks allow you to apply different formatting to specific parts of your document, such as headers, footers, or page orientation.
- How to add a section break:
- Place your cursor where you want the break.
- Go to Layout > Breaks > Next Page or Continuous.
- Examples: Use section breaks to separate the title page from the main content or to apply different headers/footers for each chapter.
7. Optimize Headers and Footers
Headers and footers provide a professional touch and make navigation easier.
- Include the report title, chapter name, or page numbers.
- Add page numbers by going to Insert > Page Number and selecting a style.
- Use different headers/footers for different sections if necessary (enabled through section breaks).
8. Leverage Advanced Formatting Tools
Word offers several advanced tools that can enhance your report:
- Styles Pane: Use Ctrl + Shift + Alt + S to open the styles pane for advanced customization.
- Navigation Pane: Enable this from View > Navigation Pane to quickly jump between sections.
- Find and Replace: Use Ctrl + H to replace text, formatting, or styles efficiently.
9. Proofread and Review Thoroughly
Before finalizing your report, ensure it’s error-free and polished:
- Spelling and Grammar Check: Use Review > Spelling & Grammar to identify errors.
- Read Aloud: Go to Review > Read Aloud to hear your document read back to you, which helps identify awkward phrasing.
- Track Changes: If collaborating, enable Track Changes under the Review tab to monitor edits.
10. Save and Export Correctly
Ensure your report is saved and shared in the right format:
- Save the Word document as a .docx file for future edits.
- Export as a PDF for sharing to preserve formatting. Use File > Save As > PDF or File > Export > Create PDF/XPS.
Get authentic Office keys at the lowest prices and unlock premium Microsoft Office features for less!

