
Office Blog
Mastering Word’s Table of Contents Feature

When it comes to creating professional documents, whether it’s a report, a research paper, or a lengthy ebook, one of the most important features you can use is a Table of Contents (TOC). A well-structured TOC helps readers navigate your document easily, making it more organized and accessible. Luckily, Microsoft Word offers a powerful Table of Contents feature that allows you to automatically generate and customize a TOC, saving you time and effort.
In this blog post, we’ll explore how to master Word’s Table of Contents feature, so you can create professional documents with ease and ensure your content is easily navigable.
What is a Table of Contents in Microsoft Word?
A Table of Contents (TOC) is a list of headings in your document, typically organized by sections, chapters, or topics. The TOC is usually located at the beginning of the document and provides clickable links to sections within the text, allowing readers to easily jump to the desired content.
Microsoft Word allows you to create an automatic TOC that updates dynamically as you add or remove content from your document. It’s an essential tool for organizing long documents and providing a user-friendly experience for readers.
Why You Should Use the Table of Contents in Word
Here are a few key reasons why using a Table of Contents in Microsoft Word is essential:
- Improves document organization: A TOC gives structure to your document, making it easier to follow.
- Saves time: Word generates the TOC for you, eliminating the need to manually create page numbers and headings.
- Enhances accessibility: A clickable TOC allows readers to navigate your document efficiently.
- Keeps your document dynamic: The TOC automatically updates as you edit or reorganize the content.
How to Create a Table of Contents in Microsoft Word
Creating a Table of Contents in Word is quick and easy. Here’s a step-by-step guide on how to create one:
Step 1: Apply Heading Styles
To create a TOC in Word, you first need to apply Heading Styles to the headings you want to appear in the Table of Contents. These are pre-defined styles that tell Word which text should be included in the TOC.
1️⃣ Highlight the text that you want to appear as a heading.
2️⃣ Go to the Home tab on the ribbon.
3️⃣ Under the Styles section, choose a Heading Style (e.g., Heading 1, Heading 2, etc.).
4️⃣ Repeat this for all the headings and subheadings throughout your document.
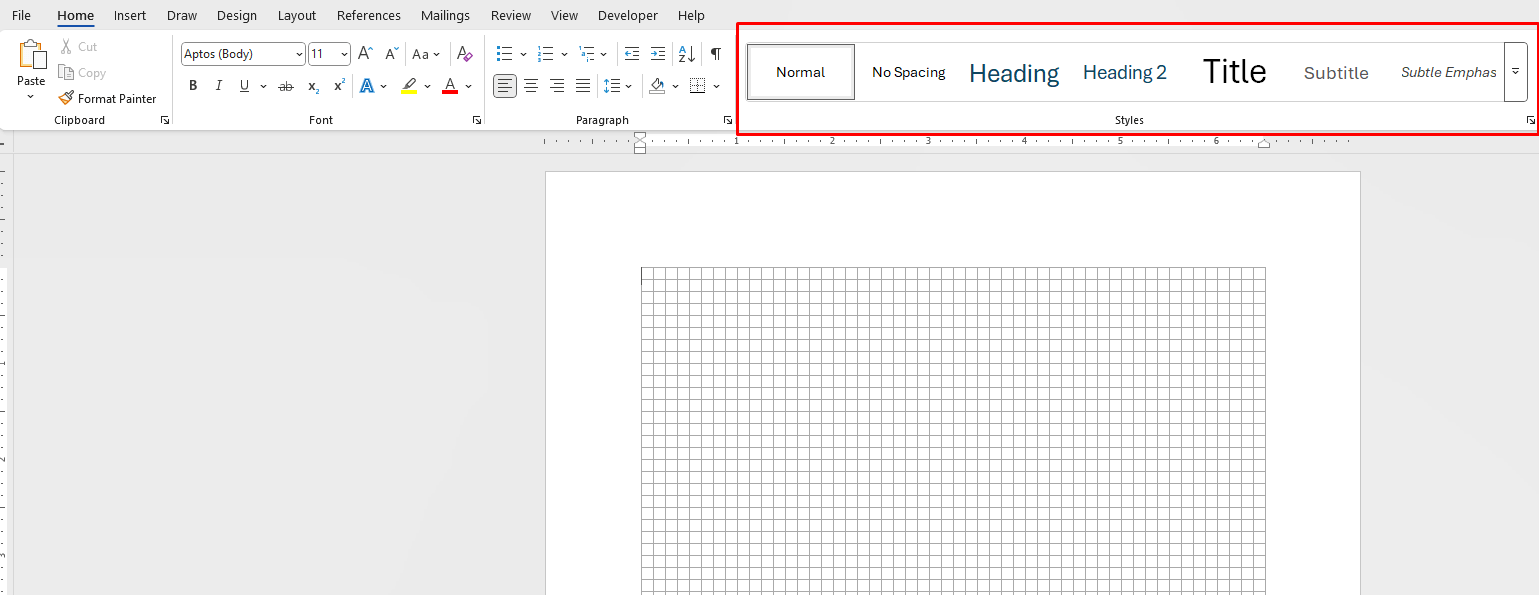
Tip: Use Heading 1 for main sections, Heading 2 for subsections, and so on to create a hierarchical structure.
Step 2: Insert the Table of Contents
Now that your document has the proper heading styles, it’s time to insert the Table of Contents.
1️⃣ Place your cursor at the beginning of your document (where you want the TOC to appear).
2️⃣ Go to the References tab on the ribbon.
3️⃣ In the Table of Contents group, click on Table of Contents.
4️⃣ Choose a TOC style from the dropdown menu. You can select from Automatic Tables or Manual Tables (we recommend choosing an Automatic Table).
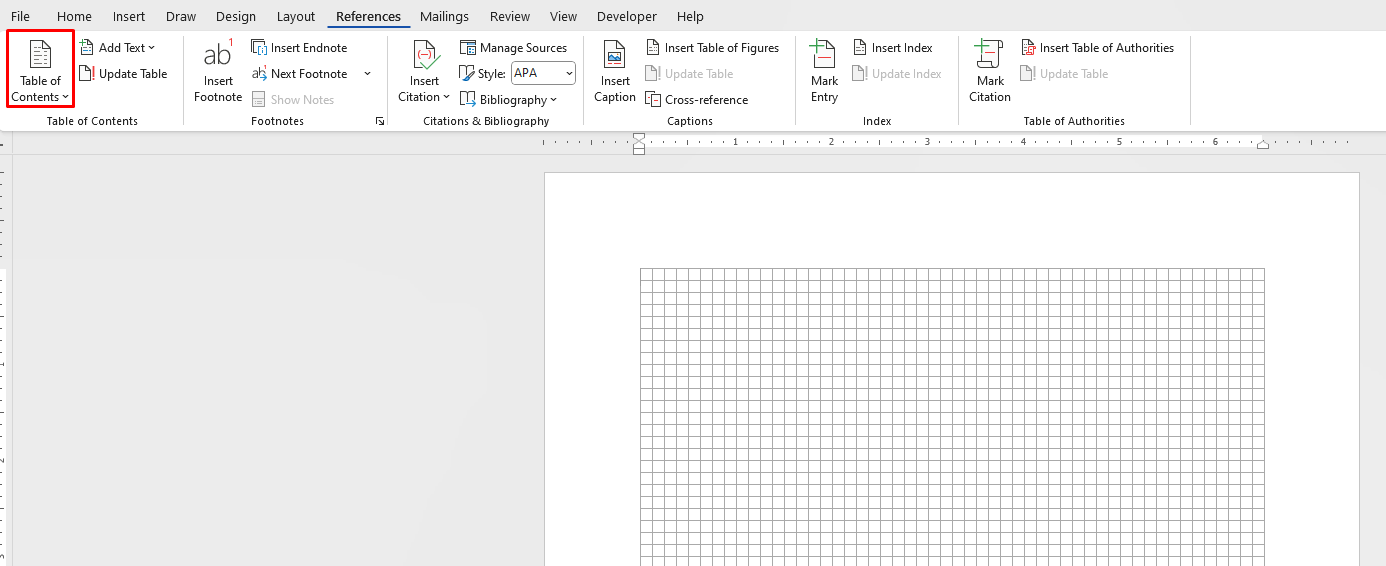
Word will insert a TOC at the location of your cursor, listing all the headings you’ve applied with the appropriate page numbers.
Step 3: Update the Table of Contents
If you make changes to your document, such as adding new sections, deleting text, or moving headings around, you’ll need to update the Table of Contents to reflect these changes.
1️⃣ Right-click anywhere in the Table of Contents.
2️⃣ Select Update Field from the context menu.
3️⃣ Choose either Update page numbers only or Update entire table to make sure your TOC reflects the most current structure of your document.
How to Customize Your Table of Contents
While the default TOC styles are convenient, you can also customize the look and feel of your Table of Contents to suit your preferences. Here’s how:
Changing the Style
1️⃣ Click on the Table of Contents to select it.
2️⃣ Go to the References tab and click Table of Contents.
3️⃣ Select Custom Table of Contents at the bottom of the dropdown menu.
4️⃣ In the Table of Contents dialog box, you can adjust the style, formats, and levels of headings.
Modifying Heading Levels
If you want to change how many levels of headings are displayed in your TOC, you can do this through the Custom Table of Contents settings. For example, you may want to show only Heading 1 and Heading 2, while excluding deeper subheadings.
Adding Leader Dots or Removing Them
By default, Word adds leader dots (e.g., “…..”) between the headings and page numbers in the TOC. If you prefer a cleaner look or want to remove them:
1️⃣ Right-click the TOC.
2️⃣ Select Edit Field.
3️⃣ Under Field codes, choose TOC and select the format you want (including options to remove leader dots).
Tips for Effective Table of Contents Design
- Use consistent heading styles: Ensure that all headings follow a consistent hierarchy (Heading 1 for main sections, Heading 2 for subsections, etc.).
- Limit the number of heading levels: For better readability, avoid displaying too many heading levels in your TOC.
- Update the TOC regularly: After significant edits or content changes, always update the TOC to keep it accurate.
- Keep the TOC at the beginning: Place the TOC at the beginning of the document so that readers can easily access it.
Get genuine Microsoft Office keys at the lowest prices—instant delivery and hassle-free activation!