Fashion
How to Write Professional Documents in Microsoft Word?
Microsoft Word has been a go-to tool for creating professional documents for decades. Its robust features and user-friendly interface make it the ideal choice for drafting everything from business proposals to academic reports. Whether you’re a beginner or looking to refine your skills, here’s a step-by-step guide to writing professional documents in Microsoft Word.
1. Start with the Right Template
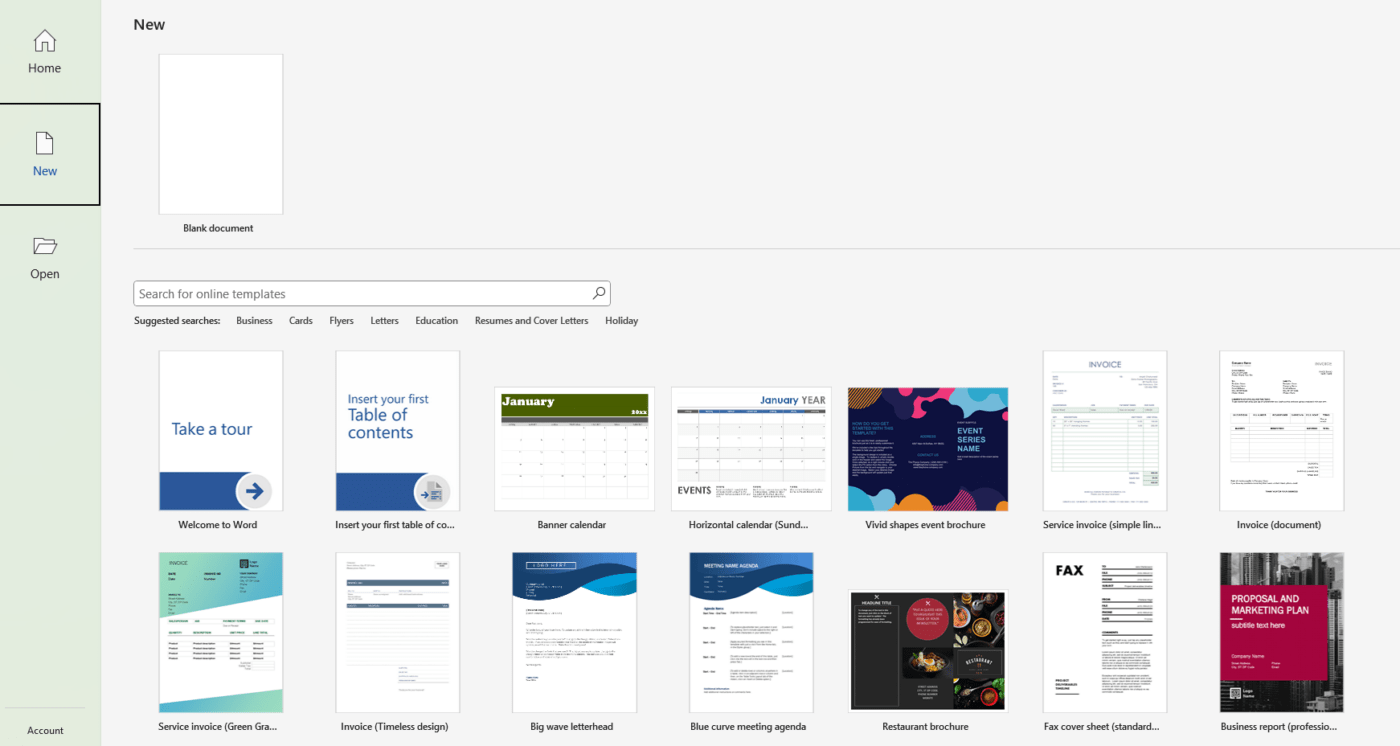
Microsoft Word offers a wide range of templates tailored for different purposes, including resumes, reports, and business letters. Using a template saves time and ensures a polished and consistent look. To select a template, open Word, click File > New, and browse the available options.
2. Set Up a Professional Layout
A well-organized layout enhances readability. To ensure your document looks professional:
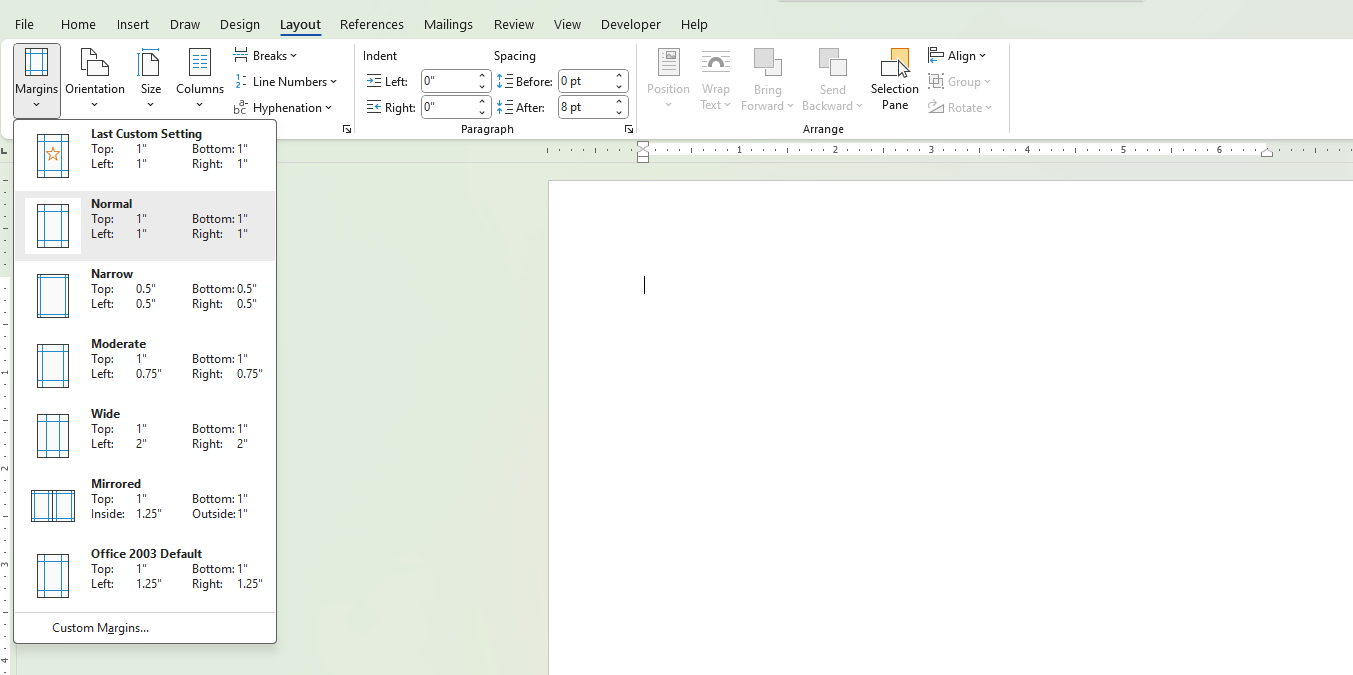
- Use margins of 1 inch on all sides (Layout > Margins).
- Choose a readable font like Times New Roman, Arial, or Calibri, and keep the font size between 10 and 12 points.
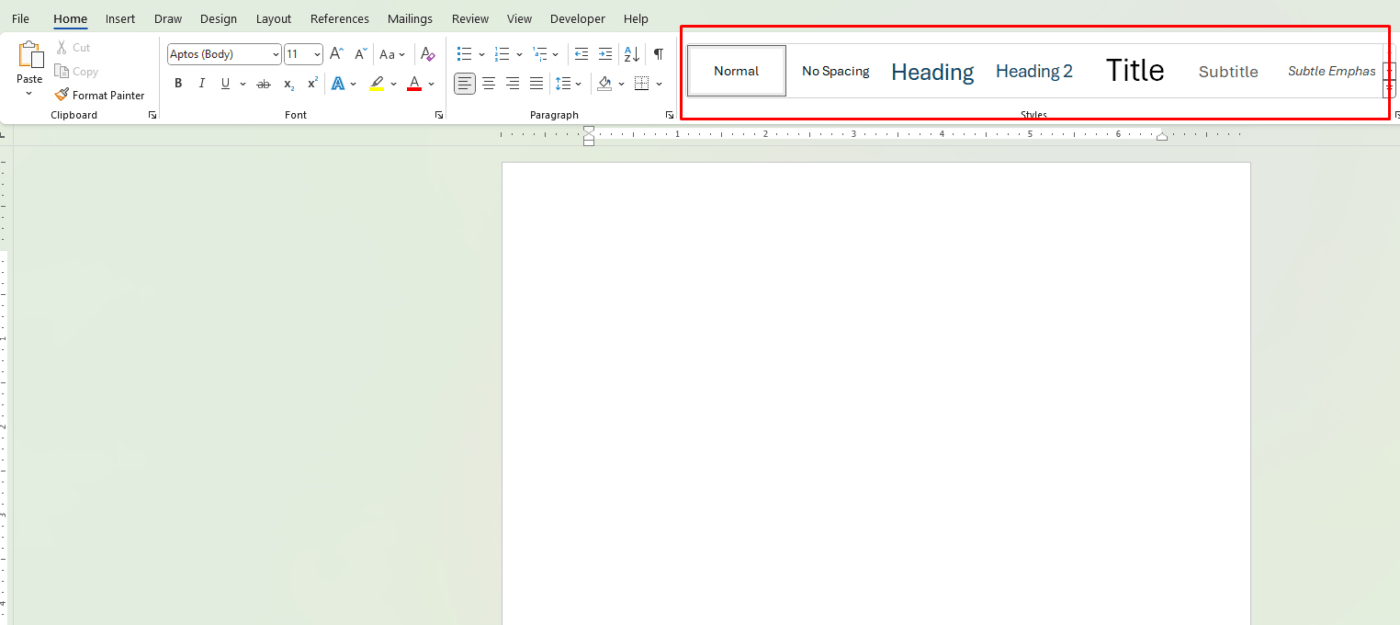
- Use headings and subheadings (Home > Styles) to break the content into sections.
3. Incorporate Headers and Footers
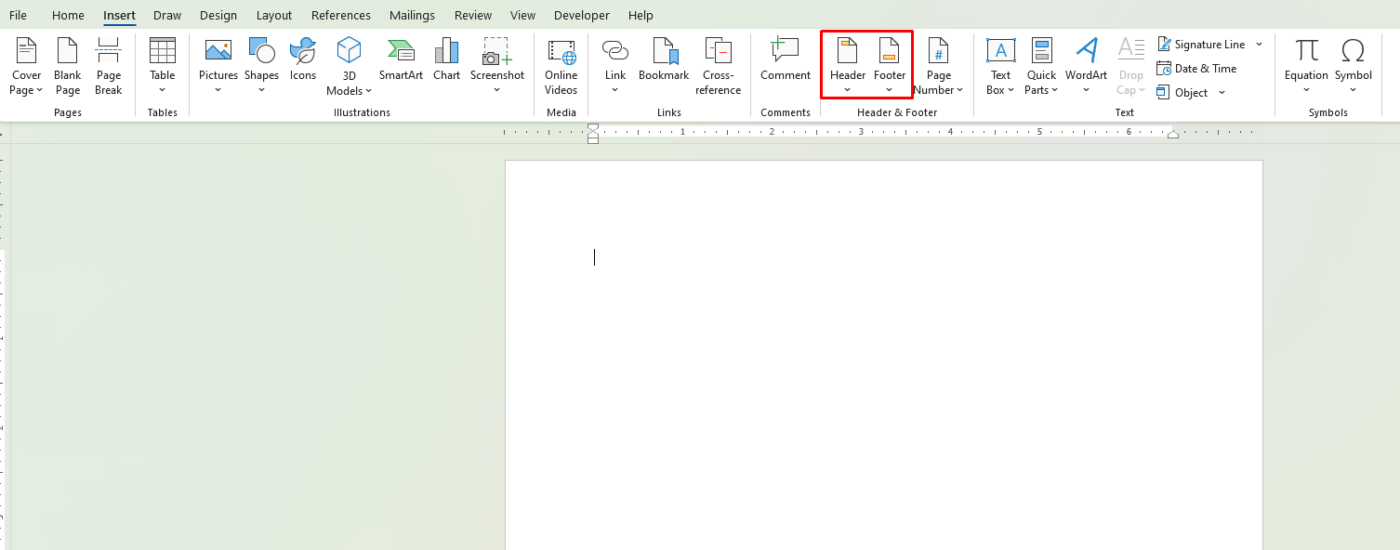
Headers and footers can add a professional touch by displaying page numbers, document titles, or company logos. You can add these elements by selecting Insert > Header/Footer.
4. Use Styles for Consistency
Microsoft Word’s Styles feature helps you maintain consistency throughout your document. Apply predefined styles like Heading 1, Heading 2, or Normal for text formatting. This also makes it easier to create a table of contents later.
5. Utilize Bullets and Numbering
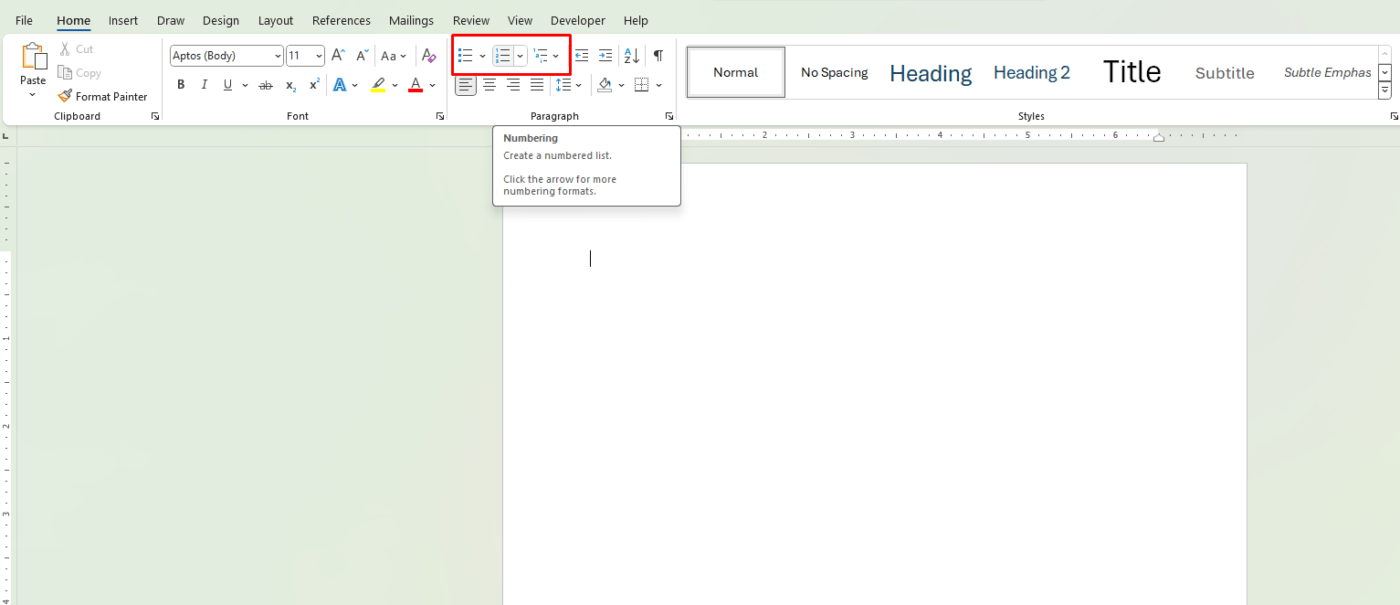
When listing points, use bullets or numbering to organize information clearly. You can find these options under the Home tab. This is particularly helpful in reports, guides, and lists.
6. Add Visual Elements
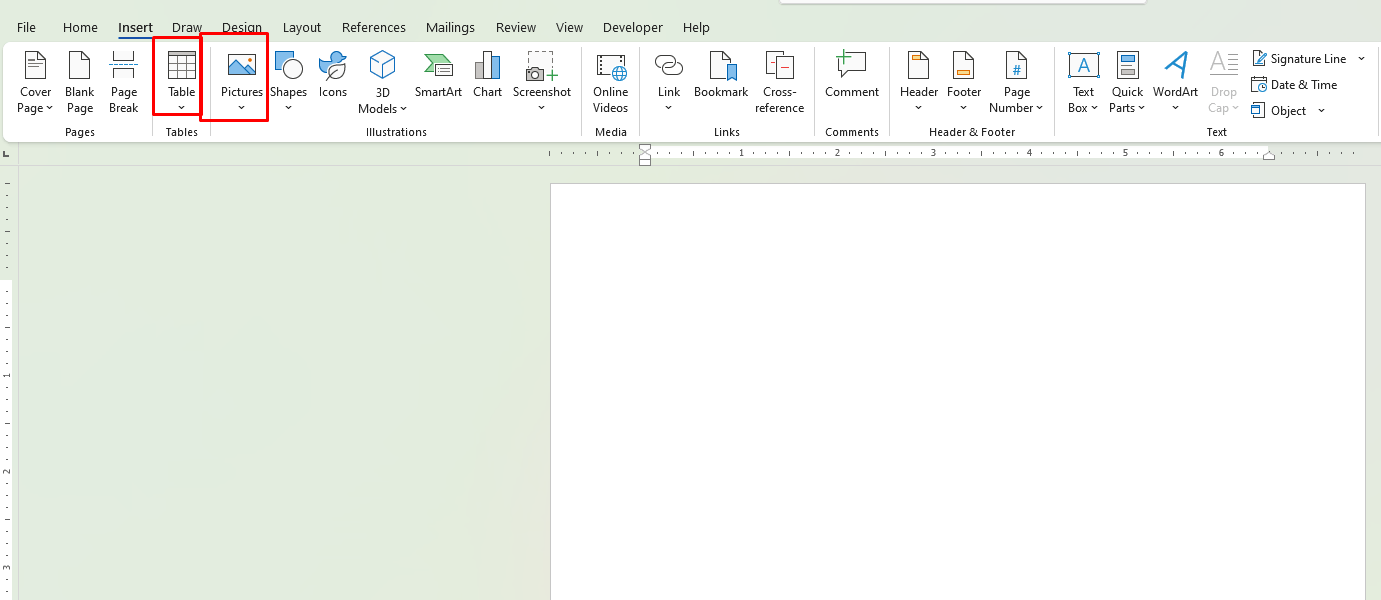
Including charts, tables, or images can make your document more engaging and easier to understand. To insert visuals, go to Insert > Pictures or Insert > Table. Ensure the visuals are relevant and do not clutter the document.
7. Leverage Spell Check and Grammar Tools
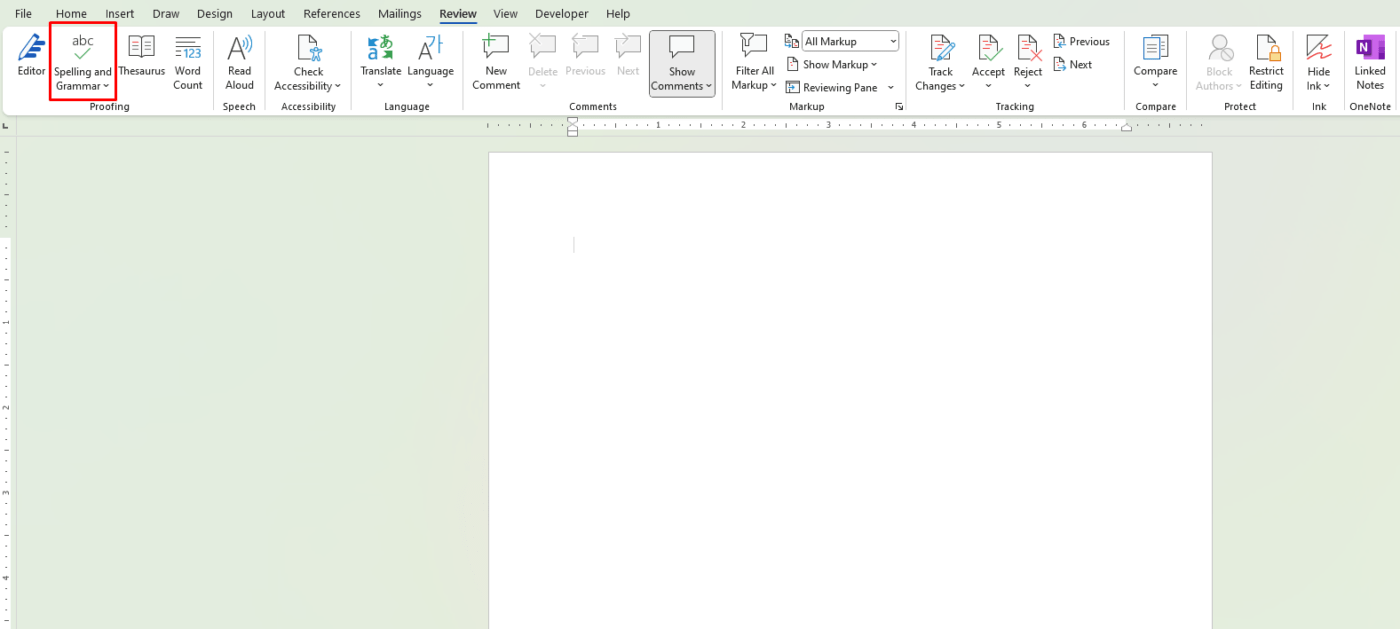
Before finalizing your document, use Word’s built-in spelling and grammar check tools (Review > Spelling & Grammar). This feature helps identify errors and suggests corrections, ensuring your document is error-free.
8. Save and Share in the Right Format
Once your document is complete, save it in the appropriate format. For professional sharing, save it as a PDF by selecting File > Save As > PDF. This ensures your document’s formatting remains intact.
9. Collaborate and Review
For team projects or feedback, use Word’s collaboration tools. You can track changes, add comments, and share documents easily. Simply go to Review > Track Changes or Share to collaborate with others in real-time.
10. Practice and Refine Your Skills
Becoming proficient in Microsoft Word takes practice. Explore advanced features like macros, mail merge, and templates to enhance your productivity and produce top-notch documents.
Get genuine Microsoft Office keys at unbeatable prices—upgrade your productivity today without breaking the bank!

