
Office Blog
How to Remove Backgrounds from Images in PowerPoint?

PowerPoint is not just for creating presentations—it’s also a powerful tool for editing images. One of the most useful features in PowerPoint is its ability to remove backgrounds from images. Whether you’re looking to create cleaner visuals, highlight specific objects, or just simplify your design, removing backgrounds can significantly improve your slides’ overall look.
In this guide, we’ll show you how to easily remove backgrounds from images in PowerPoint and make your presentations more professional and visually appealing.
Why Remove Backgrounds from Images in PowerPoint?
Removing the background from an image allows you to:
🔹 Create Custom Visuals – Extract a subject or object and place it against a new background.
🔹 Enhance Focus – Draw attention to specific elements in your image.
🔹 Improve Slide Design – Ensure images blend seamlessly with your slide’s theme or color scheme.
🔹 Create Transparent Images – Perfect for logos, icons, or web elements that need to be placed over a background.
With PowerPoint’s built-in background removal tool, you can achieve professional results without needing advanced photo editing software.
Step-by-Step Guide: How to Remove Backgrounds in PowerPoint
Follow these simple steps to remove the background of any image directly in PowerPoint:
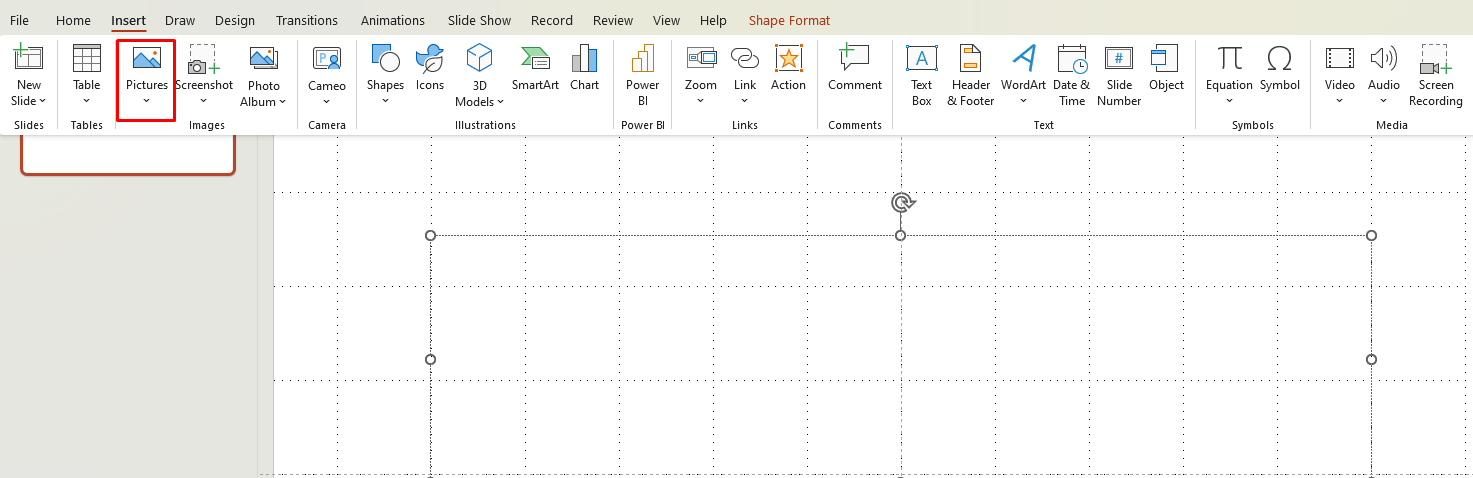
Step 1: Insert the Image
- Open your PowerPoint presentation.
- Go to the slide where you want to add the image.
- Click Insert in the top menu, then select Pictures.
- Choose the image you want to edit and insert it into the slide.
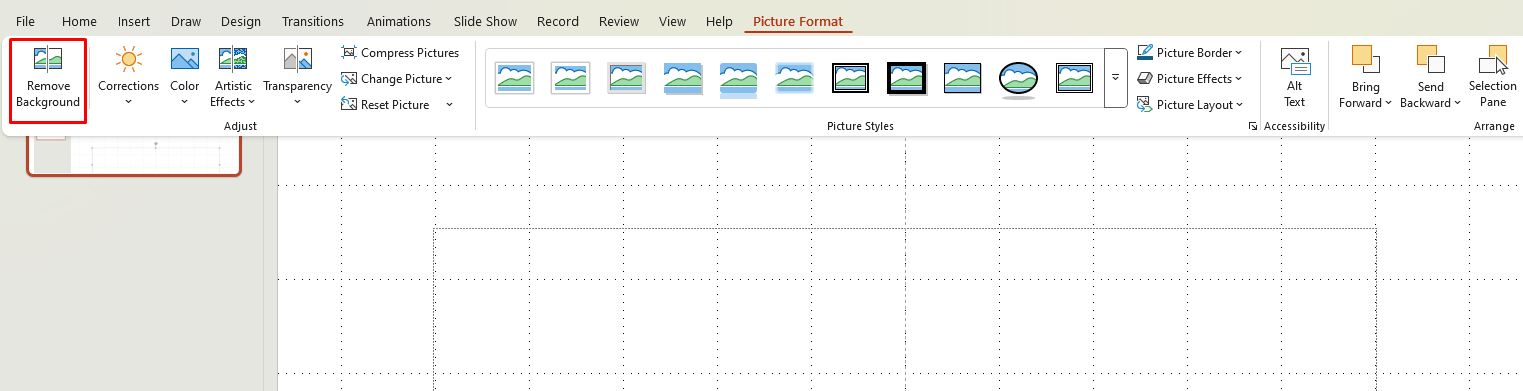
Step 2: Select the Image
- Click on the image to select it.
- This will reveal the Picture Format tab in the ribbon at the top of PowerPoint.
Step 3: Use the Background Removal Tool
- In the Picture Format tab, click on Remove Background.
- PowerPoint will automatically detect and highlight the areas it thinks are the background in magenta.
- PowerPoint typically does a good job at detecting the background, but you can make adjustments in the next steps.
Step 4: Adjust the Selection
- If PowerPoint has incorrectly marked part of the image you want to keep as background, click Mark Areas to Keep and draw over the parts you want to keep.
- If there’s any background area PowerPoint missed, click Mark Areas to Remove and draw over the parts you want to eliminate.
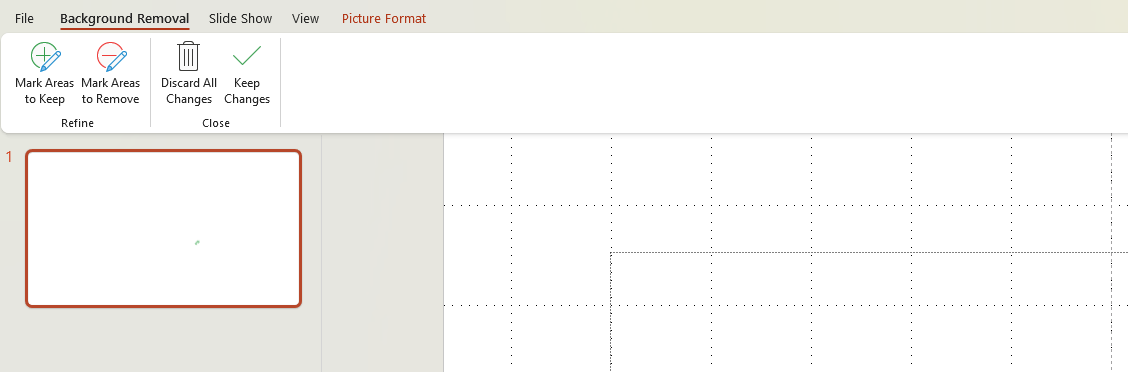
Use the zoom feature to make more precise selections if needed.
Step 5: Finalize the Background Removal
- Once you’re satisfied with the selection, click Keep Changes.
- PowerPoint will remove the background and leave you with just the selected image.
You now have a clean, background-free image ready to be used in your presentation!
Tips for Better Results When Removing Backgrounds
- High-Quality Images: The cleaner the edges of your image, the better the results. Images with sharp contrasts between the subject and background are easier for PowerPoint to process.
- Simple Backgrounds: The tool works best on images with solid or simple backgrounds. For complex backgrounds, you may need to manually adjust the selections.
- Refine Edges: Use the “Refine” option in the background removal tool for images with intricate edges, like hair or fur, to make sure no important details are lost.
- Use the “Reset” Option: If you make a mistake or don’t like the result, you can always click Reset Picture to return to the original image and start over.
Get the best deals on the cheapest Office keys, offering genuine licenses at unbeatable prices for your software needs!