Office Blog
How to Add Citations and References in Word?
Properly citing sources is crucial for academic and professional writing, ensuring your work is credible and free from plagiarism. Microsoft Word simplifies this process with built-in tools for adding citations, managing references, and creating bibliographies. This guide will walk you through how to add citations and references in Word step by step.
Why Use Word for Citations and References?
Microsoft Word’s citation and reference features help you:
- Save time formatting citations manually.
- Automatically generate a bibliography or works cited page.
- Ensure consistency with various citation styles like APA, MLA, or Chicago.
Step 1: Set Up Your Citation Style
Before adding citations, choose the appropriate citation style for your document:
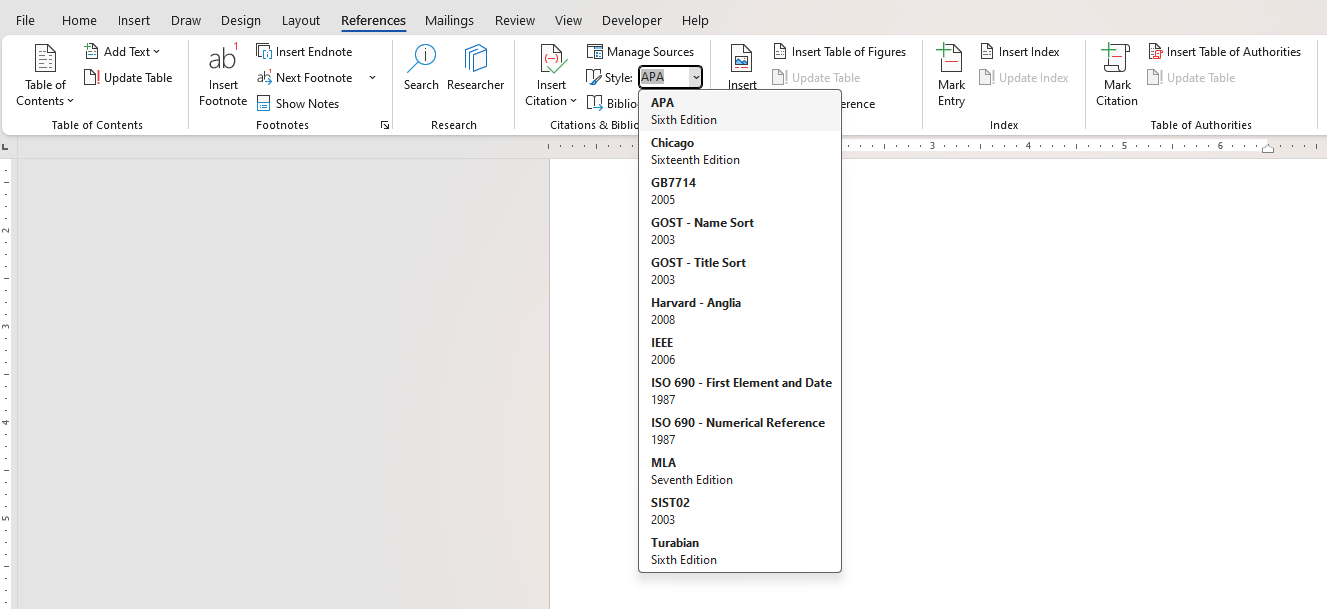
- Go to the References tab on the ribbon.
- In the Citations & Bibliography group, click the Style dropdown menu.
- Select your preferred style (e.g., APA, MLA, Chicago, Harvard).

Step 2: Add a New Source
To add a citation to your document:
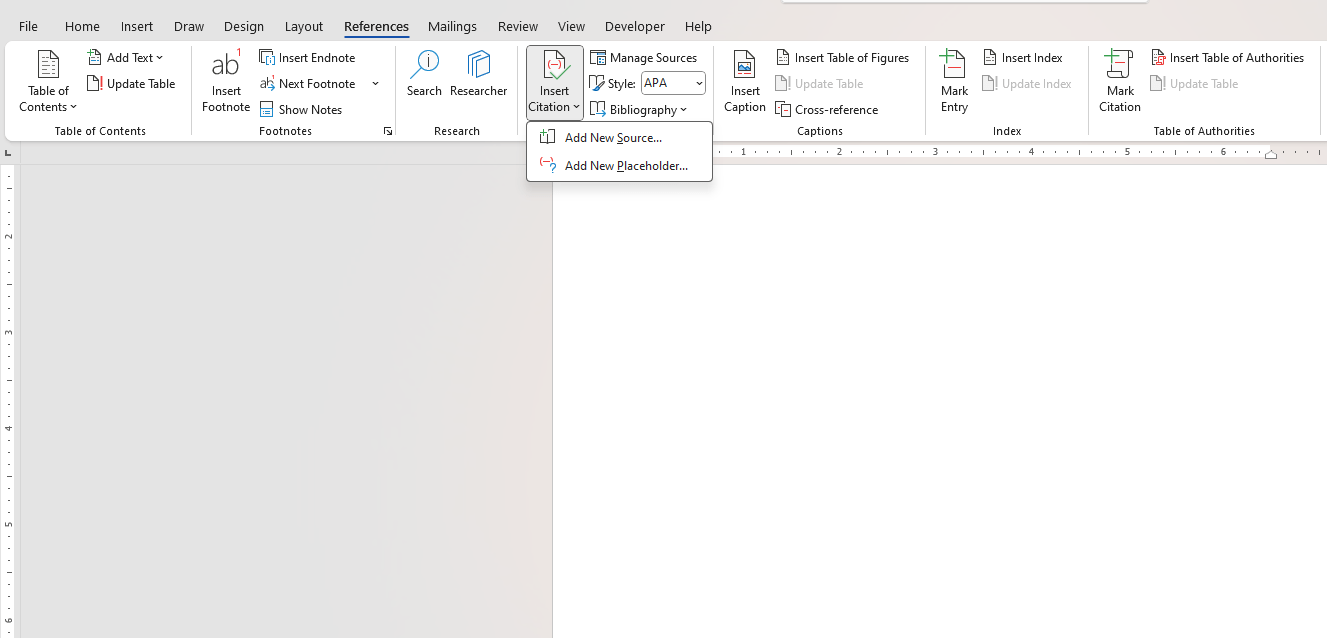
- Place your cursor where you want the citation to appear.
- Click Insert Citation in the References tab.
- Select Add New Source from the dropdown menu.
- In the Create Source dialog box, fill in the details for your source:
- Type of Source: Choose the appropriate category (e.g., book, journal article, website).
- Author, Title, Year: Provide the required information.
- Click OK to insert the citation into your document.

Step 3: Manage Your Sources
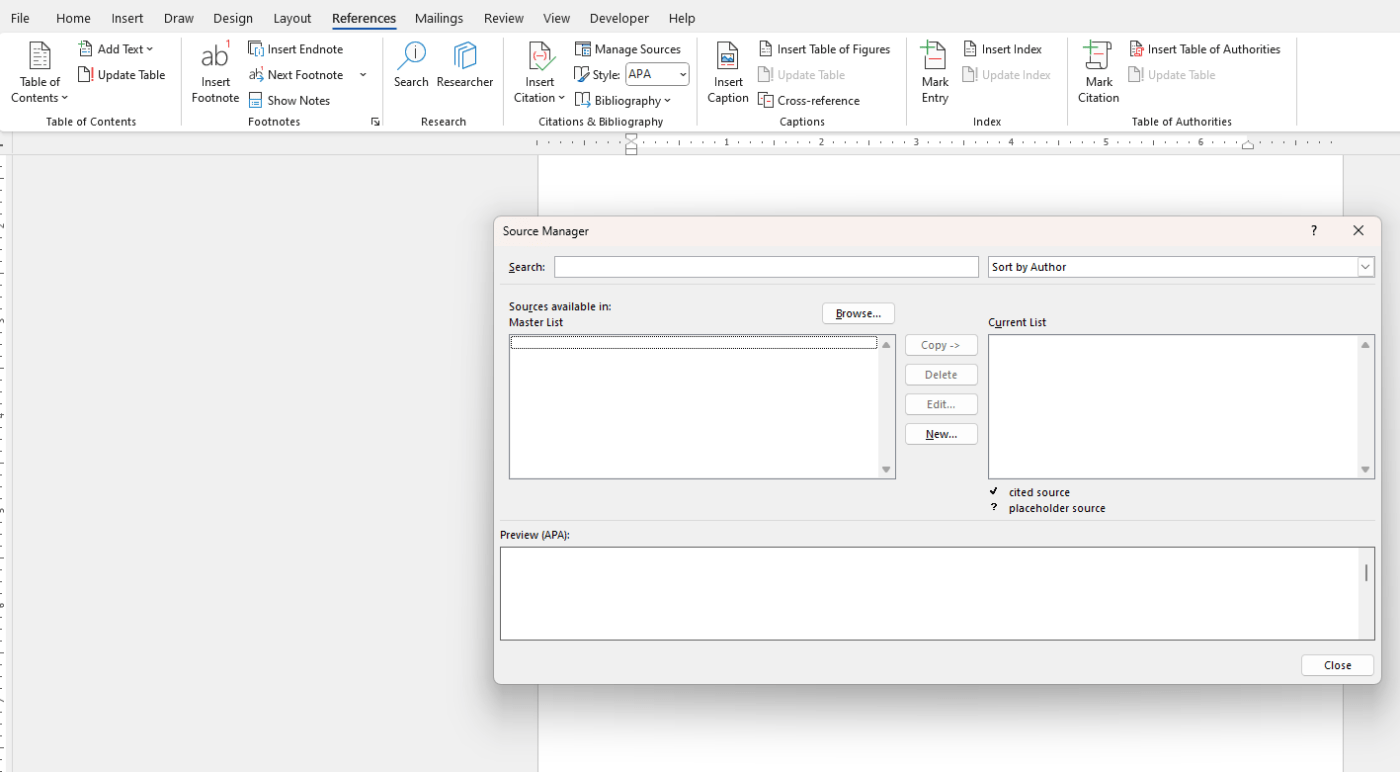
Word stores all your sources in a master list, making it easy to reuse them in other documents.
- Access the Source Manager:
- Go to References > Manage Sources.
- View both the Current List (sources in the current document) and the Master List (all saved sources).
- Edit or Delete Sources: Select a source and click Edit or Delete to update or remove it.

Step 4: Insert Citations
To reference a source already in your list:
- Place your cursor where the citation should go.
- Click Insert Citation in the References tab.
- Select the source from the dropdown menu. Word will automatically insert the citation in the chosen style.
Step 5: Create a Bibliography or Works Cited Page
Once you’ve added all your citations, you can generate a bibliography:
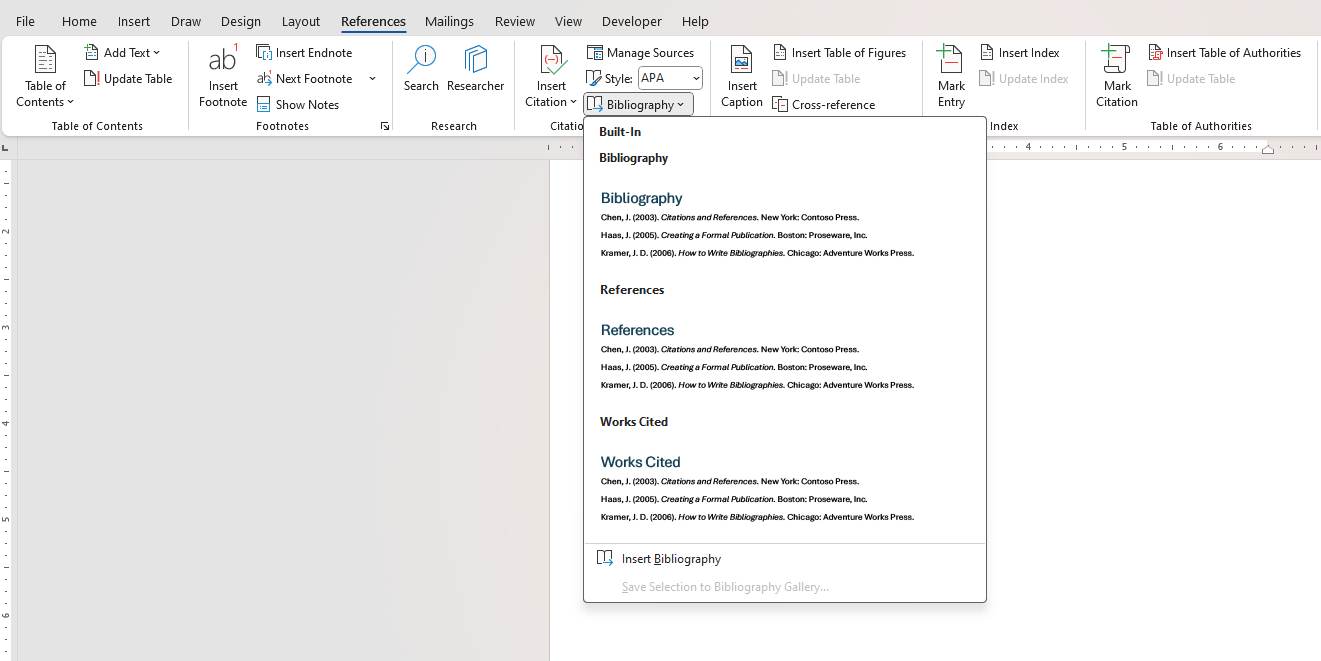
- Place your cursor where you want the bibliography to appear (typically at the end of the document).
- Go to the References tab and click Bibliography.
- Choose a preformatted style (e.g., Bibliography, Works Cited). Word will generate the list automatically.

Step 6: Update Citations and Bibliography
If you add or modify sources after creating the bibliography:
- Click the bibliography or any citation.
- Select Update Citations and Bibliography to reflect the changes.
Discover the cheapest office keys available online—affordable, high-quality options to meet all your workplace access needs, only on our website!

