
Office Blog
How do you use the Accessibility Checker in PowerPoint?

Ensuring your PowerPoint presentation is accessible to everyone, including individuals with disabilities, is crucial. PowerPoint’s Accessibility Checker is a powerful tool that can help you identify and fix accessibility issues in your slides. Here is a detailed guide on how to use the Accessibility Checker in PowerPoint.
Step 1: Open Your PowerPoint Presentation
The first step is to open the presentation file you want to check for accessibility issues.
- Launch Microsoft PowerPoint.
- Click on
Filein the top left corner. - Select
Openfrom the menu. - Navigate to the location of your PowerPoint file.
- Double-click the file to open it.
Step 2: Access the Accessibility Checker
Once your presentation is open, you can access the Accessibility Checker.
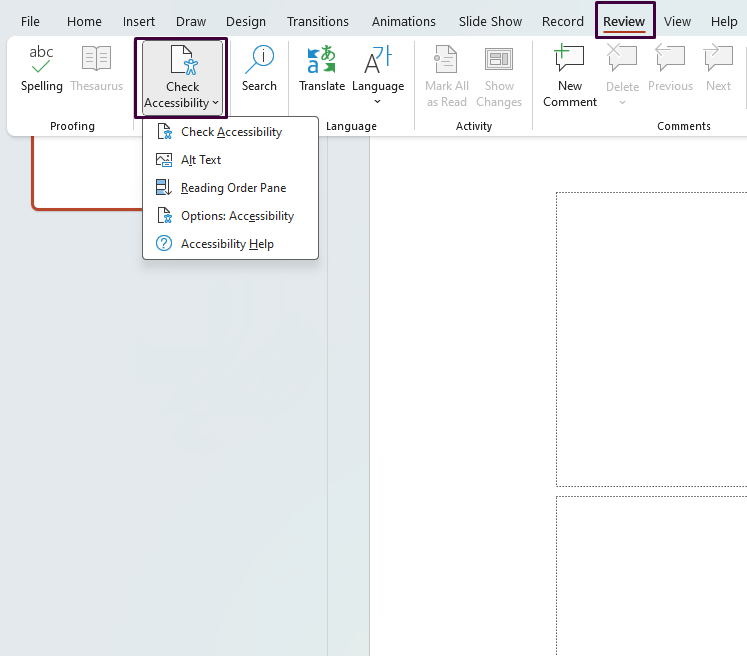
- Click on the
Reviewtab in the Ribbon. - Look for the
Check Accessibilitybutton in theAccessibilitygroup. - Click on
Check Accessibility.
Step 3: Review the Accessibility Checker Pane
The Accessibility Checker pane will open on the right side of the PowerPoint window, listing any issues it finds.
- The pane will display a list of
Errors,Warnings, andTips. - Errors indicate content that makes the document very difficult or impossible for people with disabilities to understand.
- Warnings suggest content that, in most cases, makes the document difficult for people with disabilities to understand.
- Tips give suggestions to improve accessibility.
Step 4: Investigate Each Issue
Click on each issue listed in the Accessibility Checker pane to get more details and instructions on how to fix it.
- Click on an error or warning in the Accessibility Checker pane.
- PowerPoint will highlight the corresponding element in your presentation.
- Read the recommendations provided in the pane.
Step 5: Fix the Issues
Make the necessary changes to fix the accessibility issues identified by the checker.
- For text elements without alt text, right-click on the object, select
Format Picture,Alt Text, and fill in theDescriptionfield. - For poor color contrast, select the text or object, click on the
Formattab, and adjust the colors to ensure better contrast. - For unclear slide titles, double-click on the title box and rewrite the text to make it more descriptive.
Step 6: Recheck the Accessibility
After making the necessary changes, recheck the accessibility to ensure all issues have been resolved.
- Go back to the
Reviewtab in the Ribbon. - Click
Check Accessibilityagain. - Confirm that there are no remaining issues, or address any that are still listed.
Step 7: Save Your Presentation
Once all accessibility issues are resolved, save your presentation.
- Click on
Filein the top left corner. - Select
SaveorSave Asif you want to keep a copy with a different name. - Choose your desired location and file name, then click
Save.
Get genuine Office Keys at unbeatable low prices for all your productivity needs!