
Office Blog
How do you Create a Master Document in Word?

A Master Document in Microsoft Word helps you manage complex, multi-chapter projects by consolidating multiple documents into a single file. This can be especially useful for large reports, books, or dissertations. Follow this detailed guide to create your Master Document effectively.
Step 1: Open Microsoft Word
Command:
- Launch Microsoft Word on your computer.
- Start a new blank document by clicking on
File > New > Blank document.
Step 2: Prepare the Subdocuments
Command:
- Ensure each section or chapter you want to include is saved as a separate Word document.
- In each subdocument, structure your headings using Word’s built-in styles (e.g.,
Heading 1,Heading 2).
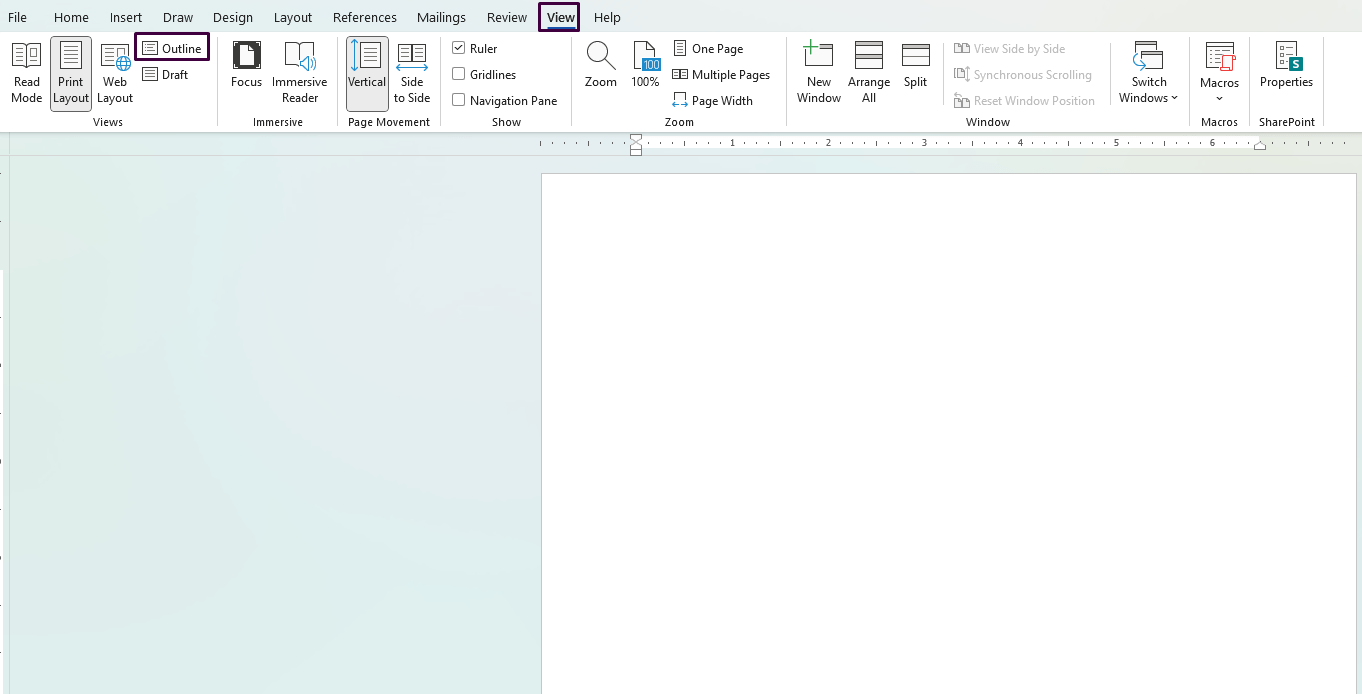
Step 3: Create the Master Document
Command:
- In your new blank document, go to the
Viewtab. - Click
Outlinein theViewsgroup to switch to Outline View.
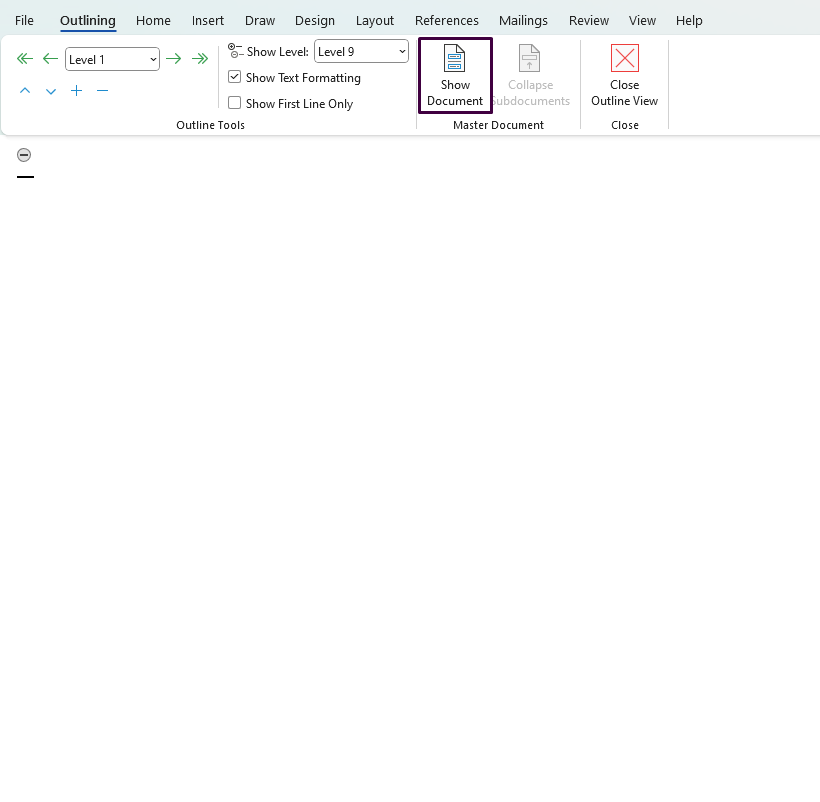
Step 4: Insert Subdocuments
Command:
- In Outline View, you’ll see an Outlining tab on the Ribbon.
- Click on
Show Documentin theMaster Documentgroup. - Click
Insertto bring up a file dialog box. - Select the first subdocument you want to include and click
Open. - Repeat this process until all subdocuments are inserted.
Step 5: Expand and Collapse Subdocuments
Command:
- With all subdocuments inserted, you can manage them by expanding or collapsing their content.
- Click the
+or-sign next to each subdocument to expand or collapse it.
Step 6: Organize and Manage Subdocuments
Command:
- Move subdocuments up or down to reorganize them: Click on the title of the subdocument and use the
Move UporMove Downbuttons in theMaster Documentgroup. - If needed, you can create new subdocuments directly in the Master Document by clicking
Create.
Step 7: Add a Table of Contents
Command:
- Place your cursor where you want the Table of Contents to appear.
- Go to the
Referencestab and clickTable of Contents. - Choose a style from the menu to insert it.
Step 8: Update the Master Document
Command:
- To update changes made to subdocuments, click
Update Linksin theMaster Documentgroup. - You can also update the Table of Contents by right-clicking it and selecting
Update Field.
Step 9: Save the Master Document
Command:
- Save your Master Document by clicking
File > Save As. - Choose a location, enter a name, and click
Save.
Step 10: Final Review and Publish
Command:
- Review the Master Document for any inconsistencies or formatting issues.
- Make final adjustments to headings, subdocuments, or Table of Contents if needed.
- Once everything looks good, save a final version of your Master Document.
Unlock the full potential of your productivity suite with our unbeatable prices on the cheapest Office keys available!