
Windows Blog
How do I Manage Updates in Windows 10 Pro?

Managing updates in Windows 10 Pro is crucial for keeping your system secure, stable, and running smoothly. Windows 10 Pro offers more control over updates compared to the Home edition, allowing users to schedule updates, pause them, and even defer feature updates. This guide will walk you through the steps to manage updates effectively.
Step 1: Access Windows Update Settings
- Open Settings: Click on the Start menu and select the gear icon (Settings) or press Windows key + I.
- Navigate to Update & Security: In the Settings window, click on Update & Security to access the Windows Update settings.
Step 2: Check for Updates
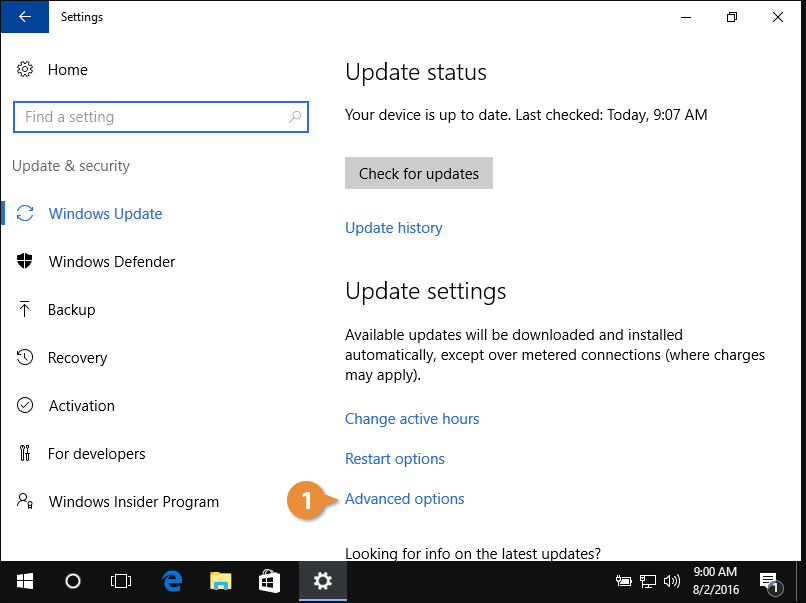
- Check for Updates: In the Windows Update section, click the Check for updates button. Windows will search for any available updates.
- Install Updates: If updates are found, you can install them by clicking the Download or Install button.
Step 3: Configure Active Hours
- Set Active Hours: Click on Change active hours to set a time frame during which your device will not restart for updates. You can specify a start and end time to suit your schedule.
- Save Changes: Click Save after selecting your preferred hours.
Step 4: Pause Updates
- Pause Updates: If you want to temporarily stop updates, you can click on Pause updates for 7 days. This option can be found under the Windows Update settings.
- Adjust Pause Duration: For more control, you can click on Advanced options and choose to pause updates for a specific number of days up to 35 days.
Step 5: Defer Feature Updates
- Access Advanced Options: In the Windows Update settings, click on Advanced options.
- Defer Feature Updates: Here, you can select the option to defer feature updates. This means that you will receive security updates but will not be prompted to install new feature updates immediately.
- Choose Duration: You can defer updates for up to 365 days.
Step 6: Manage Optional Updates
- View Optional Updates: If there are any optional updates available, you can view them by clicking on View optional updates in the Windows Update settings.
- Select Updates: You can select specific updates to install, such as driver updates or optional features.
Step 7: Update Delivery Optimization
- Access Delivery Optimization Settings: Go back to the Update & Security section and click on Delivery Optimization.
- Allow Downloads from Other PCs: Here, you can enable or disable the option to allow downloads from other PCs on your local network or the internet. This can help save bandwidth and speed up updates.
Step 8: Check Update History
- View Update History: To see which updates have been installed, click on View update history in the Windows Update settings.
- Uninstall Updates: If you encounter any issues with a recent update, you can click on Uninstall updates to remove it.
Get the best deals on the cheapest Windows 10 Pro keys—unlock premium features for your PC at an unbeatable price today!