Office Blog
How can you Print a Document in Booklet Format in Word?
Creating and printing a document in booklet format can turn your standard Word document into a professional-looking booklet. Microsoft Word makes it relatively easy to set up and print a document in this format with a few specific steps. Here’s a step-by-step guide to help you through the process.
Step 1: Open Your Document
- Launch Microsoft Word on your computer.
- Click on “File” located in the top-left corner.
- Choose “Open” and select the document you want to print in booklet format, or start a new document by selecting “New.”
Step 2: Adjust Page Layout Settings
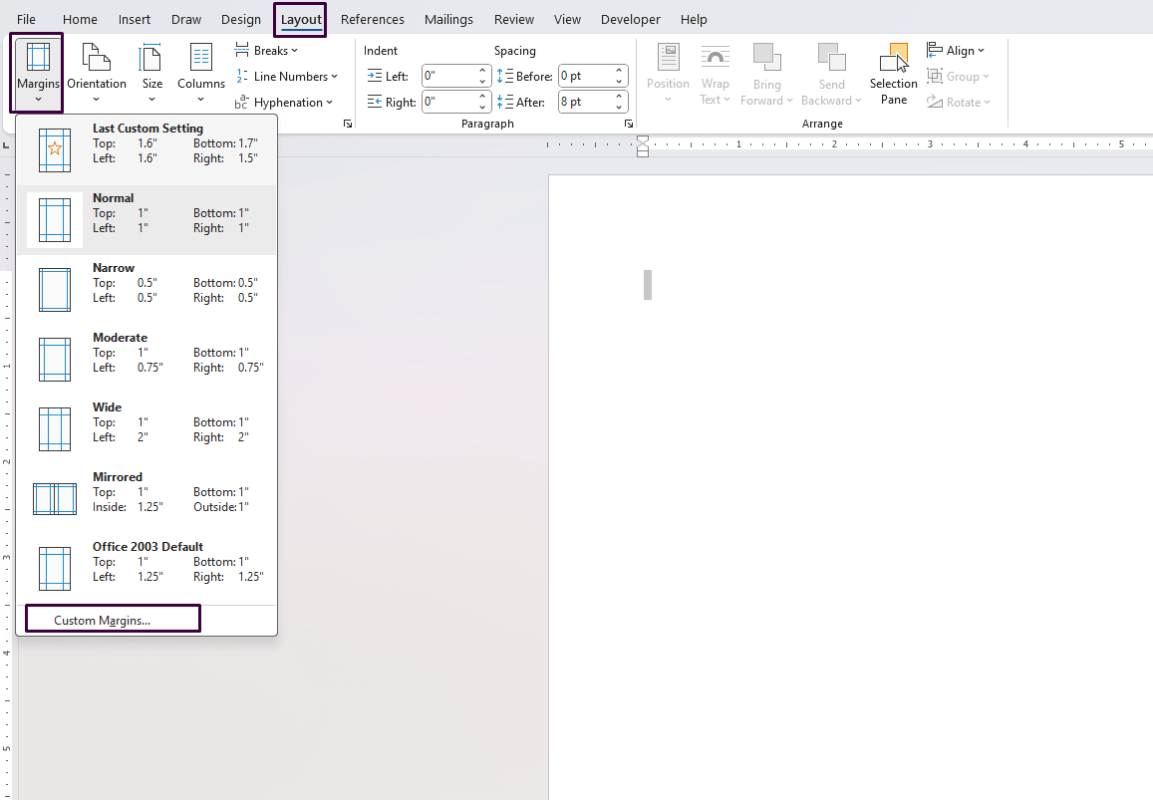
- Navigate to the “Layout” tab on the Ribbon at the top of the window.
- Click on the “Margins” dropdown menu.
- Select “Custom Margins…” at the bottom of the dropdown menu.

Step 3: Configure Margins for Booklet
- In the “Page Setup” dialog box that appears, click on the “Margins” tab.
- Change the “Multiple pages” setting to “Book fold.”
Step 4: Set the Gutter
- Within the same “Page Setup” dialog box, set the “Gutter” value. The gutter adds extra space to the inner margin for binding purposes.
- For example, you might set the Gutter to 0.5 inches.
Step 5: Select Paper Size
- Click on the “Paper” tab.
- Ensure the paper size is set to “Letter” (8.5” x 11”) or whatever size your printer supports for booklet printing.
Step 6: Configure Layout for Booklet
- Go back to the “Margins” tab if needed.
- Check the “Whole document” option under “Apply to.”
- Click “OK” to apply changes.
Step 7: Add Content and Format
- Add and format your content as necessary, bearing in mind how it will appear in a booklet format.
- Use section breaks to separate different sections if needed, by navigating to the “Layout” tab and selecting “Breaks.”
Step 8: Print Your Booklet
- Once your document is ready, click on the “File” tab.
- Choose “Print” from the menu.
Step 9: Configure Printer Settings
- In the Print settings, ensure that your printer supports double-sided printing (duplex) and is enabled for duplex printing.
- Select “Print on Both Sides” and then choose “Flip pages on short edge.” This ensures that the pages will be correctly oriented when folded.
Step 10: Complete the Printing Process
- Before you hit the “Print” button, review the print preview to ensure everything appears as expected.
- Click “Print” to print your document. If your printer does not automatically print on both sides, you may need to manually feed the paper back into the printer to print the other side.
Get your genuine Office Keys today and enjoy lifetime access to the full suite of Microsoft Office tools at unbeatable prices.

